Brake fluid line

Front
Fill the master cylinder with DOT 4 brake fluid to the upper level.
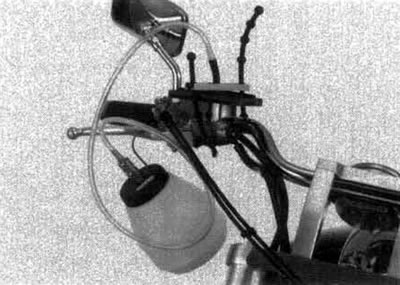
Do not mix different types of fluid since they are not compatible.
Connect a commercially available brake bleeder to the front caliper upper bleed valve.
Check the fluid level often while bleeding the brakes to prevent air from being pumped into the system.
When using a brake bleeding tool, follow the manufacturer's operating instructions.
Pump the brake bleeder and loosen the front caliper upper bleed valve. Add fluid when the fluid level in the master cylinder is low to prevent drawing air into the system.
If air enters the bleeder from around the bleed valve threads, seal the threads with Teflon tape.
Repeat the above procedures until no air bubbles appear in the plastic hose.

Close the front caliper upper bleed valve and operate the front brake lever.
If the lever is still spongy, bleed the system again.
If a brake bleeder is not available, perform the following procedure.
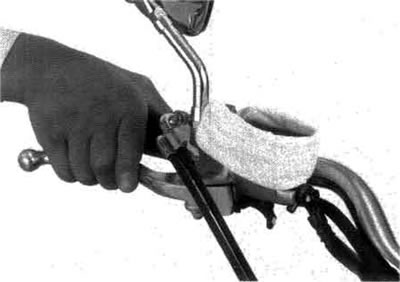
Pressurize the system with the lever until there are no air bubbles in the fluid flowing out of the reservoir small hole and lever resistance is felt.
1. Pump the brake lever several times, then squeeze the brake lever all the way and loosen the bleed valve 1/4 of a turn. Wait several seconds and close the bleed valve.
Do not release the brake lever until the bleed valve has been closed.
2. Release the brake lever slowly until the bleed valve has been closed.
3. Repeat the steps 1-2 until there are no air bubbles in the bleed hose.

After bleeding the fluid completely, tighten the bleed valves to the specified torque.
Torque: 6 N·m (0.6 kgf·m, 4.3 lbf·ft).
Fill the reservoir to the casting ledge with DOT 4 brake fluid to the upper level.
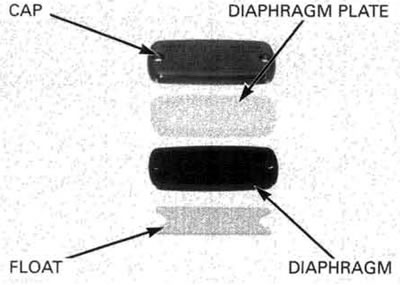
Install the diaphragm, set plate and reservoir cap.
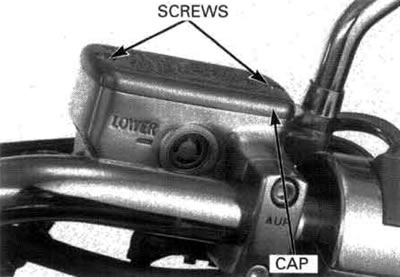
Tighten the screws to the specified torque.
Torque: 1.5 N·m (0.15 kgf·m, 1.1 lbf·ft).
Rear (linked)
Fluid feeding
Add fluid and bleed any air from the brake pedal line in the sequence as follow:
1. Right front caliper lower bleed valve
2. Left front caliper lower bleed valve
3. Rear caliper bleed valve
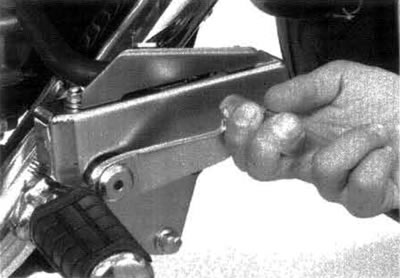
Fill the rear master cylinder with DOT 4 brake fluid to the upper level.
Operate the brake pedal several times to bleed any air from the master cylinder.
(1) Connect a commercially available brake bleeder to the front caliper lower bleed valve.
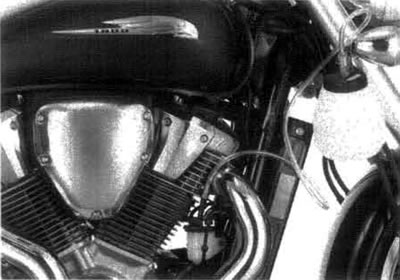
1. Pump the brake bleeder and loosen the front caliper lower bleed valve. Add fluid when the fluid level in the master cylinder is low to prevent drawing air into the system.
If air enters the bleeder from around the bleed valve threads, seal the threads with teflon tape.
2. Repeat the above procedures until a sufficient amount of fluid flows out of the caliper lower bleed valve.

It is not a problem if the fluid flowing out from the lower bleed valve contains air bubbles because the lines will be bled later.
(2) Connect a commercially available brake bleeder to the rear caliper bleed valve.
Repeat steps 1 and 2 for rear caliper bleed valve.
Next air bleed the system (see below).

If a brake bleeder is not available, perform the following procedure.
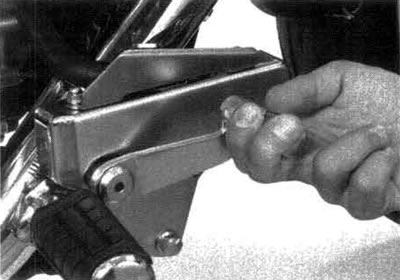
(1) Connect a bleed hose to the front caliper lower bleed valve.
Do not release the brake pedal until the bleed valve has been closed.
1. Pump the brake pedal several (5-10) times quickly, then push the brake pedal all the way down, loosen the front caliper lower bleed valve and loosen the bleed valve 1/4 of a turn. Wait several seconds and close the bleed valve.
Release the brake pedal slowly and wait several seconds after it reaches the end of its travel.
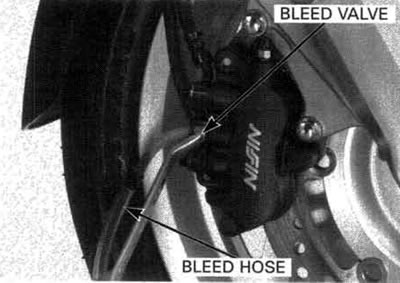
2. Repeat the above procedures until a sufficient amount of the fluid flows out from the caliper lower bleed valve.

It is not a problem if the fluid flowing out from the lower bleed valve contains air bubbles because the lines will be bled later.
(2) Connect a bleed hose to the rear caliper bleed valve.
Repeat step 1 and 2 for the rear caliper bleed valve.
Next air bleed the system (see next page).
Air bleeding
(1) Connect a bleed hose to the rear caliper bleed valve.

1. Pump the brake pedal several (5-10) times quickly, then push the brake pedal all the way down, loosen the front caliper lower bleed valve and loosen the bleed valve 1/4 of a turn. Wait several seconds and close the bleed valve.
Release the brake pedal slowly and wait several seconds after it reaches the end of its travel.
2. Repeat the above procedures until air bubbles do not appear in the transparent hose.
(2) Connect a bleed hose to the front caliper lower bleed valve.
Repeat steps 1 and 2 for the front caliper upper bleed valve.
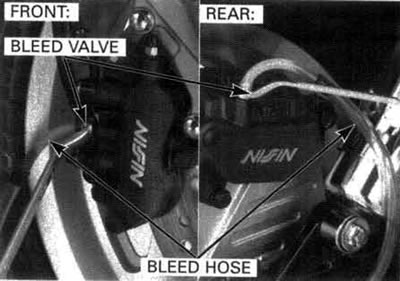
Note that you may feel strong resistance on the rear (combined) brake pedal during pumping when bleeding air from the caliper. This symptom is caused by the PCV (Proportional Control Valve) function. Be sure to apply the brake pedal fully.

After there are no more air bubbles in the fluid, repeat the air bleeding procedure about two to three times at each bleed valve.
Make sure the bleed valves are closed and operate the brake lever. If it still feels spongy, bleed the system again.
After bleeding the air completely, tighten the bleed valves to the specified torque.
Torque: 6 N·m (0.6 kgf·m, 4.3 lbf·ft).
Fill the reservoir to the casting ledge with DOT 4 brake fluid to the upper level.
Install the diaphragm, set plate and reservoir cap.
Install the reservoir cover and tighten the bolt to the specified torque.
Torque: 12 N·m (1.2 kgf·m, 9 lbf·ft).

