Warning! Brake fluid is corrosive and will damage paintwork. Avoid contact with eyes and skin. In the case of accidental contact, wash the affected area thoroughly with plenty of running water.
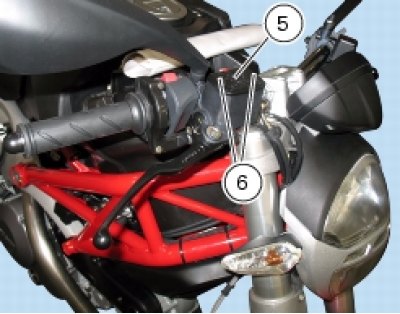
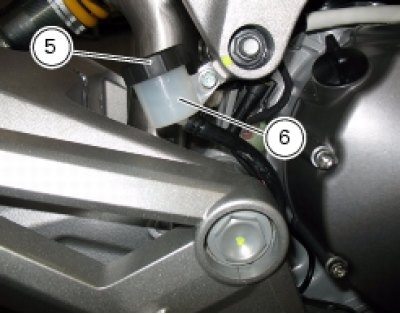
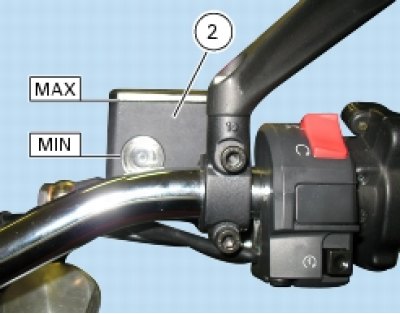
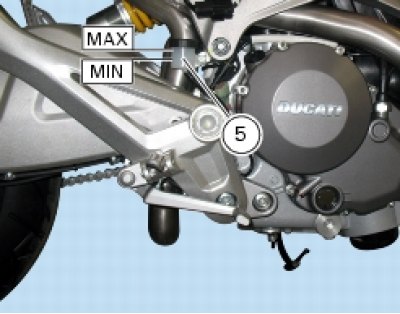
Fill the reservoirs (2) and (5) with the recommended fluid (Fuel, lubricants and other fluids) from an unopened container.
Caution! During the following operation, the fluid level must remain topped up at all times. The end of the transparent plastic tubing must remain immersed in the discharged fluid at all times.
Operate the brake lever (or pedal) several times to allow the fluid to reach all points of the circuit and expel any air.
Connect the bleed tool to bleed valve (4) or (7).
Note: Follow the manufacturer's instructions when using a commercial brake bleeding tool.
Open the bleed valve (4) or (7) and pump with the bleeder. Make sure that the reservoir level does not fall below the MIN mark.
Repeat the bleeding operation until the fluid flowing from the tube is completely free of air bubbles.
Tighten the bleed screw (4) or (7) to the specified torque (Frame torque settings).
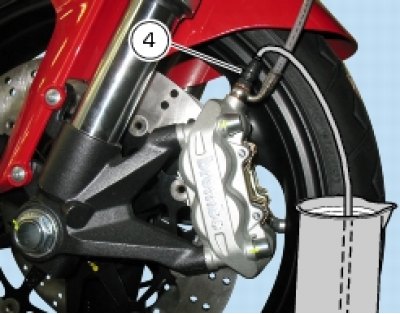
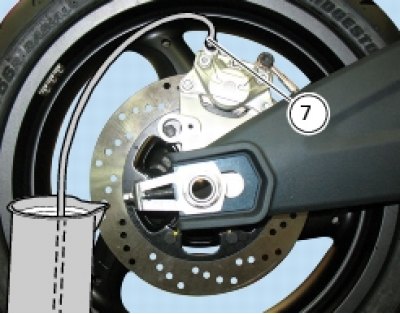
If you do not have a brake bleeder available, connect a length of transparent plastic tubing to the bleed valve as outlined in the draining procedure.
Open the bleed valve a 1/4 turn and operate the brake lever (or pedal) several times until fluid emerges from the bleed valve.
Pull the lever fully in and open the bleed valve by at least a 1/4 of a turn.
Wait a few seconds, then release the lever gradually while simultaneously closing the bleed valve (4) or (7).
Caution! Do not release the brake lever (or pedal) until the bleed valve has been fully tightened.
Repeat the bleeding operation until the fluid emerging from the plastic tube is free of air bubbles.
Bleed air from the bleed valves one at a time.
Tighten the bleed valve (4) or (7) to the specified torque (Frame torque settings). Replace the dust cap.
Top the fluid up to the correct level and refit cover (1) to reservoir (2) and tighten screws (3) and fit cap (5) to reservoir (6).
