
Check the brake fluid after the first 1000 km (621 mi) and then every 4000 km (2485 mi) or 12 months, change it every year.
Warning!
- In case of excessive stroke of the brake lever, excessive elasticity, or air bubbles, bleed the air out of the circuit, see 2.12.5.
- When using the brake fluid, take care not to spill it on the plastic or painted parts, since it can damage them.
- Before starting, check that the brake lines are neither twisted nor worn out and that the connectors are not leaking.
- Do not use or mix different types of silicone or oil fluids.
- Do not use neither old brake fluid nor fluid taken from containers opened for a long time. Prevent water or dust from accidentally getting into the circuit.
Check
Note. Place the vehicle on a firm and flat surface.
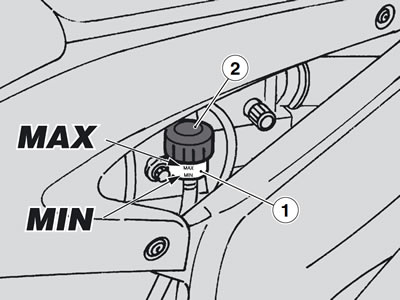
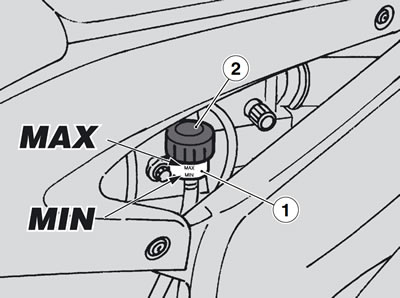
Keep the vehicle in vertical position, so that the fluid contained in the tank (1) is parallel to the plug (2).
Make sure that the fluid level exceeds the "MIN" mark.
If the fluid does not reach at least the "MIN" mark, top up as follows.
Topping up
Warning! The brake fluid may flow out of the tank. Do not operate the rear brake lever if the brake fluid tank plug is loose or has been removed.
Undo and remove plug (2).

Warning!
- Avoid any prolonged exposure of the brake fluid to the air.
- The brake fluid is hygroscopic and when in contact with the air it absorbs its humidity. Leave the brake fluid reservoir open ONLY for the time necessary for topping up.
Note. In order not to spill the brake fluid while topping up, keep the fluid in the reservoir parallel to the tank rim (in horizontal position).
Remove the gasket (3).
Using a syringe, top up fluid inside the brake tank (1), see 1.8.1, until reaching the correct level between the "MIN" and "MAX" reference marks.
Warning!
- It is advisable to top up until reaching the "MAX" level only with new pads.
- When the disc pads wear out, the level of the fluid decreases progressively to compensate for their wear.
- Do not reach the "MAX" level with worn out pads, since this will cause a fluid outflow when the pads are changed.
To refit components, follow the disassembly procedure in reverse order.