
The steering is fitted with rolling bearings to ensure smooth handling.
Proper steering adjustment is vital to smooth steering movement and safe riding. Any hardness in the steering will impair handling, whereas a soft steering will result in poor stability.
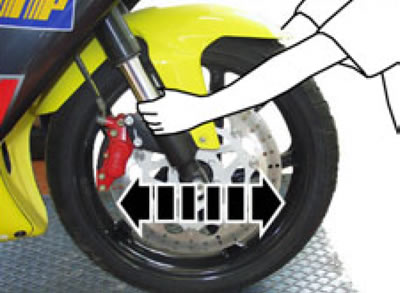
Checking play in the bearings
Put the vehicle on the centre stand.
Rock the fork back and forth in the direction of travel.
If you feel any play, adjust the bearings.
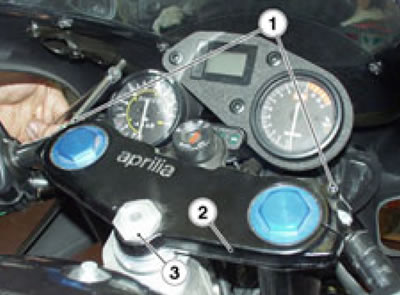
Adjusting play in the bearings
Torque wrench settings:
- Top bush (3): 80 Nm (8.0 kg·m).
Slacken but do not remove the two bolts (1) securing the top yoke (2).
Release and remove the top bush (3).
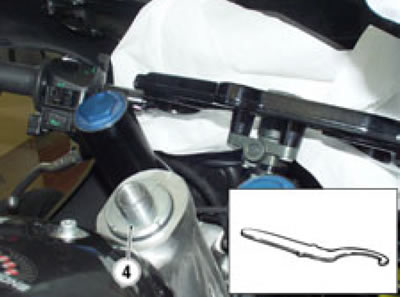
Tap the underside of the top yoke (2) gently to lift out the top yoke together with handlebar and steering lock/ignition switch.
Lean the top yoke (2) forward. Place a cloth underneath the top yoke to protect the instrument panel.
Slacken the adjusting ring (4) fully using a lockring spanner. Tighten the adjusting ring (4) to the specified torque to take up play.
Refit the top yoke (2) and position it correctly.
Smear the thread and underside of the bush (3) with oil.
Tighten the top bush (3).
Slacken the bush (3) and then re-tighten to the specified torque. This will ensure correct torque.
Tighten the two bolts (1).
Warning! When finished, ensure that the handlebars turn smoothly or the sliding surfaces will damage resulting in poor handling.