For maintenance operations, see 2.1.2.
The air, if any, present inside the hydraulic circuit will serve as "pad" by absorbing most of the pressure coming from the brake master cylinder and thus reducing the calipers efficiency during braking.
If some air is present inside the circuit, the brake control is "spongy" and the braking efficiency is reduced.
Danger!
- Safety critical operation. In order to avoid any damage to both rider and vehicle, after brake reassembly and after having restored the braking system standard operation, make sure that all air is bled out of the hydraulic circuit.
- If the brake fluid gets in contact with the skin or the eyes, it can cause serious irritations. Carefully wash the parts of your body that get in contact with the fluid. Consult a doctor or an eye specialist if the fluid gets in contact with your eyes.
Warning! Handle the brake fluid with extreme care: it may damage the vehicle paintwork and the plastic, rubber and other parts.
In case maintenance operations are to be performed on the hydraulic circuit, it is advisable to use latex gloves.
When using the brake fluid, take care not to spill it on the plastic or painted parts, since it can damage them.
Front brake
Top up fluid inside brake tank, see 2.12.1.
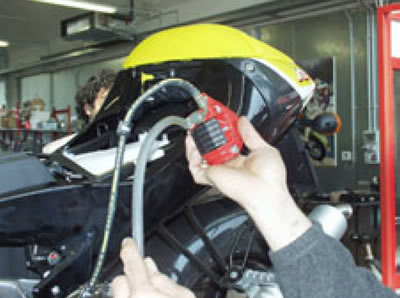
Remove the rubber cap (1) from the bleed valve (2). Insert one end of a transparent plastic tubing inside the caliper bleed valve (2) and the other end in a container for collection.
Operate the brake lever repeatedly, then keep it fully pulled.
Loosen the bleed valve by ¼ of a turn so that the brake fluid can flow inside the container. The tension on the brake lever will thus be eliminated and you will be able to take it to the end of stroke.

Repeat this last procedure until no air bubbles can be seen inside the fluid flowing inside the container.
NOTE When bleeding the hydraulic circuit, fill the tank with the suitable quantity of brake fluid. Make sure that during this procedure some brake fluid is always present inside the tank.
Tighten the bleed valve (2) and remove the plastic tubing.
Top up to the correct brake fluid level, see 2.12.1.
Refit the rubber cap (1).

Rear brake
Tightening torque values:
- Screws (3-4): 3 Nm (0.3 kg·m)
- Screws (7): 22 Nm (2.2 kg·m)
Top up brake fluid inside tank, see 2.12.4.
Undo and remove the two screws (3-4). Keep the two cable guides (5-6) with washers.
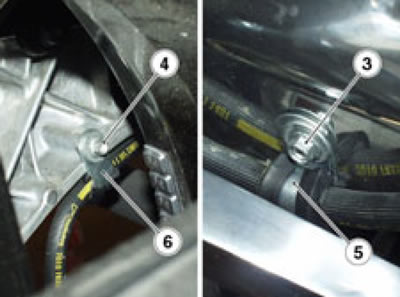
Undo and remove the two screws (7). Keep the brake caliper (8). Before refitting apply Loctite® on screw threads (7).
Position the brake caliper (8) as high as possible.
Remove the rubber cap from the bleed valve (9).

Insert one end of a transparent plastic tubing inside the caliper bleed valve (9) and the other end in a container for collection.
Operate the brake lever repeatedly, then keep it fully pulled.
Loosen the bleed valve by % of a turn so that the brake fluid can flow inside the container. The tension on the brake lever will thus be eliminated and you will be able to take it to the end of stroke.
Repeat this last procedure until no air bubbles can be seen inside the fluid flowing inside the container.
Note. When bleeding the hydraulic circuit, fill the tank with the suitable quantity of brake fluid. Make sure that during this procedure some brake fluid is always present inside the tank.
Tighten the bleed valve (10) and remove the plastic tubing.
Top up to the correct brake fluid level, see 2.12.4.
Refit the rubber cap (1).