
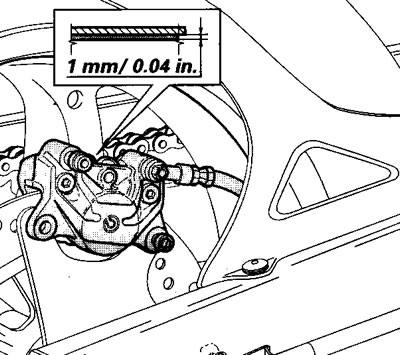
Caution! If one of the pads is worn then change both pads.
To change the pads, proceed as follows:
Warning! Corrosion and irritant hazard. Brake fluid is corrosive and will damage paintwork. Avoid contact with eyes and skin. In the event of accidental contact, wash the affected part with abundant quantities of running water.
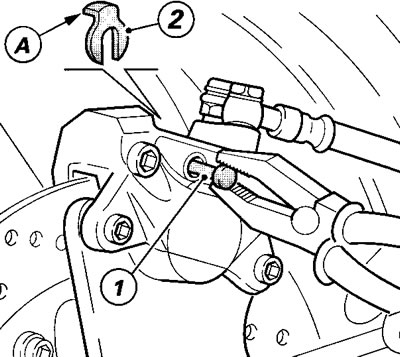
Working from the inboard side of the caliper, Remove the spring clip (2) from the pad retaining pin.
Force the brake pads apart to force the caliper pistons into their housings.
Pull the pad retaining pin (1) outwards and remove.
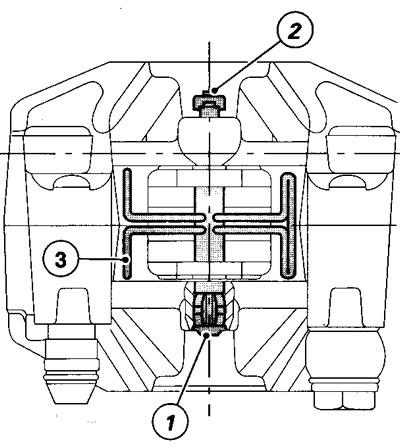
Remove the pad retaining spring (3) from between the two caliper halves.
Remove the worn pads.
Note. Change pads which are shiny or vitrified.
Insert the new pads and the spring (3).
Insert the centring pins(1) and fix them in place with the spring clips (2); the safety tab must be pointing towards the wheel.
Operate the brake pedal repeatedly so that the pads bed in under the action of the brake pistons.
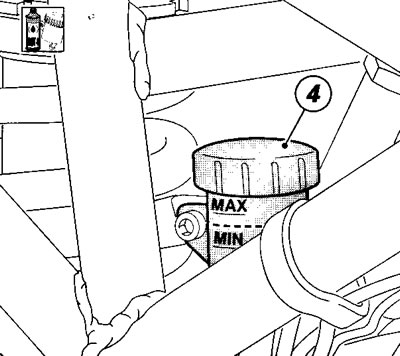
Check that the brake fluid level in the master cylinder reservoir is between the MIN and MAX marks. If this is not the case, unscrew the reservoir cap (4) and top up with brake fluid.
Caution! Running in new pads. New pads must be run-in carefully for the first hundred kilometers / 62 miles to allow the friction material to bed in completely.