Air suction valve removal
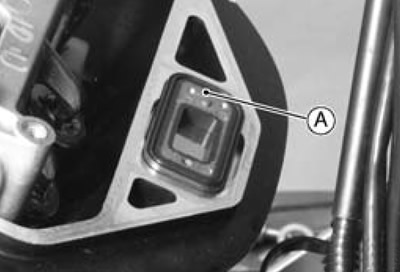
Remove:
- Cylinder Head Covers (see Cylinder head cover removal)
- Air Suction Valves [A]

Air suction valve installation
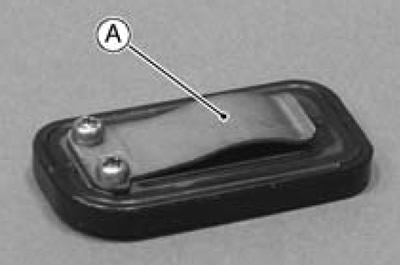
Install each air suction valve so that stopper side [A] of the reed faces downward.

Air suction valve inspection
Remove the air suction valve (see Air suction valve removal).
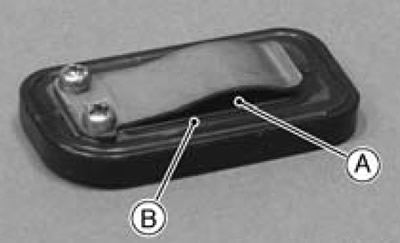
Visually inspect the reeds for cracks, folds, warps, heat damage or other damage.
★ If there is any doubt as to the condition of the reeds [A], replace the air suction valve as an assembly.
Check the reed contact areas [B] of the valve holder for grooves, scratches, any signs of separation from the holder or heat damage.

Air switching valve removal
Remove:
- Fuel Tank (see Fuel tank removal in the Fuel System (DFI) chapter)
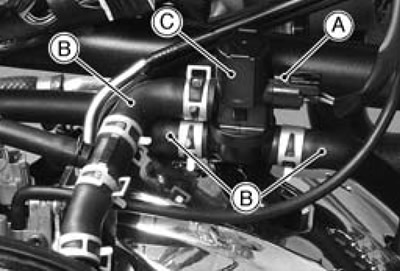
Disconnect the air switching valve connector [A] and pull off the hoses [B].
Remove the air switching valve [C].

Air switching valve installation
Route the hoses correctly (see Cable, wire and hose routing section in the Appendix chapter).
Air switching valve operation test
Refer to the Air switching valve operation test in the Periodic Maintenance chapter.
Air switching valve inspection
Refer to the Air switching valve inspection in the Electrical System chapter.
Clean air system hose inspection
Be certain that all the hoses are routed without being flattened or kinked, and are connected correctly to the right air cleaner base, air switching valve, and fittings on the rocker case covers
★ If they are not, correct them. Replace them if they are damaged.
