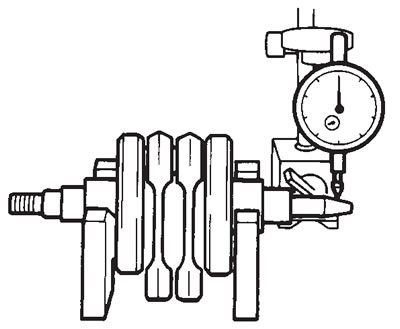
Out of specification → Replace the crankshaft.
- Crankshaft runout: Less than 0.02 mm

2. Check:
- crankshaft journal surfaces
- crankshaft pin surfaces
- bearing surfaces
Scratches/wear → Replace the crankshaft.
3. Measure: crankshaft-pin-to-big-end-bearing clearance
Out of specification → Replace the big end bearings.
- Crankshaft-pin-to-big-end-bearing clearance: 0.044-0.073 mm
The following procedure applies to all of the connecting rods.
Caution! Do not interchange the big end bearings and connecting rods. To obtain the correct crankshaft-pin-to-big-end-bearing clearance and prevent engine damage, the big end bearings must be installed in their original positions.
a. Clean the big end bearings, crankshaft pins, and the inside of the connecting rod halves.
b. Install the big end upper bearing into the connecting rod and the big end lower bearing into the connecting rod cap.
Note: Align the projections (a) on the big end bearings with the notches (b) in the connecting rod and connecting rod cap.

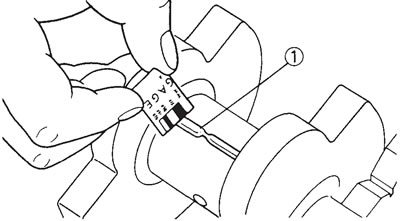
c. Put a piece of Plastigauge (1) on the crankshaft pin.

d. Assemble the connecting rod halves.
Note:
- Do not move the connecting rod or crankshaft until the clearance measurement has been completed.
- Apply molybdenum disulfide grease onto the bolts, threads, and nut seats.
- Make sure that the "Y" mark (2) on the connecting rod faces towards the left side of the crankshaft.
- Make sure that the characters (3) on both the connecting rod and connecting rod cap are aligned.

e. Tighten the connecting rod nuts.
Caution!
- When tightening the connecting rod nuts, be sure to use an F-type torque wrench.
- Without pausing, tighten the connecting rod nuts to the specified torque. Apply continuous torque between 4.3 and 4.8 m·kg. Once you reach 4.3 m·kg, DO NOT STOP TIGHTENING until the specified torque is reached.
- If the tightening is interrupted between 4.3 and 4.8 m·kg, loosen the connecting rod nut to less than 4.3 m·kg and start again. Refer to "INSTALLING THE CONNECTING RODS".
- Connecting rod nut: 48 Nm (4.8 m·kg)
f. Remove the connecting rod and big end bearings. Refer to "Removing the connecting rods".
g. Measure the compressed Plastigauge width (1) on each crankshaft pin.
If the clearance is out of specification, select replacement big end bearings.

4. Select: big end bearings (P1,P2)
Note:
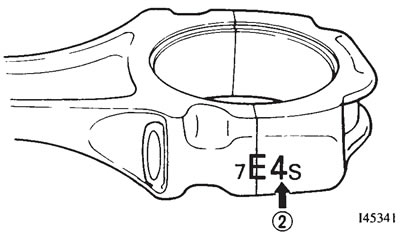
- The numbers (1) stamped into the crankshaft web and the numbers (2) on the connecting rods are used to determine the replacement big end bearing sizes.
- "P1,P2" refer to the bearings shown in the crankshaft illustration.


For example, if the connecting rod "P1" and the crankshaft web "P1" numbers are "4" and "1" respectively, then the bearing size for "P1" is:
Bearing size for "P1": "P1" (connecting rod) - "P1" (crankshaft web) = 4 - 1 = 3 (brown)
Rear cylinder lower bearing/Front cylinder upper and lower bearing
| BEARING COLOR CODE | |
| 1 | blue |
| 2 | black |
| 3 | brown |
| 4 | green |
| 5 | yellow |
Rear cylinder upper bearing
| BEARING COLOR CODE | |
| 1 | black |
| 2 | |
| 3 | brown |
| 4 | green |
| 5 | |
