Note:
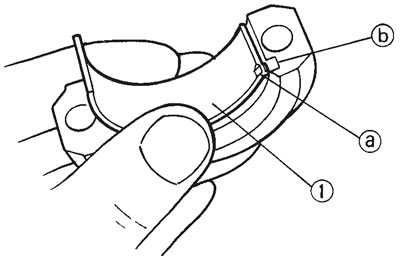
- Align the projection (a) of the bearings with the notches (b) in the connecting rod cap.
- Install each bearing in its original place.

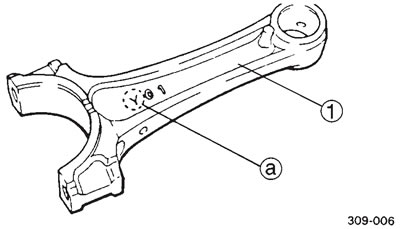
4. Install: connecting rods (1)

Note:
- The stamped "Y" mark (a) on the connecting rods should face towards the left side of the crankcase.
- Install each connecting rod in its original place.
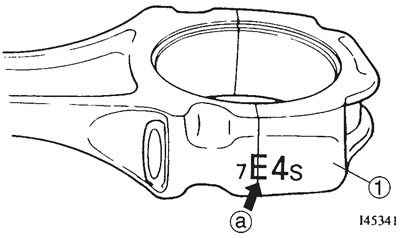
5. Install: connecting rod cap (1)

Note: Be sure that the characters (a) on the side of the cap and connecting rod are aligned.
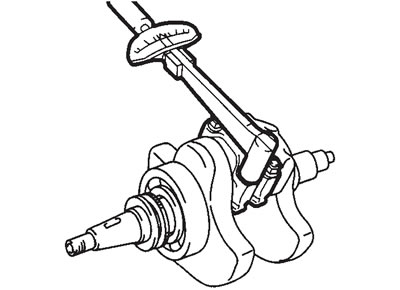
6. Tighten: nuts (connecting rod cap): 48 Nm (4.8 m·kg)

Note: Apply molybdenum disulfide grease to the rod cap bolt threads and nut surfaces.
Caution!
- When tightening the nuts be sure to use an F-type torque wrench.
- Without pausing tighten to full torque specification. Apply continuous torque between 4.3 and 4.8 m·kg. Once you reach 4.3 m·kg DO NOT STOP TIGHTENING until final torque is reached. If the tightening is interrupted between 4.3 and 4.8 m·kg, loosen the nut to less than 4.3 m·kg and start again.
7. Install: crankshaft installing tool
Note: Attach the spacer to the bearing inner race.
- Crankshaft installer pot (1): 90890-01274
- Crankshaft installer bolt (2): 90890-01275
- Adapter (3): 90890-04130
- Spacer (4): 90890-04060

8. Install: crankshaft (1)
Note: Align the left connecting rod with the rear cylinder sleeve hole.

