Warning: Securely support the vehicle so that there is no danger of it falling over.
2. Install:
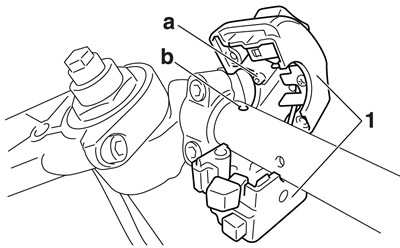
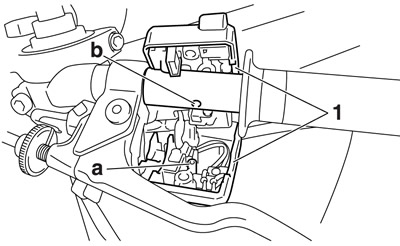
- Right handlebar switch "1"
- Align the projection "a" on the right handlebar switch with the hole "b" on the right handlebar.
3. Install:
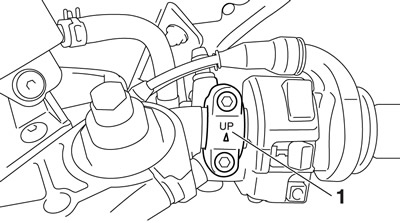
- Brake master cylinder holder "1"
Front brake master cylinder holder bolt 13 Nm (1.3 m·kgf, 9.4 ft·lbf).
Notice: Install the brake master cylinder holder with the "UP" mark facing up.
First, tighten the upper bolt, and then the lower bolt.
4. Install:
- Throttle grip
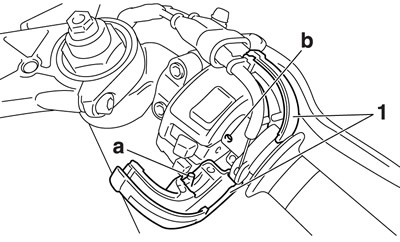
- Throttle cable housing "1"
- Throttle cables
Align the projection "a" on the throttle cable housing with the hole "b" in the right handlebar.
5. Install:
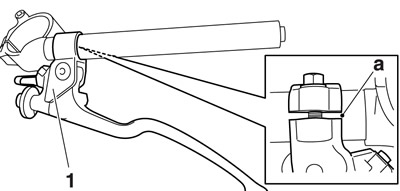
- Clutch lever holder "1"
Clutch lever holder bolt 11 Nm (1.1 m·kgf, 8.0 ft·lbf).
Align the slit on the clutch lever holder with the punch mark "a" on the left handlebar.
6. Install:
- Left handlebar switch "1"
Align the projection "a" on the left handlebar switch with the hole "b" on the left handlebar.
There should be 2.0-2.5 mm (0.08-0.10 in) of clearance between left handlebar switch and clutch lever holder.
7. Install:
- Handlebar grip
- Grip end
- a. Apply a thin coat of rubber adhesive onto the end of the left handlebar.
- b. Slide the handlebar grip over the end of the left handlebar.
- c. Wipe off any excess rubber adhesive with a clean rag.
Warning:
- Do not touch the handlebar grip until the rubber adhesive has fully dried.
- When installing the handlebar grip, keep the clearance of 1.0-3.0 mm (0.04-0.12 in) between the handlebar grip and grip end.
8. Adjust:
- Clutch cable free play
Refer to "Adjusting the clutch cable free play".
Clutch lever free play 10.0-15.0 mm (0.39-0.59 in).
9. Adjust:
- Throttle cable free play
Refer to "Adjusting the throttle cable free play".
Throttle cable free play 3.0-5.0 mm (0.12-0.20 in).
