
Warning! Before starting work, ensure the motorcycle is stabilised and adequately supported. This will help prevent it from falling and causing injury to the operator or damage to the motorcycle.
Removal
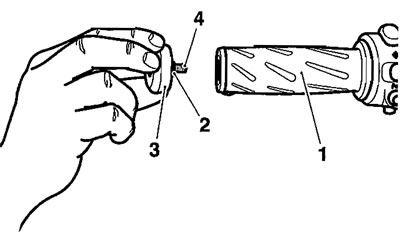
1. Undo the screws and remove the end weights from the handlebars.
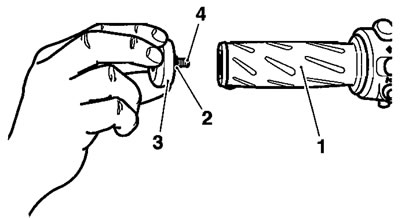
1. Handlebar; 2. Spacer; 3. End weight; 4. Fixing
2. Release the wiring and brake hose from its clips on either side of the handlebar.
3. Undo the screws and free the left switchgear assembly from the handlebar.
4. Unscrew the bolts and remove the clamp from the clutch lever assembly.
5. Undo the screws and free the right switchgear assembly from the front brake master cylinder. Free the switch wiring from the handlebars.
6. Unscrew the bolts and remove the clamp from the master cylinder.
7. Release the two screws securing the upper cover of the handlebar clamp to the lower section.
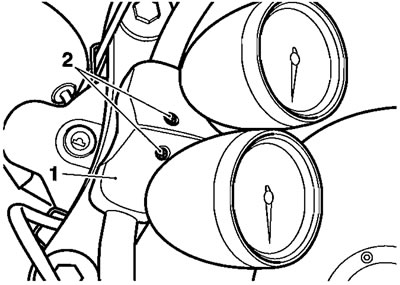
1. Upper cover; 2. Screws
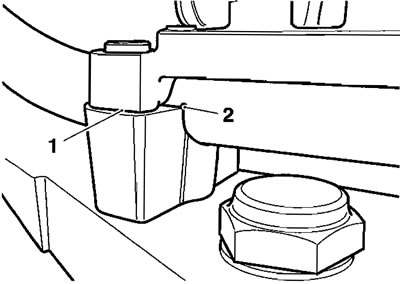
8. Pivot the instruments forward to reveal the handlebar clamp bolts.

1. Handlebar clamp bolts
9. Support the handlebars then unscrew the bolts and lift off the handlebar clamp, together with the instruments. Protect the top of the fuel tank from accidental damage and then lay the instruments and clamp on the fuel tank.
10. Free the handlebar from the twist-grip/master cylinder assembly and remove it from the motorcycle. Support the master cylinder in an upright position.
Installation
1. Fit the throttle twist-grip assembly then locate the
handlebars in the lower halves of the clamp. Fit the clamp and bolts together with the instruments.
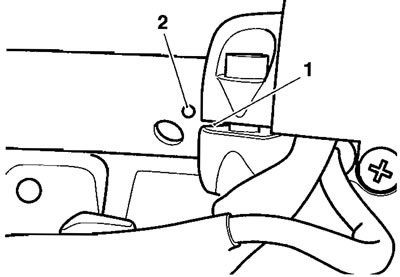
2. Align the handlebar punch mark with the lower-rear inner left-hand split line of the clamp, then tighten the front ciamp bolts to 26 Nm, then the rears.
1. Clamp split line; 2. Handlebar punch mark
3. Pivot the instruments into position then fit and tighten the cover bolts to 3 Nm.
4. Locate the clutch lever assembly to the handlebar and fit the clamp.
5. Align the clamp lower split line with the punch mark on the handiebar then tighten the clamp bolts to 15 Nm.

1. Clamp lower split line; 2. Handlebar dot mark
6. Fit the clamp to the front brake master cylinder.
7. Align the clamp lower split line with the punch mark on the handlebar then evenly tighten the clamp bolts to 15 Nm.
1. Clamp lower split line; 2. Handlebar dot mark
8. Refit the left and right switchgear assemblies, tightening their screws to 4 Nm.
9. Assemble the handlebar end weights into the handlebar ends, and tighten the fixings to 7 Nm.
1. Handlebar; 2. Spacer; 3. End weight; 4. Fixing
10. Renew any damaged clips before refitting all wiring and the front brake hose to the clips.
11. Check that the throttle opens and closes smoothly without sticking. Rectify as necessary.
Warning! Operation of the motorcycle with incorrectly adjusted, incorrectly routed or damaged throttle cables could interfere with the operation of the brakes, clutch or the throttle itself. Any of these conditions could result in loss of control of the motorcycle and an accident.
Warning! Move the handlebars to left and right full lock while checking that cables and harnesses do not bind or that the steering feels tight or difficult to turn. A cable or harness that binds, or is tight/difficult to turn steering will restrict the steering and may cause loss of control and an accident.