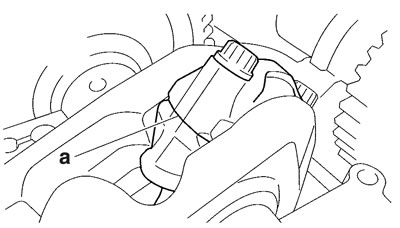
1. Install:
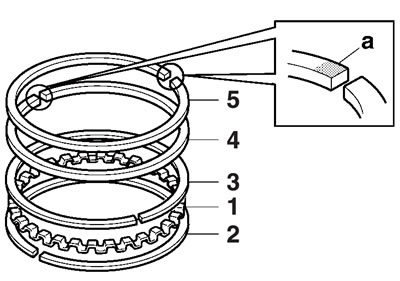
- Oil ring expander "1"
- Lower oil ring rail "2"
- Upper oil ring rail "3"
- 2nd ring "4"
- Top ring "5" (into the piston)
Be sure to install the piston rings so that the manufacturer's marks or numbers "a" face up.
2. Install:
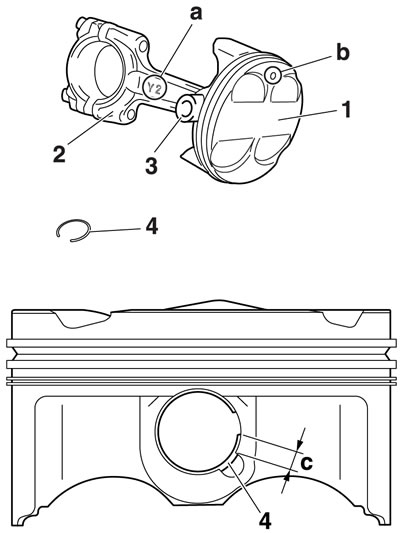
- Piston "1" (onto the respective connecting rod "2")
- Piston pin "3"
- Piston pin clip "4"
- Apply engine oil onto the piston pin.
- Make sure that the "Y" mark "a" on the connecting rod faces left when the punch mark "b" on the piston is pointing up as shown.
- Install the piston pin clips, so that the clip ends are 3 mm (0.12 in) "c" or more from the cutout in the piston.
- Reinstall each piston into its original cylinder (numbering order starting from the left: #1 to #4).
3. Lubricate:
- Piston
- Piston rings
- Cylinder (with the recommended lubricant)
Recommended lubricant: Engine oil.
4. Offset:
- Piston ring end gaps
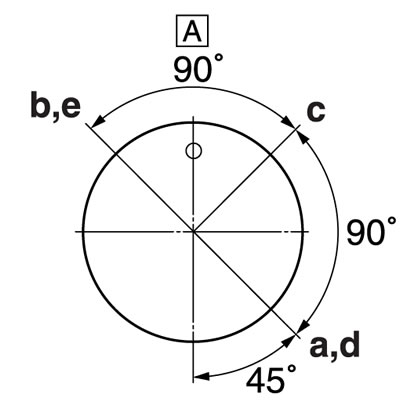
a. Top ring; b. 2nd ring; c. Upper oil ring rail; d. Oil ring expander; e. Lower oil ring rail
A. Exhaust side
5. Lubricate:
- Crankshaft pins
- Big end bearings
- Connecting rod big end inner surface (with the recommended lubricant)
Recommended lubricant: Engine oil.
6. Check:
- Cylinder stud bolts
Cylinder stud bolt 8 Nm (0.8 mr·kgf, 5.8 ft·lbf).
7. Install:
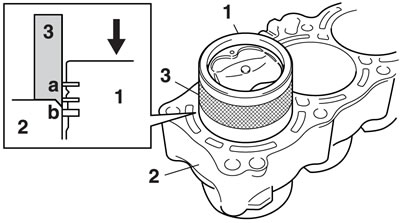
- Piston assemblies "1" (into the cylinder "2")
Piston installing tool 90890-04161 YM-04161.
Notice: If the projection "a" of the piston installing tool damages, you cannot use it. Please handle with care.
Fit the projection "a" of the piston installing tool "3" and blunt-edged part "b" of the cylinder, fix the position of the piston installing tool, and then push the piston down to the cylinder.
8. Install:
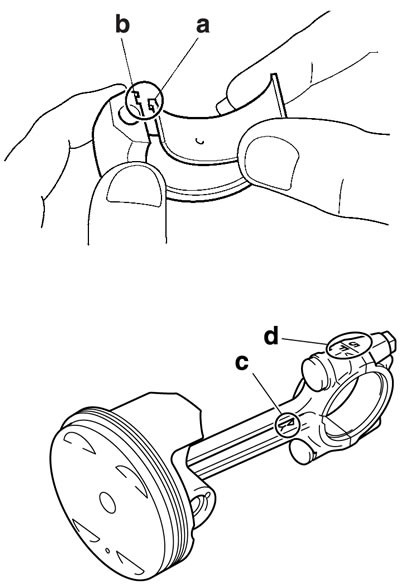
- Big end bearings (onto the connecting rods and connecting rod caps)
- Cylinder gasket New
- Dowel pin
- Cylinder assembly
- Connecting rod caps
- Connecting rod bolts New
- Align the projections "a" on the big end bearings with the notches "b" in the connecting rods and connecting rod caps.
- Be sure to reinstall each big end bearing in its original place.
- Make sure the "Y" marks "c" on the connecting rods face towards the left side of the crankshaft.
- Make sure the characters "d" on both the connecting rod and connecting rod cap are aligned.
- Apply Molybdenum disulfide oil to the bearing surface of the connecting rod bolt and connecting rod cap.
9. Tighten:
- Connecting rod bolts "1"
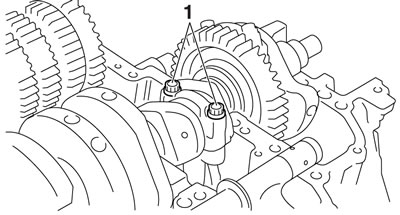
Warning: Replace the connecting rod bolts with new ones.
Tighten the connecting rod nuts using the following procedure.
a. Tighten the connecting rod bolts with a torque wrench.
Connecting rod bolt (1st) 20 Nm (2.0 m·kgf, 14 ft·lbf).
b. Put a mark "1" on the corner of the connecting rod bolt "2" and the connecting rod cap "3".
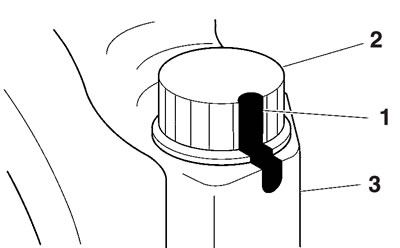
c. Tighten the connecting rod bolts further to reach the specified angle 145°-155°.
Connecting rod bolt (final):
Specified angle 145°-155°.
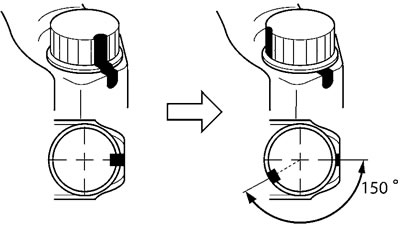
Warning: If the connecting rod bolt is tightened more than the specified angle, do not loosen the bolt and then retighten it. Instead, replace the connecting rod bolt with a new one and perform the procedure again.
Notice: Do not use a torque wrench to tighten the connecting rod bolt to the specified angle.
d. After the installation, check that the section shown "a" is flush with each other by touching the surface.
