
During production the throttle body assembly is adjusted and set using data from extensive testing. Each part of the throttle body assembly is an integral part of the injection ignition system and must work in complete harmony with all the other parts of the system.
The throttle body should therefore be seen as a whole and we strongly advise you to treat it as such. This section describes the procedure for adjusting the throttle body as a system.
This section describes the following operations:
Positioning the potentiometer.
Balancing the air flow.
Adjusting the idling mixture. The idling mixture strength is an engine operating parameter subject to strict international environmental protection legislation. This legislation tends towards a lean mixture (with CO at 1.5%) while optimum vehicle performance tends towards full-load mixtures with CO values between 4% and 6%.
For this operation you will require the following instruments:
- "MATHESIS" tester code no. 88765.1069;
- Mercury column vacuometer.
- CO tester.
Proceed as follows:
Raise the fuel tank and remove the air filter box.
Fully loosen or disconnect the accelerator and choke control cables from the throttle body.
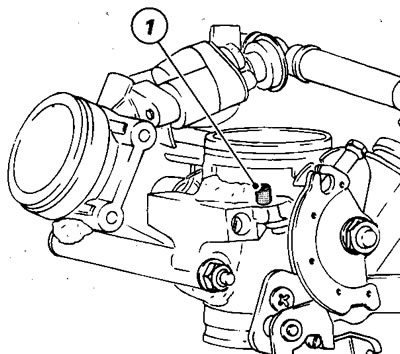
Unscrew the horizontal cylinder throttle adjuster screw (1) so that it is not resting on its end stop.
Unscrew the vertical cylinder throttle adjuster screw (2) so that it is not resting on its end stop.
Unscrew the throttle mixture adjuster (3) so that the MASTER throttle (on the potentiometer side) is fully closed.

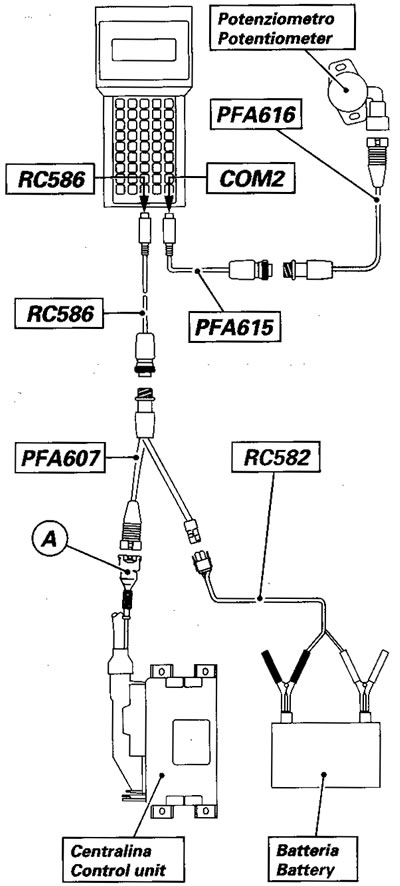
Connect the "MATHESIS" (RC 582) tester power supply cable to the bike battery and to the 3-way Packard self-diagnosis adapter cable (PF A 607).
Connect the 3-way Packard selfdiagnosis adapter cable to the CDS self-diagnosis adapter cable (RC 586). Connect the CDS adapter cable to the main port on the tester.
Connect the potentiometer adapter cable (PF A 615) to the interface (PF A 616) and to the COM 2 port on the tester.
Connect the interface cable (PF A 616) to the throttle body potentiometer. Insert the memory card in the tester.
Loosen the two potentiometer retaining screws (4). Keeping the MASTER throttle in the closed position, turn the potentiometer until you obtain the reading 150 mV+15 on the tester.
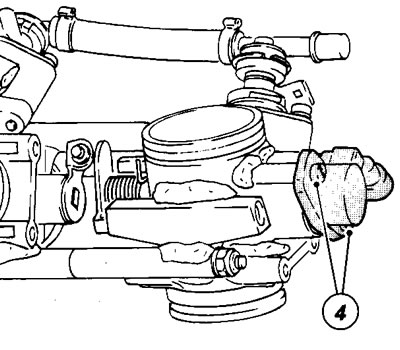
Tighten the potentiometer screws (4). Disconnect the "MATHESIS" tester from the potentiometer and reconnect the bike cabling.
If you disconnected the accelerator control cable previously, now reconnect the cable end to the cam pulley and adjust the cable travel as indicated in the next section.
Remove the screw on the vacuometer connector hole and connect the vacuometer to the intake manifolds.
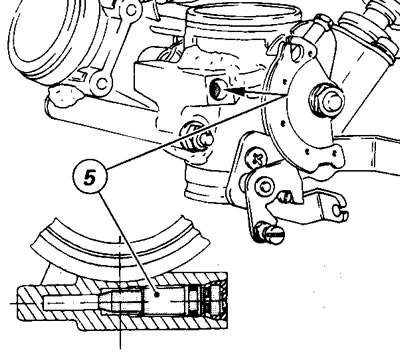
Fully tighten and close the bypass screws (5).
Start the engine and run it slightly fast.
Balance the vacuum in the intake manifolds by turning the balancing screw (3) of the two throttles.
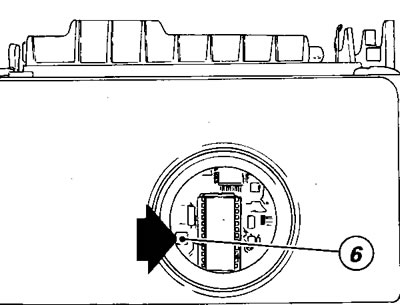
Connect the self-diagnosis adapter connector (PF A 607) to the diagnosis socket (A) on the control unit (see figure). On the main menu, select function F1 - SELF DIAGNOSIS.

Turn the MASTER adjuster screw (2) until you obtain a reading of 500-560 mV.
Turn the other adjuster screw (1) until there is a change in the readout on the tester.
Unscrew the by-pass screws (5) for each cylinder until you obtain an idling speed of 1000-1100 rpm with the balanced air flow.
If balancing proves to be difficult, turn the adjuster screws (1 and 2) one at a time until you obtain the idling rpm specified.
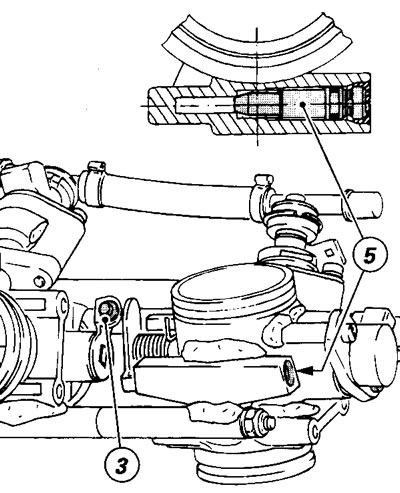
To check the CO level, connect the CO tester to the exhaust pipes using service connector code no. 88713.1010. Measure the CO level for each cylinder by turning the bypass screws (5). If the CO levels are not within specified values, remove the trimmer cover (5) on the control unit and adjust the trimmer accordingly. The trimmer is similar to a mixture adjustment screw; turn the trimmer clockwise to enrich the mixture; turn the trimmer anticlockwise to lean out the mixture.
Adjust the travel of the choke cable. Turn the handlebar lever to the maximum position and check that the plate (10) is touching the stop. In this position the engine must be running at 2000 rpm. To adjust, turn the adjuster screw (11).

Caution! Adjustment of the throttle and starter cables can change the results of the other adjustments made previously. Here it is a question of striking the right compromise between one set of adjustments and the other. You must, however, optimise adjustments to obtain the following result: Balanced air flow CO level between 1.5 and 4% Idling speed 1,000-1,100 rpm.
The trimmer adjusts all the injectors in the same way and as a result it may occur that one cylinder runs richer than another. This is not a problem if the difference is small (e.g.±0.5%). If the difference is large (e.g. 1 %) it will be necessary to sacrifice perfect air flow balancing in favour of a more uniform mixture. Do this by closing the by-pass screw of the cylinder which is running lean and slightly opening the by-pass screw of the cylinder which is running rich.
As a final test, disconnect the spark plugs alternately and then use a portable digital rev counter to check that the drop in rpm is the same. If this is the case the two cylinders are delivering the same torque and are balanced.