Bearing removal - 2nd gear end
Warning! Always wear proper eye protection when installing retaining rings. Use the correct retaining ring pliers. Verify that the tips of the pliers are not damaged or excessively worn. Slippage may propel the ring with enough force to cause eye injury.
1. See Figure 7-36. Remove retaining ring at 2nd gear crankcase bearing.
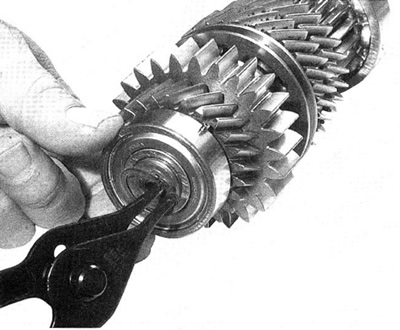
Figure 7-36. 2nd gear bearing retaining ring
2. See Figure 7-37. Use puller to remove 2nd gear bearing. To protect the end of the shaft use END CAP (HD-34902), part of BIG-TWIN MAINSHAFT PRIMARY BEARING RACE REMOVER AND INSTALLER (HD-34902-B).
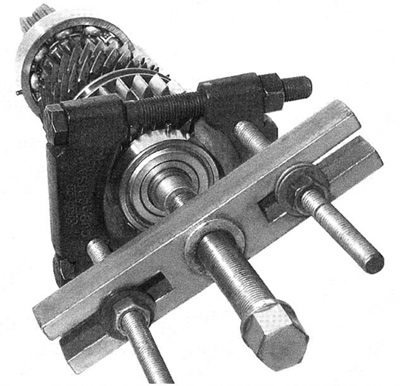
Figure 7-37. 2nd gear bearing removal
Important note. If no further disassembly of this end is needed go to step 3. If further disassembly of this end is needed go to step 4.
Bearing installation - 2nd gear end
3. See Figure 7-38. Install new bearing with bearing alignment pin offset toward the gears. Use a pressing ring so installation force is on the inner race only.

Figure 7-38. 2nd gear bearing alignment Pin
Warning! Always wear proper eye protection when installing retaining rings. Use the correct retaining ring pliers. Verify that the tips of the pliers are not damaged or excessively worn. Slippage may propel the ring with enough force to cause eye injury.
4. See Figure 7-39. Install retaining ring.
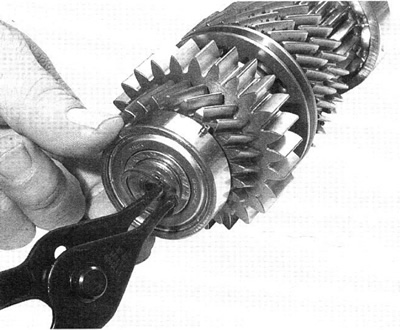
Figure 7-39. 2nd gear bearing retaining ring
5. See Figure 7-40. Place a puller clamp behind 5th gear and press off 2nd and 5th gear. Support the input shaft when removing the gears.
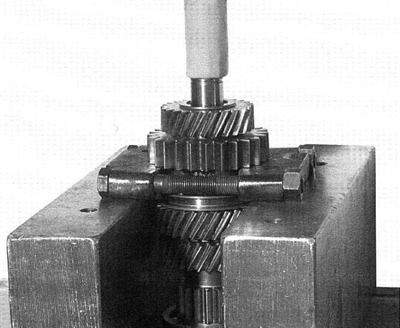
Figure 7-40. 2nd and 5th gear removal
Note. 2nd gear is an interference fit and MUST be replaced when removed from the input shaft regardless of its condition.
6. See Figure 7-41. Remove the splined thrust washer.
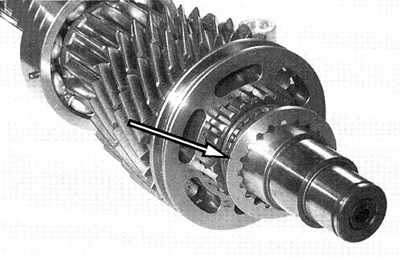
Figure 7-41. Splined thrust washer
7. See Figure 7-42. Remove half moon keepers.
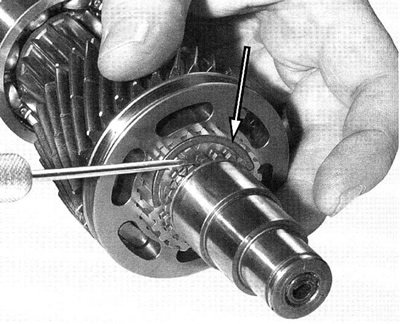
Figure 7-42. Half moon keepers
8. See Figure 7-43. Remove shifting fork ring.
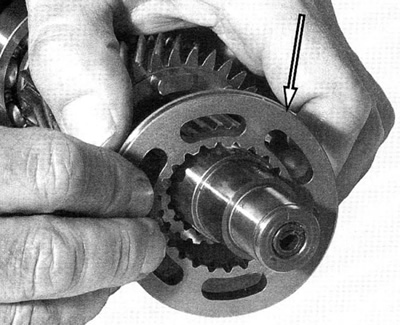
Figure 7-43. Shifting fork ring
9. See Figure 7-44. Remove splined slider.
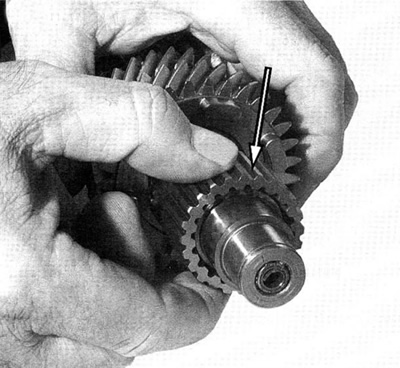
Figure 7-44. Splined slider
10. See Figure 7-45. Remove half moon keepers.
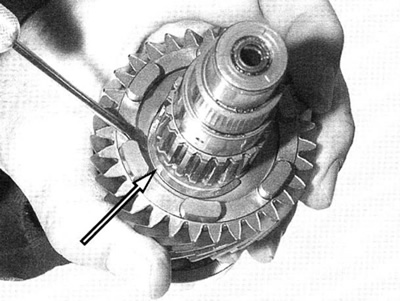
Figure 7-45. Half moon keepers
11. See Figure 7-46. Remove 4th gear.
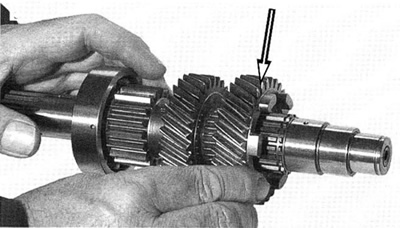
Figure 7-46. 4th gear
12. See Figure 7-47. Remove split cage bearing.
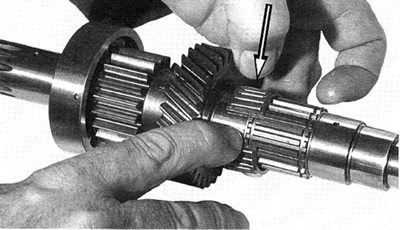
Figure 7-47. Split cage bearing
Note. See Figure 7-5. 1st gear and 3rd gear are part of the input shaft assembly and are not removable. Damage to 1st or 3rd gear requires replacement of the input shaft.
