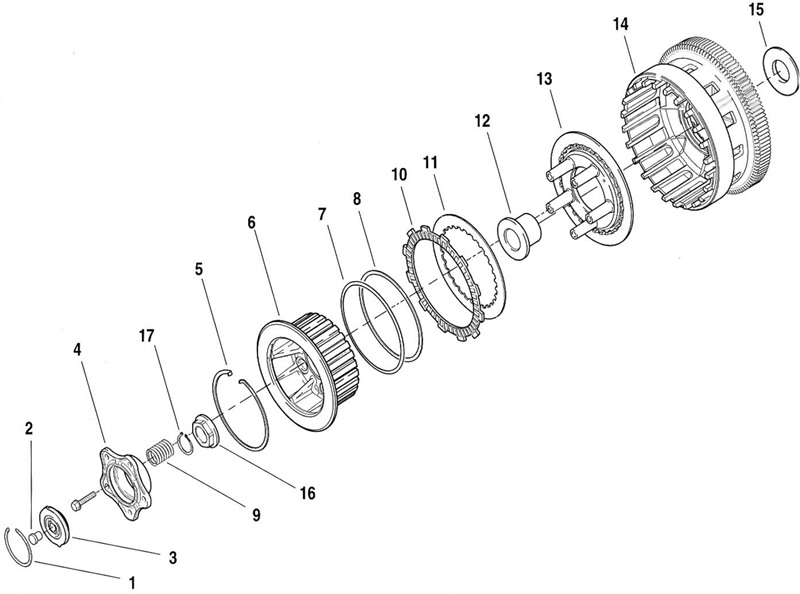
Figure 3-77. Clutch: 1. Retaining ring; 2. Contact button; 3. Lifter guide; 4. Lifter plate; 5. Oil retaining ring; 6. Clutch hub; 7. Damper spring seat; 8. Damper spring; 9. Pressure plate spring (5); 10. Friction plate (9); 11. Separator plate (8); 12. Distance collar; 13. Pressure plate; 14. Clutch basket; 15. Thrust washer; 16. Clutch hub nut; 17. Clutch hub nut retaining ring
| PART NO. | SPECIALTY TOOL |
| HD-45318 | Clutch hub holder |
1. See Figure 3-75. If engine is in chassis, remove secondary clutch actuator cover.

Figure 3-75. Secondary clutch actuator
2. Remove three fasteners on secondary clutch actuator and remove from clutch housing. Wrap clutch actuation cylinder with shop towel and secure away from engine.
3. See Figure 3-76. Remove clutch side crankcase cover.

Figure 3-76. Clutch cover removed
Warning! Always wear proper eye protection when installing retaining rings. Use the correct retaining ring pliers. Verify that the tips of the pliers are not damaged or excessively worn. Slippage may propel the ring with enough force to cause eye injury.
4. See Figure 3-78. Remove retaining ring and lifter guide.

Figure 3-78. Lifter guide
5. See Figure 3-79. Remove clutch hub retaining ring and nut.
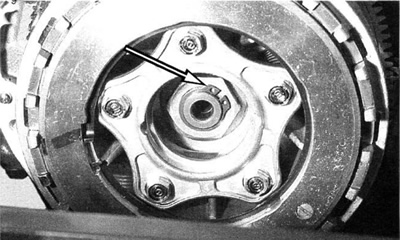
Figure 3-79. Clutch hub nut retaining ring
6. See Figure 3-77. and Figure 3-80. Remove oil retaining clip (5) for proper tool installation.
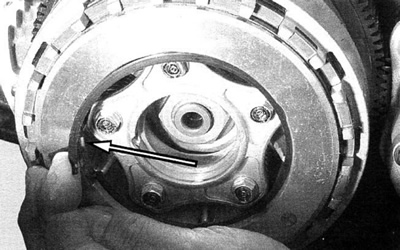
Figure 3-80. Oil retaining clip
7. See Figure 3-81. Install CLUTCH HUB HOLDER (HD-45318). The clutch hub holder can only be installed in one position. The engine case dowel pin must match the hole in the tool.
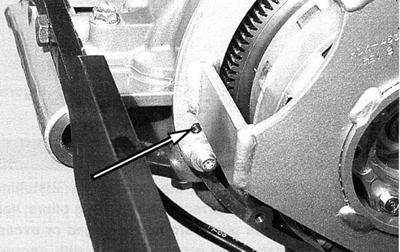
Figure 3-81. Clutch hub holder dowel pin position
Caution! DO NOT ROTATE ENGINE CLOCKWISE. This is opposite the normal engine operation. Engine damage may result.
8. See Figure 3-82. It may be necessary to rotate engine slightly to properly engage the clutch hub.

Figure 3-82. Tool and hub properly engaged
Caution! When LOCTITE® cannot be broken under normal conditions with conventional methods, apply moderate heat or use an air impact wrench ONLY TO LOOSEN clutch hub mainshaft nut. Failure to do so may result in damaged clutch hub and/or threads.
Caution! When applying heat to the clutch hub mainshaft nut, do so carefully. Excessive heat will damage pressure plate springs.
Warning! Use extreme caution when operating propane torch. Read the manufacturer’s instructions carefully before use. Do not direct open flame or heat toward any fuel system component. Extreme heat can cause fuel ignition and explosion. Inadequate safety precautions could result in death or serious injury.
9. See Figure 3-84. Heat clutch hub nut with a propane torch to loosen LOCTITE®. An air impact can be used to (REMOVAL ONLY) remove nut.
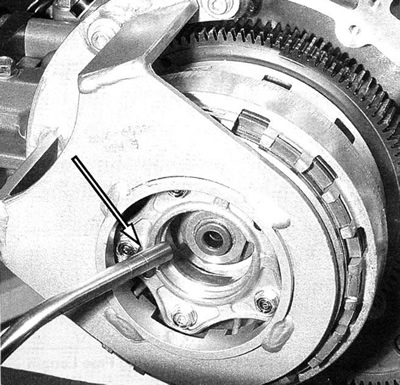
Figure 3-84. Heat clutch hub nut
10. See Figure 3-83. Remove clutch hub nut.

Figure 3-83. Remove clutch hub nut
Note. Clutch hub nut is one-time-use only. Always use a new nut for assembly (Part No. 8008M).
11. See Figure 3-85. Remove clutch assembly.

Figure 3-85. Remove clutch assembly
12. See Figure 3-86. Note position of thrust washer behind the clutch basket.

Figure 3-86. Thrust washer position
13. Remove CLUTCH HUB HOLDER (HD-45318).
