
Warning: Refer to the precautions given in Section 1 before starting work.
Caution: The fuel tanks on these machines are quite large, which means if they are full they will be heavy. It is advisable therefore to only remove the tank when it is at least half empty. If the tank is full it is best to drain it before removal. The best way to do this is to obtain a commercially available syphoning tool and a jerry can. Alternatively attach a suitable hose to the tap and feed its open end into a jerry can. On XL models you will have to apply a vacuum to the tap before it can be drained, otherwise the fuel will not flow out.
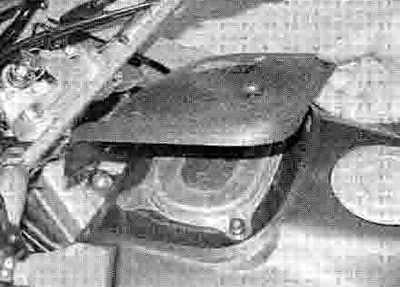
Fuel tank
Removal - XL600V models
1. Make sure the fuel tap is turned to the OFF position. Make sure the fuel cap is secure.
2. Remove the seat and the fairing side panels (see Chapter 8).
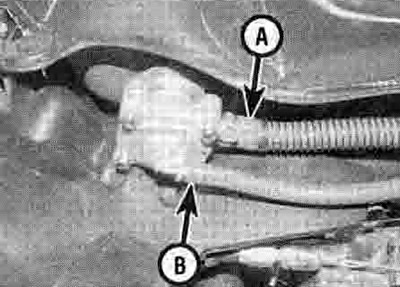
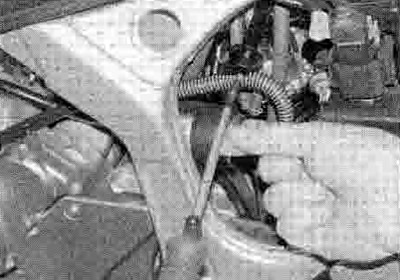
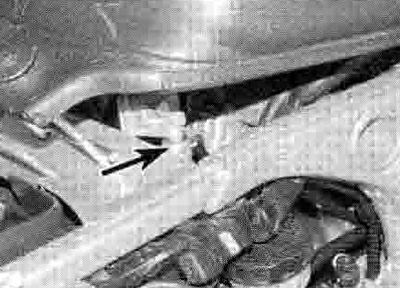
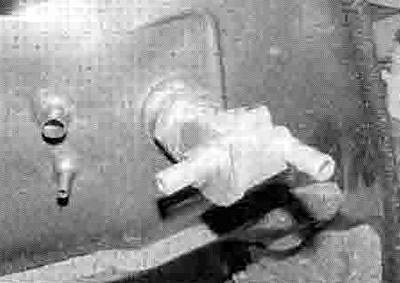
3. Release the fuel hose clamp and detach the hose from the tap (see illustration). Release the vacuum hose clamp and detach the hose from the tap (see illustration).
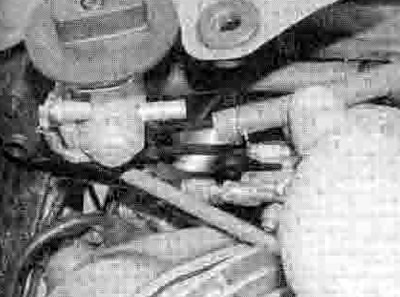
2.3a. Detach the fuel hose...
2.3b ...and the vacuum hose (arrowed)
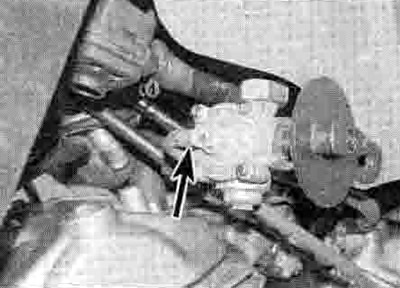
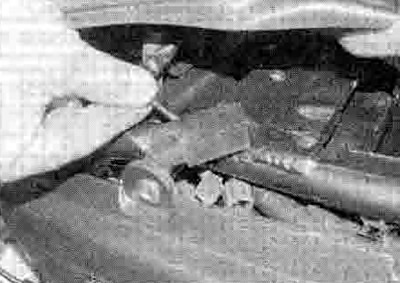
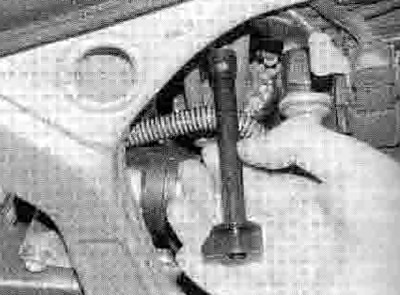
4. Unscrew and remove the fuel tank mounting bolt (see illustration).

2.4. Unscrew the mounting bolt...
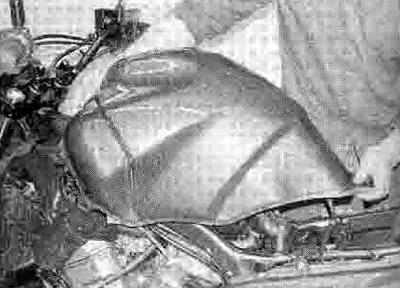
5. Remove the tank by carefully drawing it back and away from the bike (see illustration). Take care not to lose the mounting rubbers from the rear of the tank, and from between the sides of the tank and the frame, noting how they fit.
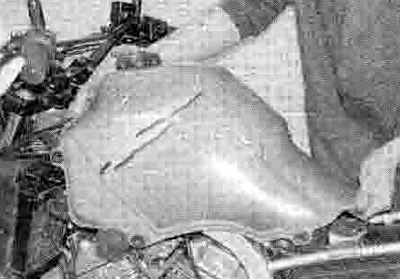
2.5 ...and carefully remove the tank
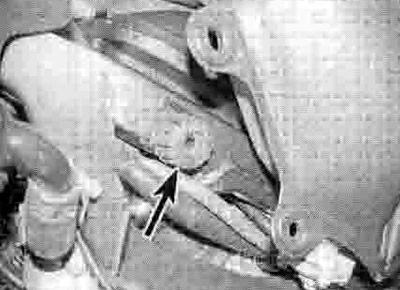
6. Check the tank mounting rubbers for damage or deterioration and replace them with new ones If necessary (see illustration).
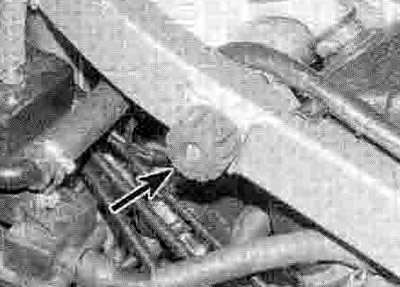
2.6. Check the mounting rubbers (arrow) for damage and deterioration
Removal - XL650V models
7. Make sure the fuel cap is secure.
8. Remove the seat and the fairing (see Chapter 8).
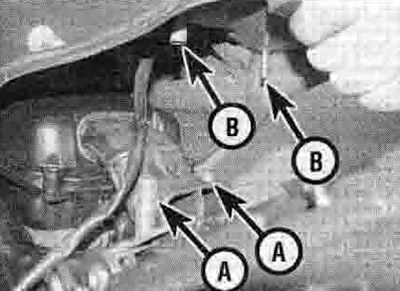
9. Release the fuel hose clamp and detach the hose from the tap (see illustration). Release the vacuum hose clamp and detach the hose from the tap.
2.9. Detach the fuel hose (A) and the vacuum hose (B)
10. Unscrew and remove the fuel tank mounting bolt (see illustration).

2.10. Unscrew the bolt (arrowed), then raise the tank at the rear
11. Raise the tank at the rear and support it using a block of wood if required. Disconnect the fuel level sensor wiring connector, then carefully draw the wiring under the frame tube, noting its routing (see illustrations). Also disconnect the overflow and breather hoses from their unions on the tank, noting which fits where (see illustration).

2.11a. Disconnect the wiring connector (arrowed)...
2.11b ...and draw it out from under the frame rail
2.11c. Delach the overflow and breather hoses (A) from their unions (B)
12. Remove the tank by carefully drawing it back and away from the bike (see illustration). Take care not to lose the mounting rubbers from the rear of the tank, and from between the sides of the tank and the frame, noting how they fit.
2.12. Carefully remove the tank
13. Check the tank mounting rubbers for damage or deterioration and replace them with new ones if necessary.
Removal - XRV750 models
14. Make sure the fuel tap is turned to the OFF position. Make sure the fuel cap is secure.
15. Remove the seat and the fairing side panels (see Chapter 8).
16. On L to N (1990 to 1992) models, disconnect the fuel level sensor wiring connector, located below the tank on the lefthand side.
17. On P models onward (1993-on). undo the screws securing the air filter housing cover, noting which fit where, and remove it (see illustrations). Also undo the screw in the centre of the fuel tap knob and remove the knob (see illustrations). Unscrew and remove the fuel tank mounting bolts (see illustration). Remove the tank prop from under the seat, then raise the tank at the rear and insert the prop between the tank and its bracket, using the bolt holes in each as anchors for the support (see illustrations).

2.17a. Undo the screws...
2.17b ...and remove the cover
2.17c. Undo the screw...
2.17d ...and remove the knob
2.17e. Unscrew the mounting bolts

2.17f. Remove the prop (arrowed) from under the seat...
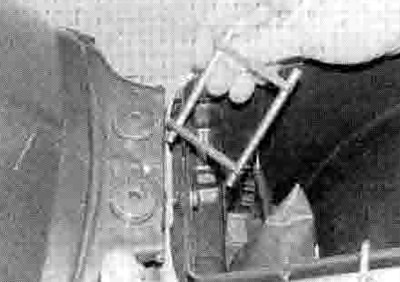
2.17g ...then raise the back of the tank...

2.17h ...and locate the prop between it and the bracket
18. Release the fuel hose clamp and detach the hose from the tap - remember that on L to N (1990 to 1992) models there are two fuel taps (see illustration). On P models onwards (1993-on), also disconnect the overflow and breather hoses from their unions on the tank, noting which fits where (see illustration).
2.18a. Detach the fuel hose (arrowed)...

2.18b ...and the breather and overflow hoses (arrowed) - later model type shown
19. Remove the tank by carefully drawing it back and away from the hike Take care not to lose the mounting rubbers from the rear of the tank, and from between the sides of the tank and the frame, noting how they fit.
20. Check the mounting rubbers for damage or deterioration and replace them with new ones if necessary.
Installation - all models
21. Installation is the reverse of removal, noting the following:
If removed, install the tank mounting rubbers (see illustration 2.6). Make sure the rubbers remain in place when installing the tank (see illustration).
Check that the tank is properly seated and is not pinching any control cables or wires.
Make sure the fuel hose is fully pushed onto its union on the tap and secure it with its clamp.
Turn the fuel tap to the ON or RES position and check that there is no sign of fuel leakage. Start the engine and check again that there is no sign of fuel leakage, then shut if off.
2.21 Take care not to dislodge the rubbers (arrow) as you locate the tank
Fuel tap
Removal
22. The tap should not be removed unnecessarily.
23. Remove the fuel tank as described above.
24. Unscrew the nut securing the tap to the tank and withdraw the tap assembly, noting its orientation (see illustrations).

2.24a. Fuel tap - XL600V
2.24b. Fuel tap - XL650V
2.24c. Fuel tap - XRV750-P models onwards
Inspection
25. Remove the strainer (see illustration). Discard the О-ring (see illustration). Clean the strainer to remove all traces of dirt and fuel sediment. Check the gauze for holes. If any are found, a new strainer should be fitted. Fit the strainer using a new O-ring.

2.25a. Remove the strainer...
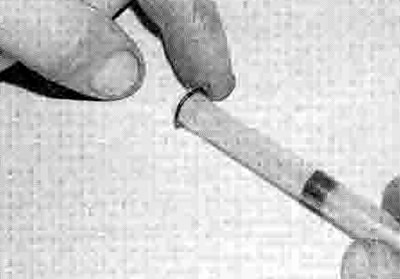
2.25b ...and discard its O-ring
26. On XL models, if the tap is faulty, it can be disassembled and inspected. The most likely problem is a hole or split in the diaphragm. Before removing and dismantling the tap. check that there are no splits or cracks in the vacuum hose. If In doubt, attach a spare hose to the vacuum union on the tap and apply a vacuum to the hose. If fuel does not flow through the tap (make sure it is turned ON), or if fuel flows when there is no vacuum applied, undo the cover screws and remove the spring and diaphragm, noting how they fit (see illustration). Hold the diaphragm up to a light to check for splits or holes. On XL600V models, a new cover assembly including the spring and diaphragm is available. On XL650V models a new tap must be installed.

2.26. Fuel tap cover screws (arrowed)
Installation
27. Installation is the reverse of removal. Make sure the tap is pointing the correct way (see illustration 2.24a, b or c). Tighten the nut securely - if the correct tools are available tighten it to the torque setting specified at the beginning of the Chapter.