
Warning: Refer to the precautions given in Section 1 before proceeding.
Removal
1. Remove the fuel tank (see Section 2). Mark each cable according to its position at each end.
2. Slacken the lower (opening) cable locknut and thread it up the adjuster a little, then slide the adjuster along until the captive nut clears the small lug on the bracket and slip it out of the bracket (see illustration).

11.2a. Counter-hold the adjuster, then slacken the locknut (arrowed) and thread it up...

11.2b ...and slip the cable out of the bracket
3. Slacken the upper (closing) cable locknut and slip the adjuster out of the bracket (see illustration). Detach the inner cable ends from the carburettor (see illustration).

11.3a. Slacken the locknut and slip the cable out of the bracket
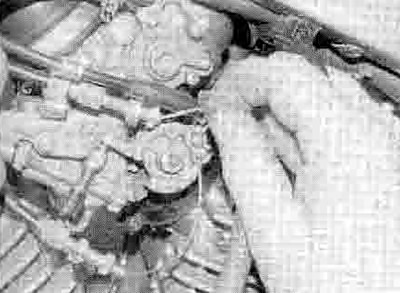
11.3b. Detach the cable ends from the throttle cam
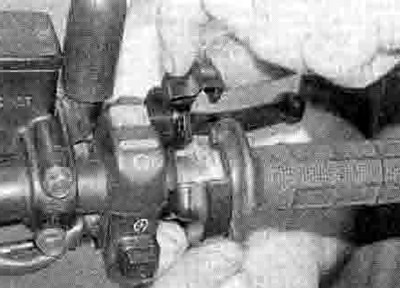
4. Pull back the rubber cover from the throttle housing on the handlebars (see illustration). Slacken the locknut on the opening cable adjuster and the holder on the closing cable. Undo the two throttle pulley housing screws and separate the two halves (see illustration). Remove the cable guide, noting how it fits (see illustration). Detach the cable nipples from the pulley, then unscrew the adjuster and the holder and remove the cables from the housing, noting how they fit (see illustrations). Mark each cable to ensure It is connected correctly on installation.

11.4a. Pull back the cover, then slacken the locknut (A) and holder (B)

11.4b. Undo the screws (arrowed) and separate the halves

11.4c. Remove the guide...

11.4d ...then detach the cable ends from the pulley...

11.4e ...and thread the adjuster and holder out of the housing
5. Remove the cables from the machine noting their correct routing.
Installation
6. Install the cables making sure they are correctly routed. The cables must not interfere with any other component and should not be kinked or bent sharply.
7. Fit the cables into the throttle pulley housing, making sure each is installed into its correct position, and thread the adjuster and holder into the housing (see illustration 11.4e). Lubricate the cable nipples with multi-purpose grease and fit them into the throttle pulley (see illustration 11.4d). Fit the cable guide into the housing (see illustration 11.4c).
8. Fit the two halves of the housing onto the handlebar, making sure the top mating surfaces align with the punch mark in the handlebar, and install the screws, tightening them securely (see illustrations).
11.8a. Assemble the housing...
11.8b ...aligning the mating surfaces with the punch mark (arrowed)
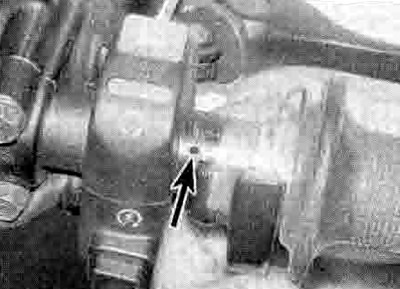
9. Lubricate the cable lower ends with multipurpose grease and attach them to the throttle cam on the carburettor (see illustration 11.3b). Fit the upper (closing) cable into the mounting bracket and tighten the locknut against it (see illustration 11.3a). Fit the lower (opening) cable into the bracket and draw the captive nut against the lug on the bracket (see illustration). Tighten the locknut against the bracket (see illustration 11.2a).

11.9. Fit the cable into the bracket
10. Operate the throttle to check that it opens and closes freely.
11. Check the amount of freeplay in the throttle cables and adjust if necessary (Chapter 1). Turn the handlebars back and forth to make they don't cause the steering to bind.
12. Install the fuel tank (see Section 2).
13. Start the engine and check that the idle speed does not rise as the handlebars are turned. If it does, the throttle cables are routed incorrectly. Correct the problem before riding the motorcycle.