
Removal
1. Remove the fuel tank (see Section 2).
2. Unscrew each choke plunger assembly nut from the carburettors and withdraw the plunger assembly from each carburettor body (see illustrations 7.4a and b). Compress the spring and detach the cable end from the choke plunger, noting how it fits. Withdraw the cable from the assembly. If the carburettor is not being disassembled for cleaning, it is advisable to reinstall the choke plunger assembly into the carburettor to avoid losing any of the components.
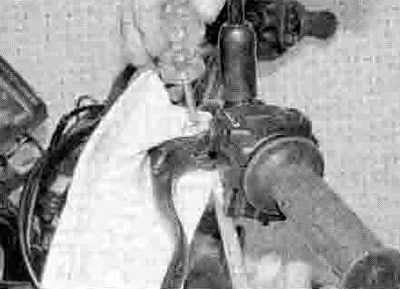
3. Unscrew the bolt and remove the collar from the hand guard on the left-hand side (see illustration). Counter-hold the screwhead and undo the nut on its bottom (see illustration). Remove the handguard (see illustration).

12.3a. Unscrew the bolt and remove the collar
12.3b. Counter-hold the screwhead and undo the nut on the bottom...

12.3c ...and remove the handguard
4. Pull back the rubber cover on the choke cable (see illustration). Undo the screw securing the lever, then detach the lever, noting the wave washer and plate beneath it (see illustration). Draw the cable end out of the lever bracket, then slip the inner cable out using the slot and detach the nipple from the lever.
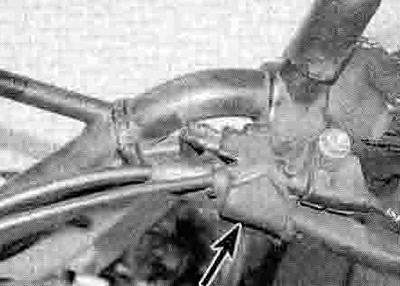
12.4a. Pull back the cover (arrowed)...
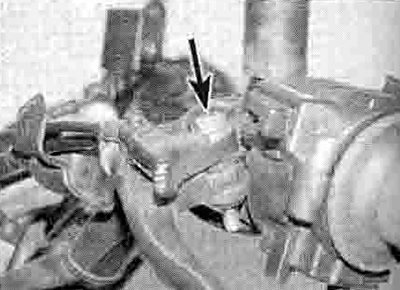
12.4b ...then undo the screw (arrowed), lift off the lever and detach the cable
5. Remove the cable from the machine noting its correct routing.
Installation
6. Install the cable making sure it is correctly routed. The cable must not interfere with any other component and should not be kinked or bent sharply.
7. Lubricate the upper cable nipple with multipurpose grease. Fit the cable end into the lever, then slip the inner cable into the bracket and fit the outer cable end into its socket. Mount the lever on the bracket, making sure the plate and wave washer are fitted, and install the screw. Fit the handguard, then thread the locknut onto the bottom of the screw. Fit the top bolt with its collar.
8. Pass the lower end of each inner cable through its plunger assembly nut and spring, then attach the nipple to the plunger, making sure it is secure. Install each plunger assembly into the carburettor body and tighten its nut securely.
9. Fit the cable in its guide. Check the operation of the choke cable as described in Chapter 1.