
Air duct housing - XL600V and XRV750-L to N (1990 to 1992) models
Removal
1. Remove the fuel tank (see Section 2).
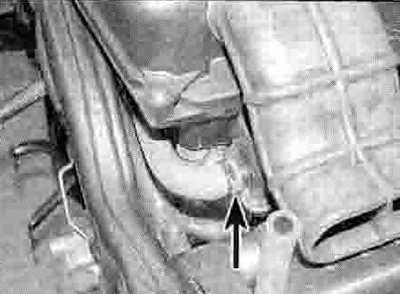
2. Slacken the clamp screws securing the аи duct housing to the air filter housing joint piece and the carburettor Intakes (see illustrations). On XL600V-T to X (1997 to 1999) models, unscrew the bolt securing the resonator tank to the frame (see illustration) Remove the air duct, noting how it fits (see illustration). If required, slacken the clamp screw securing the joint piece to the air filter housing and remove it. noting how it locates (see illustration).

4.2a. Slacken the joint piece clamp screw (arrowed)...

4.2b ...and each carburettor clamp screw (arrow)
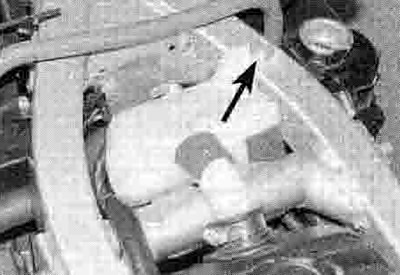
4.2c. Where fitted, unscrew the resonator tank bolt (arrowed)
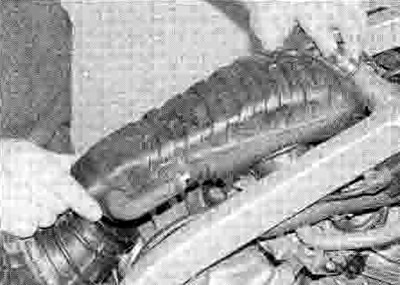
4.2d. Lift the duct housing up off the carburettors
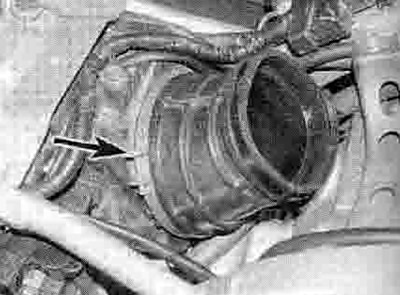
4.2e. Slacken the clamp screw (arrowed) and remove the joint piece if required
Installation
3. Installation is the reverse of removal. Locate the tab on the air filter housing in the slot in the joint piece (see illustration). Make sure the Intake ducts to the carburettors are correctly orientated (see illustration). Tighten all clamps screws securely.
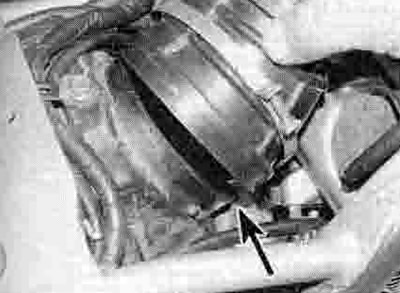
4.3a. Make sure the tab locates correctly (arrow)

4.3b. Make sure the ducts are correctly positioned
Air filter housing - XL650V and XRV750-P models onwards (1993-on)
Removal - XL650V models
4. Remove the fuel tank (see Section 2).
5. Release the clamp securing the hose to the sub-air cleaner and detach it (see illustration). Also detach the PAIR system, crankcase breather and drain hoses from the front, middle and back of the housing - if you find them difficult to access do this as they become accessible after lifting the housing off the carburettors (see illustration).
4.5a. Detach the hose (arrowed) from its union
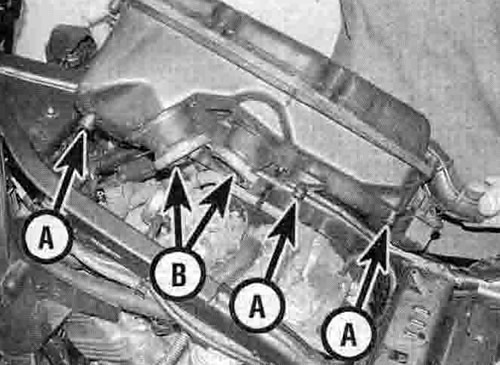
4.5b. Hose unions (A), clamps (B)
6. Slacken the clamp screws securing the air filter housing to the carburettor intakes (see illustration 4.5b).
7. Unscrew the bolt securing the front of the air filter housing to the frame, then carefully lift the housing up off the carburettors, noting how it fits (see illustration 4.5b).
Removal - XRV750 models
8. Remove the fuel tank (see Section 2).
9. Release the clamps and detach the crankcase breather and drain hoses from the housing (see illustration).

4.9. Detach the hoses (arrowed) from their unions
10. Slacken the clamp screws securing the air filter housing to the carburettor intakes (see illustration).

4.10. Slacken the clamp screws (arrowed)
11. Unscrew the bolts securing the front and sides of the air filter housing to the frame, then carefully lift the housing up off the carburettors, noting how it fits (see illustrations).
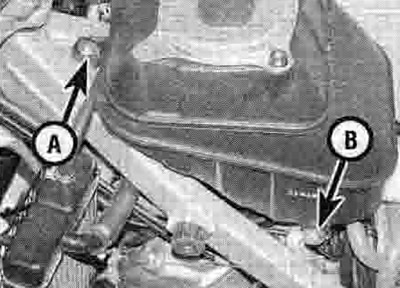
4.11a. Unscrew the bolt at the front (A) and the bolt on each side (B)...

4.11b ...and remove the housing
Installation - all models
12. Installation is the reverse of removal. Make sure all the hoses are correctly installed and secured by their clamps.