Right engine cover removal
Drain:
- Engine Oil (see Engine oil change in the Periodic Maintenance chapter)
- Coolant (see Coolant change in the Periodic Maintenance chapter)
Remove:
- Brake Pedal (see Brake pedal removal in the Brakes chapter)
- Right Footboard (see Footboard removal/installation in the Frame chapter)
- Muffler (see Muffler removal in the Engine Top End chapter)
- Clutch Cable (see Clutch cable removal)
- Down Tube (see Downtube removal in the Frame chapter)
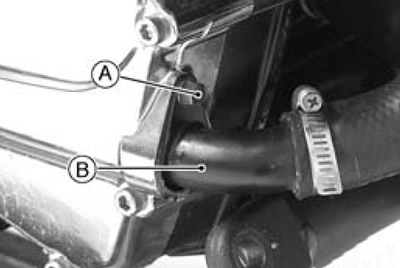
- Bolt [A]
- Coolant Pipe [B]
Remove:
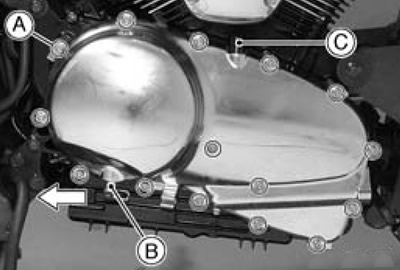
- Clutch Cover Bolts [A]
Turn the release lever [B] toward the rear as shown, and remove the right engine cover.
The water pipe [C] is removed along with the right engine cover.
Right engine cover installation
Install the dowel pins [A], and replace the cover gasket with a new one.
Check to see that the washer [B] is in place.
Apply a non-permanent locking agent to the threads of the right engine cover bolt (L = 50) [C].

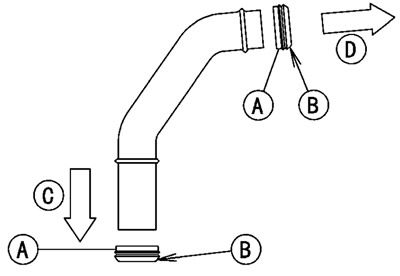
Install the seals [A] to the water pipe so that tapered side [B] facing the engine inside.
Apply a soap and water solution to the seal. Do not apply a grease or oil to the seal.
Be sure the water pipe installed correctly.
- [C] Right Engine Cover Side
- [D] Crankcase Side
Tighten:
- Torque - Right Engine Cover Bolts: 9.8 N·m (1.0 kgf·m 87 in·lb)
Release shaft removal
Caution! Do not remove the clutch release lever and shaft assembly unless it is absolutely necessary. If removed, the oil seal replacement may be required.
Remove the right engine cover (see Right engine cover removal).
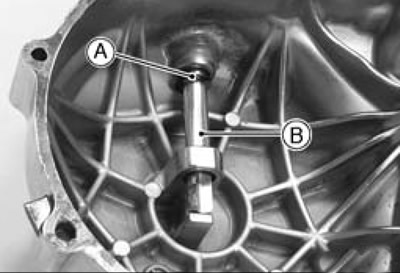
Remove the circlip [A] from the release shaft.
Pull the lever and shaft assembly [B] out of the right engine cover.
Release shaft installation
Apply grease to the oil seal lip [A] on the lower ridge of the clutch cover.
Apply oil to the bearings [B] in the hole of the right engine cover.
Insert the release shaft [C] straight into the lower hole of the right engine cover.

Caution! When inserting the release shaft, be careful not to remove the spring of the oil seal.
Install the new circlip.
Clutch cover disassembly
Remove:
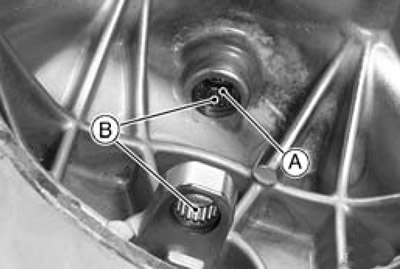
- Oil Seal [A]
- Needle Bearings [B]
Clutch cover assembly
Replace the needle bearings and oil seal with new ones.
Note. lnstall the needle bearings so that the manufacture's mark face out.
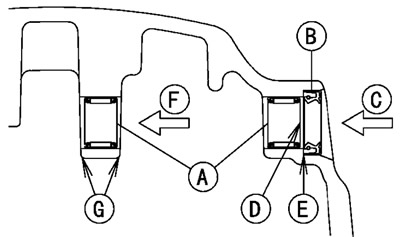
Install the needle bearings [A] and oil seal [B] position as shown.
Press [C] the outer needle bearing so that the bearing surface [D] is flush with the housing end [E] of clutch cover.
Press [F] the inner needle bearing so that the bearing both surface does not protrude from the both housing ends [G] of clutch cover.
