Warning! Securely support the motorcycle so that there is no danger of it falling over.
2. Install:
- handlebar
- upper handlebar holders: 28 Nm (2.8 m·kg)
Caution!
- First, tighten the bolts on the front side of the handlebar holder, then on the rear side.
- Turn the handlebar all the way to the left and right. If there is any contact with the fuel tank, adjust the handlebar position.
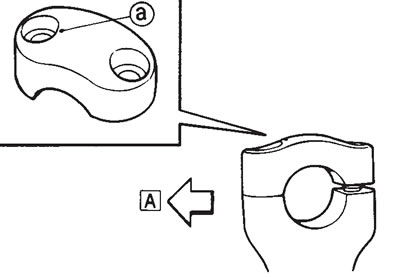
Note: The upper handlebar holders should be installed with the punch mark (a) facing forward [A].

Align the match marks (b) on the handlebar with the upper surface of the lower handlebar holders.

3. Install:
- throttle grip
- throttle cable
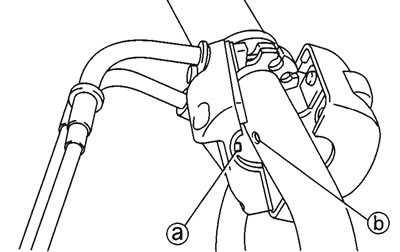
Warning! Make sure that the pin (a) on the throttle cable housing is aligned with the hole (b) in the handlebar.

4. Install: master cylinder. Refer to "Front and rear brakes".
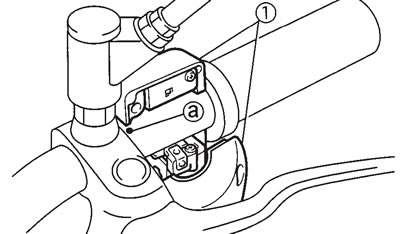
5. Install: clutch lever holder (1)
Note: Align the slit in the clutch lever holder with the punch mark (a) in the handlebar.

6. Install: left handlebar switch (1)
Note: Align the matching surface on the handlebar switches with the punch mark (a) on the handlebar.

7. Install: clutch cable
8. Connect: clutch switch coupler
Note: Apply a thin coat of lithium soap base grease onto the end of the clutch cable.
9. Adjust: clutch cable free play. Refer to "Adjusting the clutch cable free play".
- Clutch cable free play (at the end of the clutch lever): 5-10 mm
10. Adjust: throttle cable free play. Refer to "Adjusting the throttle cable free play".
- Throttle cable free play (at the flange of the throttle grip): 4-6 mm
