
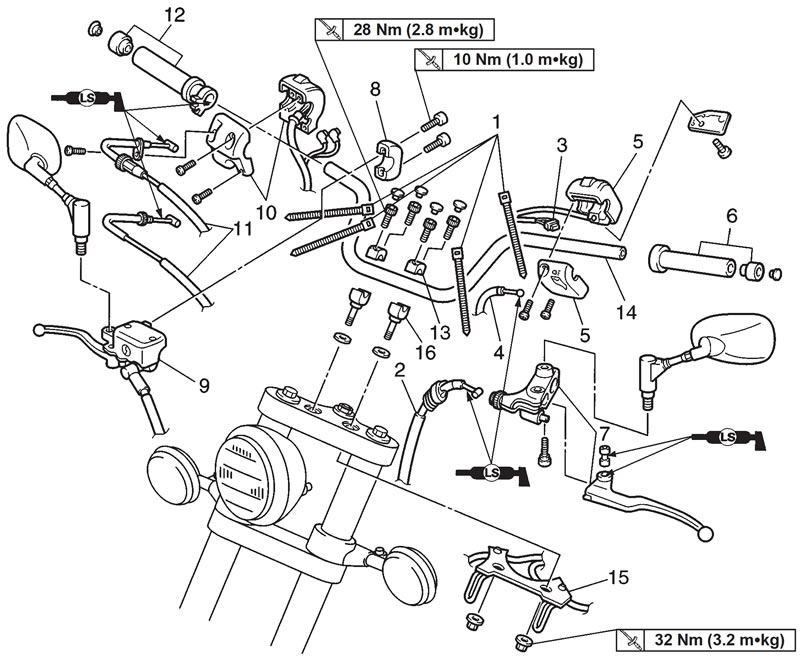
| Order | Job name/Part name | Quantity | Remarks |
| Removing the handlebar | Remove the parts in the order listed. | ||
| Stand the motorcycle on a level surface. | |||
| Warning! Securely support the motorcycle so that there is no danger of it falling over. | |||
| 1 | Plastic locking ties | 4 | |
| 2 | Clutch cable | 1 | |
| 3 | Clutch switch lead | 1 | |
| 4 | Starter cable | 1 | |
| 5 | Handlebar switch (left) | 1 | Refer to "Installing the handlebar". |
| 6 | Grip (left) | 1 | |
| 7 | Clutch lever assembly | 1 | Refer to "Installing the handlebar". |
| 8 | Master cylinder bracket | 1 | |
| 9 | Master cylinder assembly | 1 | |
| 10 | Handlebar switch (right) | 1 | |
| 11 | Throttle cables | 2 | |
| 12 | Throttle grip assembly | 1 | |
| 13 | Handlebar holders (upper) | 2 | |
| 14 | Handlebar | 1 | |
| 15 | Cable guide | 1 | |
| 16 | Handlebar holders (lower) | 2 |
For installation, reverse the removal procedure.
1. Stand the motorcycle on a level surface.
Warning! Securely support the motorcycle so that there is no danger of it falling over.
2. Remove: handlebar grip (left) (1)
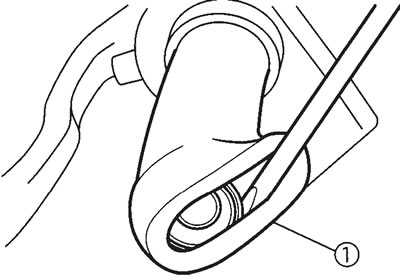
Note: Blow compressed air between the handlebar and the handlebar grip, and gradually push the grip off the handlebar.