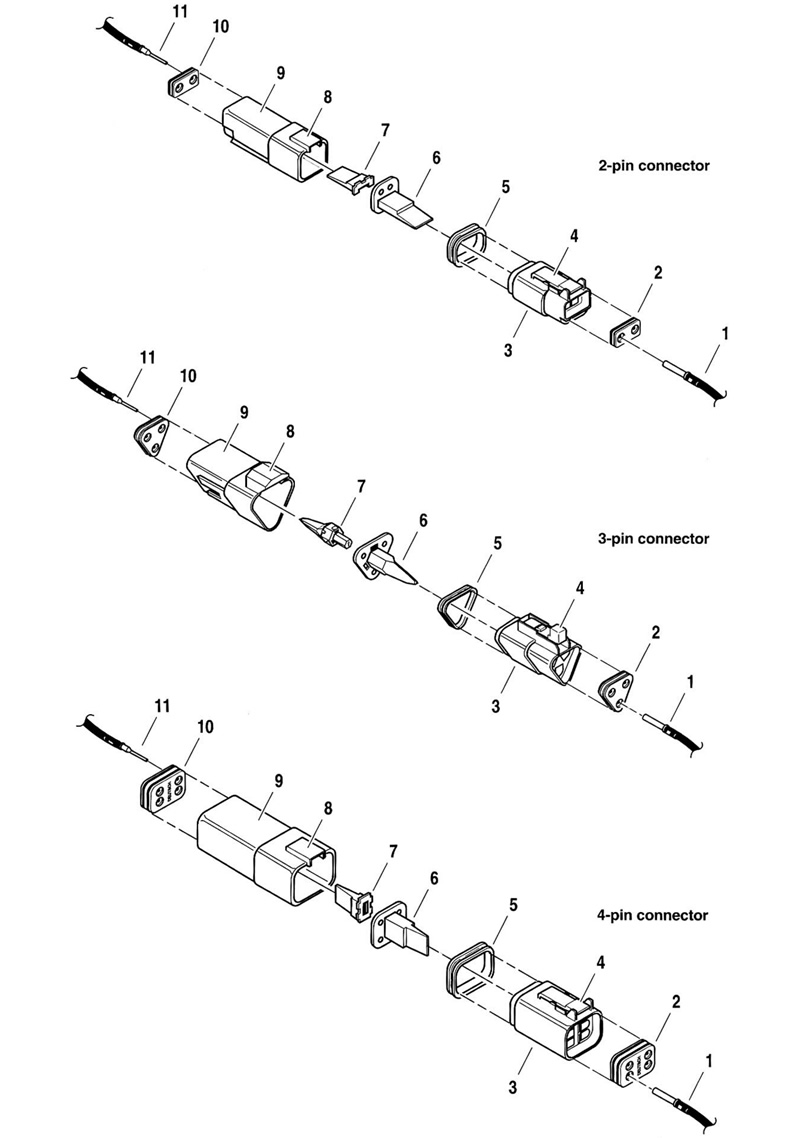
Figure B-13. 2-pin, 3-pin and 4-pin Deutsch connectors: SOCKET SIDE: 1. Socket terminal; 2. Wire seal; 3. Socket housing; 4. External latch; 5. Internal seal; 6. Locking wedge; PIN SIDE: 7. Locking wedge; 8. Latch cover; 9. Pin housing; 10. Wire seal; 11. Pin terminal
General
For size 20,16 and 12 contacts wire range 26-12 AWG.
Mini-Deutsch connectors make use of a solid barrel contact without crimp tails. As a result, a special TERMINAL CRIMP TOOL (Part No. HD-42879) is needed to install pin and socket terminals on wires.
Crimping instructions
1. Squeeze the handles to cycle the crimp tool to the fully open position.
2. See Figure B-14. Remove locking pin (3) from selector knob (4).

Figure B-14. Deutsch solid barrel contact crimp tool (Part No. HD-42879):
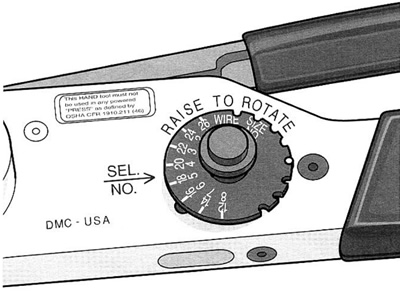
3. See Figure B-15. Raise selector knob and rotate until selected wire size stamped on wheel is aligned with "SEL. NO." arrow.

Figure B-15. Selector knob
4. Loosen knurled locknut and turn adjusting screw clockwise (in) until it stops.
5. Turn tool over and drop contact into indentor cover hole with the wire end out.
6. Turn adjusting screw counterclockwise (out) until contact is flush with bottom of depression in indentor cover. Tighten knurled locknut.
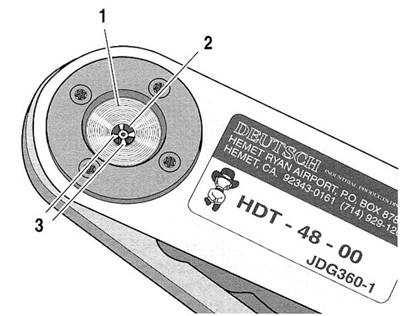
7. See Figure B-16. Slowly squeeze handles of crimp tool until contact (2) is centered between indentor points (3).

Figure B-16. Indentor points: 1. Indentor cover; 2. Contact; 3. Indentor points
8. Strip wire lead removing 1/4 in. (6.3 mm) of insulation.
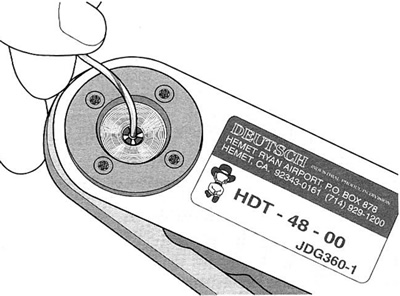
9. See Figure B-17. Insert bare wire strands into contact barrel.

Figure B-17. Contact barrel
10. Squeeze handle of crimp tool until tightly closed. Tool automatically opens when the crimping sequence is complete.
11. Remove crimped contact from indentor.
12. Inspect the quality of the crimp. Verify that all wire strands are in crimp barrel.
Note. Tool must be readjusted when changing contact size/type.
13. Install pin to lock position of selector knob.
