
Lock the crankshaft with the specific special tool
- Specific tooling: 020720Y Timing tool
If necessary, remove the timing system gears from the camshafts:
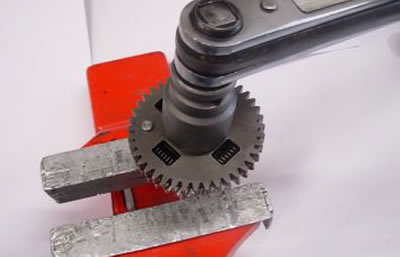
Place the camshaft with the timing system gear on a vice and protect the cams of the camshaft adequately.
Unscrew and remove the nut.
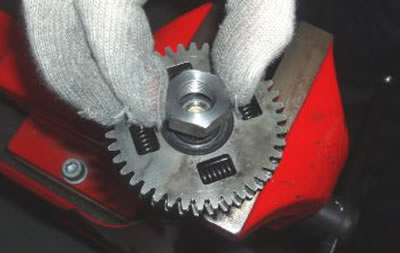
Caution! Anticlockwise nut for both rear cylinder shafts, an anticlockwise arrow has been punched on it.
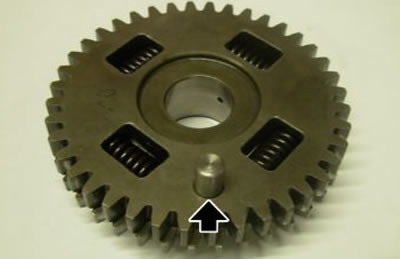
Collect the washer.
Remove the timing system gear from the camshaft.

Clean gears surfaces (camshaft cone and gear cone) with: "System MC 217 spray metal cleaner".
Pre-fit the gear on the camshaft, so that it can turn freely.
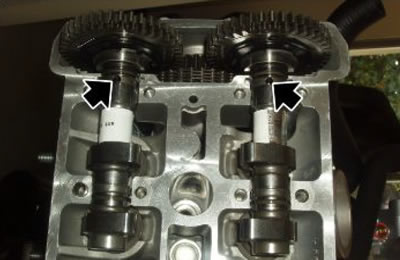
Place the two camshafts in the head seats and align the two camshaft holes with the head holes.
Align the clearance recovery gear to the main timing system gear using the specific tool.
- Specific tooling: 020718Y Camshaft gear alignment pin
Using the specific template, check the correct position of the cams.
Note. Use of the template: this tool is placed on the cams without the cam caps, using the profile marked with the number of the cylinder being used, with the markings facing the flywheel side.
Note. The template is not a tool designed for timing but for identifying the correct direction for camshaft fitting (the shafts may be fitted rotated by 180° with reference to the correct position).
- Specific tooling: 020723Y Jig for timing overhead camshafts

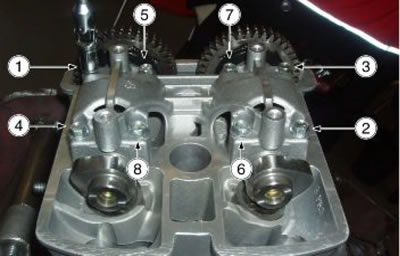
Place the cam cap.
Pre-tighten the eight screws in the sequence indicated, to the prescribed torque.
Tighten the eight screws in the sequence indicated, to the prescribed torque.
Carry out camshaft timing with the appropriate dowels.
- Specific tooling: 020719Y Timing pin
Locking torques (N·m):
- Cam cap/head fixing screws - M6 (16)
- Pre-tightening: (4.90 - 6.86) Nm ((3.61 - 5.06) lbf ft)
- Tightening: (9.81 - 12.75) Nm ((7.24 - 9.40) lbf ft)
Caution! Install the camshaft tightening nuts with the mark facing up.
Pre-tighten the gear nut on the camshaft.
Caution! Refit the nut with the machined surface facing the gear (the material acronym should be visible).
Locking torques ( N·m):
- Nut fixing camshaft gears (pre-tightening) - M15x1 (4) 30 Nm (22.13 lbf ft)
Remove the camshaft, lock it on a vice with aluminium jaws, then tighten it to the prescribed torque.
Caution!
- Do not tighten the camshaft gear nut to the ultimate tightening torque with the shaft mounted on the cylinder.
- This operation would irretrievably damage the head.
Locking torques ( N·m):
- Nut fixing camshaft gears - M15x1 (4) 90 Nm (66.38 lbf ft)
Remove the gear alignment tool.
- Specific tooling: 020718Y Camshaft gear alignment pin
Release the crankshaft from the specific special tool.
Rotate the crankshaft in the riding direction until the rear cylinder piston reaches the top dead centre.
Lock the crankshaft with the specific special tool.
Carry out the timing operations performed for the front cylinder.
- Specific tooling: 020720Y Timing tool
See also specifications for this operation.