
Warning! Before starting work, ensure the motorcycle is stabilised and adequately supported. This will help prevent it from falling and causing injury to the operator or damage to the motorcycle.
Check
1. Raise and support the motorcycle so that the front wheel is clear of the ground.
2. Move the handlebars from lock-to-lock whilst checking for signs of tight spots or notchiness (bearings over-tightened).
3. Hold the lower end of the front forks and try to move them forward and backward to check for signs of free play in the bearings (bearings insufficiently tightened or worn).

Checking for free play in steering head bearings
4. Adjust as described below then lower the motorcycle to the ground.
Adjustment
1. Slacken the top yoke clamp bolts.
1. Top yoke clamp bolt
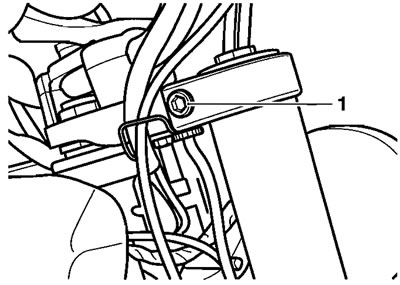
2. Release the two screws securing the upper cover of the handlebar clamp to the lower section.
1. Upper cover; 2. Screws
3. Pivot the instruments forward to reveal the steering stem top nut.
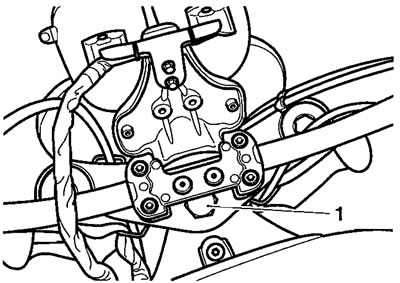
1. Top nut
Note: When the handlebars and top yoke are removed (below), the steering lock and headlights will also be removed as part of the assembly.
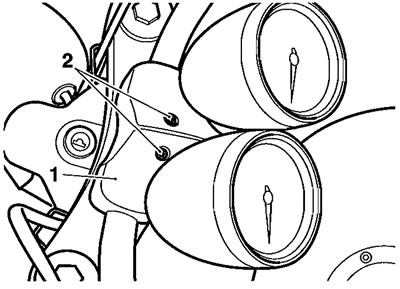
4. Slacken and remove the top nut and washer. Lift and support the handlebar and top yoke assembly to gain access to the bearing adjuster nut and locknut.

1. Locknut; 2. Adjuster nut
5. Slacken the locknut and adjuster nut.
6. Adjust the bearing free play as follows:
- a) Tighten the adjuster nut to 40 Nm.
- b) Slacken the adjuster nut fully.
- c) Re-tighten the adjuster nut to 6 Nm.
- d) Loosen the adjuster nut by 90°. Note that there will now be free-play present.
- e) Hold the adjuster nut in that position while tightening the locknut to 40 Nm.
Note: Ensure the adjuster nut does not move as the locknut is tightened.
7. Seat the top yoke assembly in position then refit the washer and top nut, tightening it to 65 Nm.
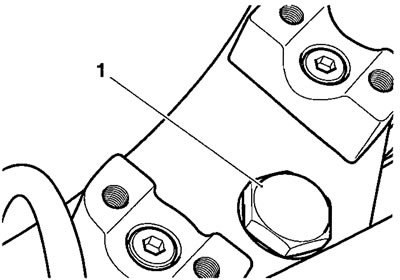
1. Top nut
8. Check that the free play has been eliminated and that the steering can be turned freely from lock to lock without any sign of tightness. Re-adjust if necessary.
Warning! Operation of the motorcycle with incorrectly adjusted steering head bearings, either too loose or too tight, may cause a dangerous riding condition leading to loss of motorcycle control and an accident.
9. Tighten the top yoke clamp bolts to 20 Nm.
10. Pivot the instruments back to their normal position, fit the two bolts to the upper cover and tighten them to 3 Nm.