Removal
Warning! Before starting work, ensure the motorcycle is stabilised and adequately supported. This will help prevent it from falling and causing injury to the operator or damage to the motorcycle.
1. Remove the rider's seat as described on page 17.9.
2. Disconnect the battery, negative (black) lead first.
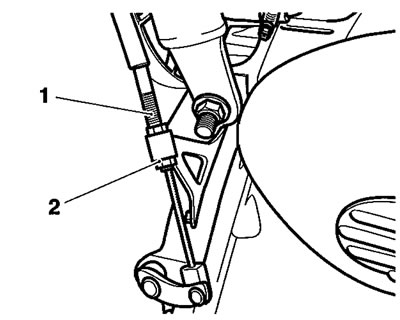
3. Slacken the cable locknut and release the adjuster at the engine end to give maximum play in the cable.

1. Clutch cable; 2. Adjuster
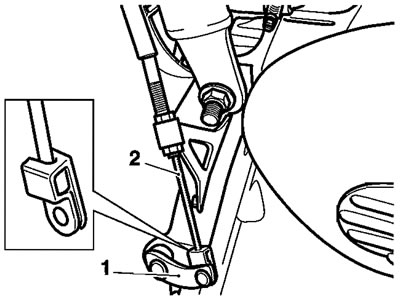
4. Release the clutch cable from the actuating arm by pushing the inner cable nipple through the arm and sliding the cable out. Detach the cable from the bracket.

1, Actuating arm; 2. Inner cable
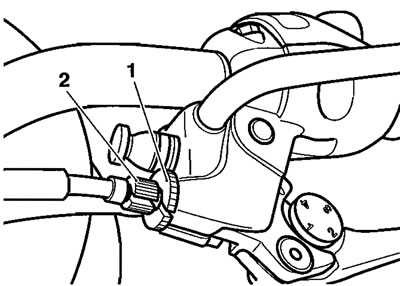
5. Align the slots in the lever adjuster and locknut.

1. Locknut; 2. Lever adjuster
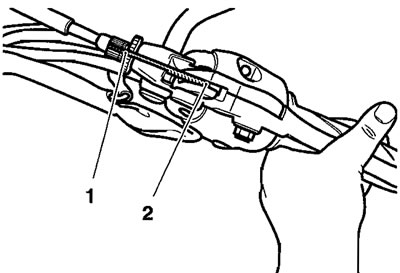
6. Pull in the clutch lever and turn the inner cable, anti-clockwise through the slots in the adjuster and locknut, until the cable can be detached from the lever.

1. Nut/locknut Slots; 2. Cable Release Point
7. Remove the cable from the motorcycle noting the cable routing, particularly where it passes through steering area.
Note: To ensure the same route can be followed on installation, tie a length of string to one end while pulling the cable through from the other. When installing the new cable, tie the string to one end of the cable and use it to guide the new cable into position.
Examination
1. Check the inner cable for free movement through the outer cable.
2. Examine the inner cable for frayed strands.
3. Examine the two inner cable nipples for signs of looseness and damage. Replace the cable if necessary.
Installation
1. Position the cable to the motorcycle following the same routing as noted during removal.
2. Attach the inner cable to the clutch lever and actuating arm using a reversal of the removal process.
3. Refit the outer cable to the adjuster bracket at the engine end.
Note: Ensure that the two adjuster nuts are positioned, one either side of the bracket.
4. Set the lever adjuster to a point where an equal adjustment is possible in both directions.
5. Set the adjuster at the clutch end to give a preliminary setting of 2-3 mm of free play as measured at the lever.
6. Operate the clutch lever several times and recheck the amount of free-play present.
7. Set the final adjustment of the cable to give 23 mm of free-play at the lever by turning the adjuster nut and locknut at the lever end. Secure the setting with the knurled locknut.

1. Clutch Lever; 2. Correct Setting, 2-3 mm
8. Reconnect the battery positive (red) lead first.
9. Refit the rider's seat.
