
Removal
Warning! Before starting work, ensure the motorcycle is stabilised and adequately supported. This will help prevent it from falling and causing injury to the operator or damage to the motorcycle.
1. Remove the clutch cover as described on page 4.5.
2. Undo the bolts, withdraw the springs and remove the clutch pressure plate.
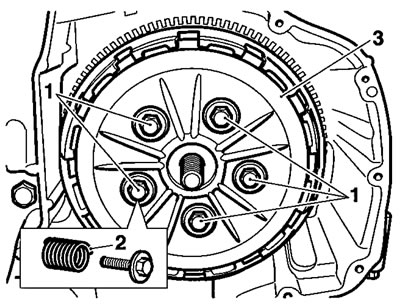
1. Pressure plate bolts; 2. Springs; 3. Pressure plate
3. Remove the lifter piece, needle bearing and thrust washer.
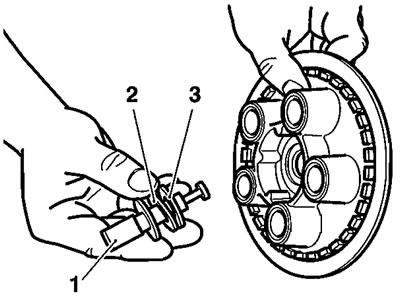
1. Lifter piece; 2. Needle bearing; 3. Thrust washer
4. Remove all the clutch friction plates and steel plates together with the anti-judder seat washer and spring. Note the orientation of all components as they are removed.

1. Friction Plates; 2. Steel Plate; 3. Anti-judder Seat Washer; 4. Anti-judder Spring
Note:
- The inner and outermost friction plates are different to the remainder and are also different to each other. They must not be fitted in any other positions.
- Refer to the following page of this section for details of clutch friction plate inspection.
- It is not normally necessary to disassemble the clutch further, but if the clutch inner and outer drums are to be removed, proceed as follows:
5. Engage any gear and lock the inner and outer clutch drums together using service tool 3880025-T0301.

1. Service tool 3880025-T0301
6. Depress the rear brake pedal to prevent the engine from turning, and then release the clutch centre nut.
7. Remove the centre nut, Belleville washer, plain washer, clutch inner drum and thrust washer.
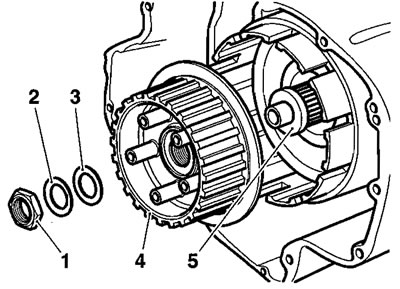
1. Centre Nut; 2. Belleville washer; 3. Plain washer; 4. Inner Drum; 5. Thrust Washer
8. Slide the clutch outer drum outwards from the engine, collecting the bearing sleeve on removal of the drum.
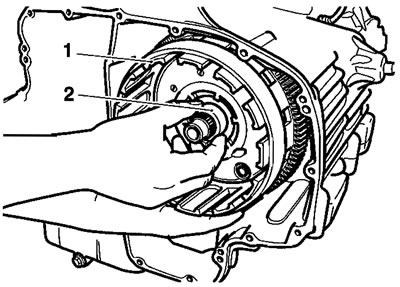
1. Outer drum; 2. Bearing sleeve
Installation
Installation is carried out in reverse order.