
Thickness
1. If any friction plate thickness is outside the service limit, replace the friction plates as a set.

1. Clutch friction Plate
| Friction plate thickness - all plates | |
| Standard | 3.72-3,88 mm |
| Service limit | 3.5 mm |
2. Check all plates for bend and warp as follows: Place the plate being checked on a clean surface plate and attempt to pass a feeler gauge of the maximum service limit thickness between the friction plate and surface plate. If the feeler gauge can be passed beneath the friction plate at any point, renew the plates as a set.
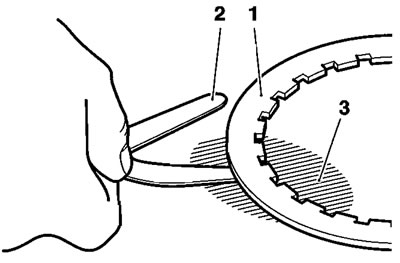
1. Friction Plate; 2. Feeler Gauge; 3. Surface Plate
| Friction plate bend/warp | |
| Service limit | 0.30 mm |
Assembly
1. Position the bearing sleeve then the clutch outer drum to the input shaft.
2. Align the oil pump drive pegs with the corresponding holes in the rear of the clutch outer drum.

1. Clutch outer drum; 2. Oil pump sprocket drive pegs; 3. Oil pump drive holes
3. Pre-load and align the primary gear and backlash eliminator with the crank gear. Align the gears through the hole arrowed below.

1. Primary gear; 2. Backlash eliminator; 3. Crank gear; 4. Arrowed; alignment hole
Note: When the outer drum is correctly fitted and the gears are pre-loaded correctly, the bearing sleeve will be a flush fit with the clutch drum face. In addition, a groove around the input shaft will be visible.
4. Fit the thrust washer to the shaft.
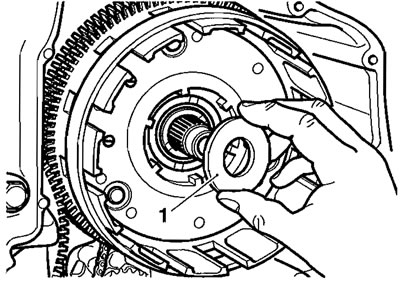
1. Thrust washer
5. Fit the clutch inner drum.
6. Refit the plain washer, fit a new Belleville washer ("out" mark facing outwards), and refit the centre nut.
1. Belleville washer "out" mark
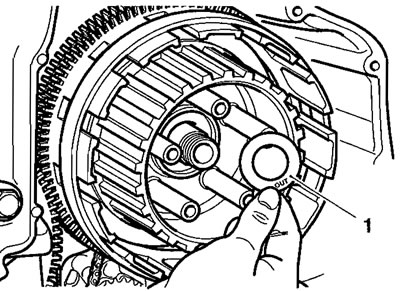
7. Lock the inner and outer drums together using service tool 3880025-T0301. Depress the rear brake pedai to prevent the engine from turning, and tighten the clutch centre nut to 105 Nm. Remove the service tool.
1. 3880025-T0301
8. Disengage second gear and check for free rotation of the clutch inner drum.
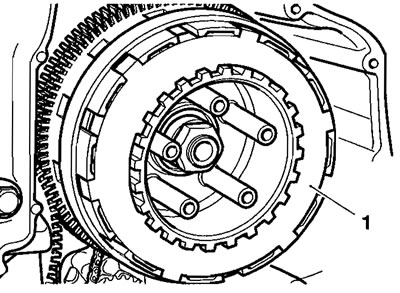
9. Coat all clutch friction plates in clean engine oil
10. Fit the friction plates, steel plates, anti-judder seat and spring to the clutch basket, in the same order as noted during removal.
Note: The inner and outermost friction plates are different to the remainder and are also different to each other. They must not be fitted in any other positions.
11. Refit the clutch pull rod.
12. Refit the clutch pressure plate together with the springs and bolts. Tighten the bolts to 10 Nm.
Note: The pull rod should be free to move in and out and also it should be free to turn.
13. Fit the clutch cover as described on page 4.7.