
Warning! Corrosion and irritant hazard. Clutch fluid is corrosive and will damage paintwork. Avoid contact with eyes and skin. In the event of accidental contact, wash the affected part with abundant quantities of running water.
Connect a piece of clear plastic tubing to the bleed valve nipple (1) on the clutch unit. Place the other end of the tube in a container on the floor holding used clutch fluid.

Unscrew the bleed valve by 1 or 2 turns.
Remove the cover and membrane from the fluid reservoir Operate the lever until all the fluid has been bled out of the circuit.
Tighten the bleed valve (torque 6 Nm).
Filling the hydraulic circuit
Fill the reservoir with fluid from a new container.
Caution! During the next operation the fluid level must remain topped up at all times. The end of the transparent plastic tubing must remain immersed in the discharged fluid at all times.
Operate the dutch lever, open the bleed valve by + or 1 turn and then close and tighten the bleed valve.
Caution! Do not release the clutch lever until the bleed valve has been fully tightened.
Release the clutch lever gradually and then wait for several seconds when the lever reaches the end of its travel.
Repeat the bleeding operation until air bubbles no longer come out of the plastic tube.
Tighten the bleed valves to the specified torque setting. Fit the dust cap to the bleed valve nipple.
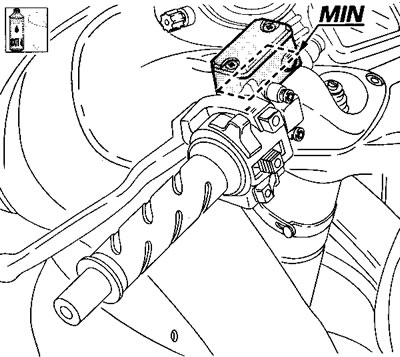
Fill the fluid in the reservoir up to MIN level.