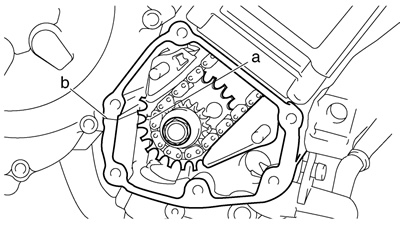
- «T» mark «a» on the pickup rotor (with the crankcase mating surface «b»)
a. Turn the crankshaft clockwise.
b. When position #1 is at TDC, align the «T» mark «a» with the crankcase mating surface «b».

2. Install:
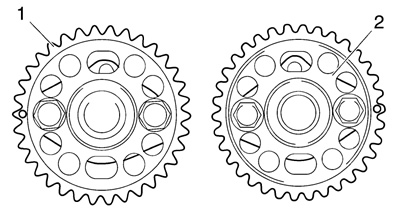
- Intake camshaft sprocket «1»
- Exhaust camshaft sprocket «2» (with the camshaft sprockets temporarily tightened)
Note: Install the camshaft sprockets as a illustration.
3. Install:
- Exhaust camshaft «1»
- Intake camshafts «2» (with the camshaft sprockets temporarily tightened)
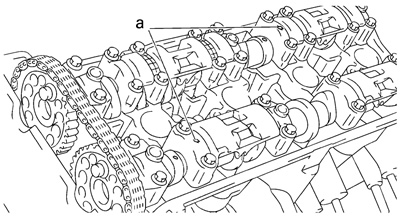
Note: Make sure the punch mark «a» on each camshaft faces up.

4. Install:
- Dowel pins
- Intake camshaft caps
- Exhaust camshaft caps
Notes: Make sure each camshaft cap is installed in its original place. Refer to the identification marks as follows:
- «I»: Intake side camshaft cap mark
- «E»: Exhaust side camshaft cap mark
- «L»: Left side camshaft cap mark
- «R»: Right side camshaft cap mark
Make sure the arrow mark «a» on each camshaft points towards the right side of the engine.
5. Install:
- Camshaft cap bolts
Camshaft cap bolt: 10 Nm (1.0 m·kg, 7.2 ft·lb)
Note: Tighten the camshaft cap bolts in stages and in a crisscross pattern, working from the inner caps out.
Cautions!
- Lubricate the camshaft cap bolts with the engine oil.
- The camshaft cap bolts must be tightened evenly or damage to the cylinder head, camshaft caps, and camshafts will result.
- Do not turn the crankshaft when installing the camshaft to avoid damage or improper valve timing.
6. Tighten:
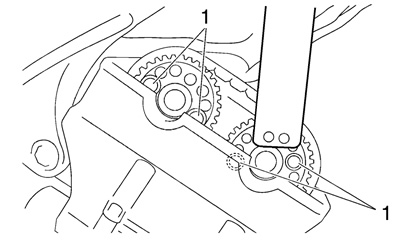
- Camshaft sprocket bolts «1»
Camshaft sprocket bolt: 24 Nm (2.4 m·kg, 17 ft·lb)
Camshaft wrench: 90890-04143 YM-04143
Caution! Be sure to tighten the camshaft sprocket bolts to the specified torque to avoid the possibility of the bolts coming loose and damaging the engine.
7. Align:
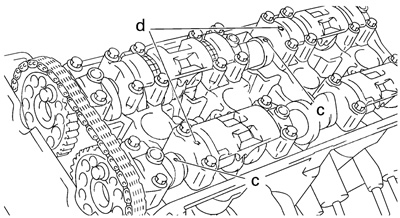
- Camshaft punch mark «a» Align the camshaft punch mark «a» and the camshaft cap arrow mark «b».
Camshaft wrench: 90890-04143 YM-04143

8. Install:
- Gasket
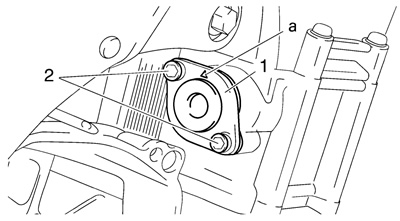
- Timing chain tensioner «1»
- Timing chain tensioner bolts «2»
Timing chain tensioner bolt: 10 Nm (1.0 m·kg, 7.2 ft·lb)
Caution! The arrow mark «a» on the timing chain tensioner should face up.
Warning! Always use a new gasket.
9. Turn:
- Crankshaft (several turns clockwise)
10. Check:
- «T» mark «a». Make sure the «T» mark on the pickup rotor is aligned with the crankcase mating surface «b».
- Camshaft punch mark «c». Make sure the punch mark «c» on the camshaft is aligned with the camshaft cap arrow mark «d».
Out of alignment → Adjust.
Refer to the installation steps above.
11. Measure:
- Valve clearance
Out of specification → Adjust.
Refer to «Adjusting the valve clearance».
12. Install:
- Pickup coil rotor cover «Crankshaft position sensor».
