Removing and installing mirror
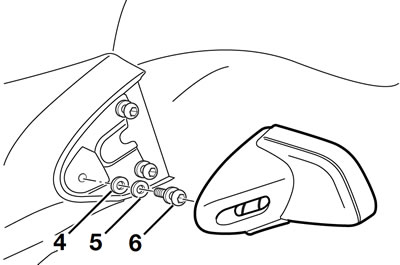
Note: The gap at the mirror can be evened out by means of washers (4, 5) on the front bolt.
- Hold the mirror casing with one hand and remove it by gently tapping/pressing with the other.
- Hold the mirror casing with one hand and install it by gently tapping/pressing with the other.
- Check that the gap around the mirror is uniform.
- If necessary, use washers (4, 5) to adjust the gap.
Removing and installing fin
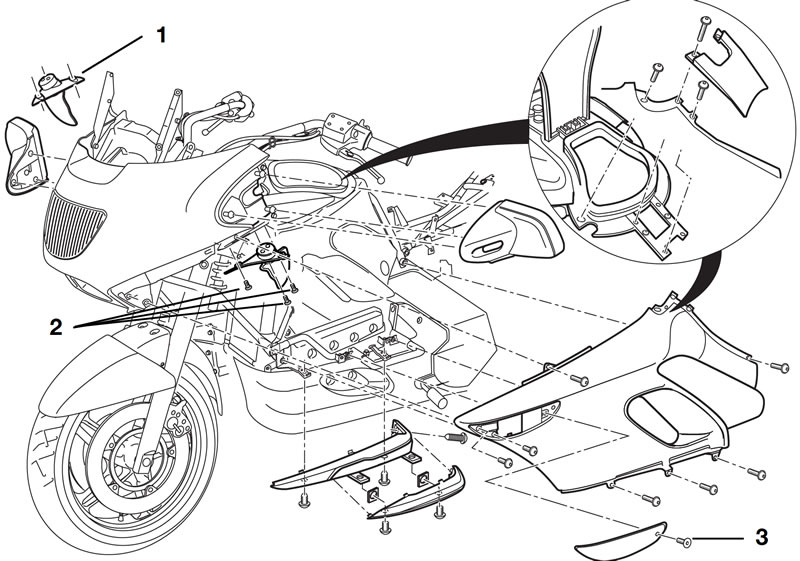
- Release 3 fasteners (2).
- Remove fin (1).
Removing and installing front turn indicator
- Remove fasteners (3) at front.
- Disengage front turn indicator housing.
- Disengage turn indicator bulb.
- Remove turn indicator housing.
Removing and installing bottom of tank cover
- Open the front seat.
- Open the flap of the radio control unit.
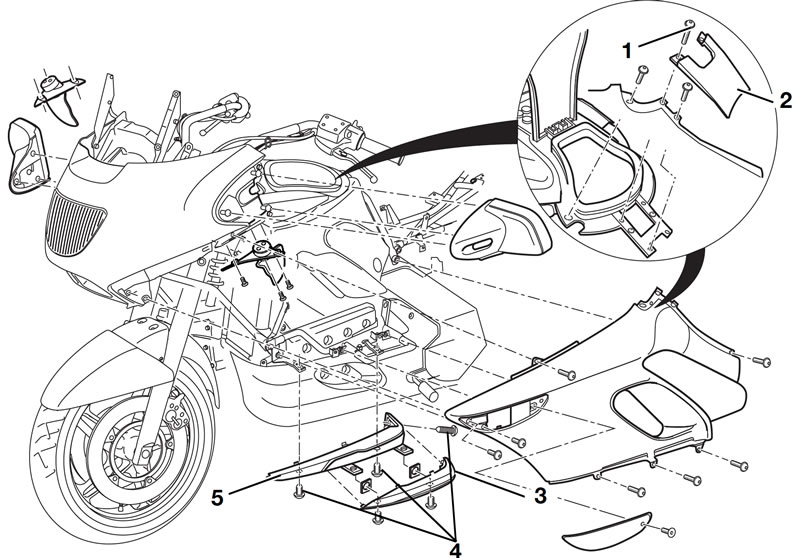
- Release 2 fasteners (1).
- Move bottom of tank cover (2) down to disengage and remove.
Removing and installing fairing skirt
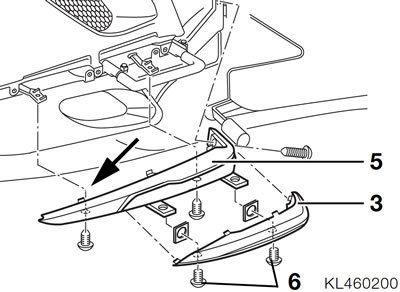
- Release 2 fasteners (6).
- Remove fairing skirt trim (3) from skirt (5).
- Installation is the reverse of the removal procedure.
Removing skirt
- Release 3 fasteners (4).
- Remove skirt (5).
- Installation is the reverse of the removal procedure: pay particular attention to the following.
- Make sure that all 3 hooks (arrow) of the fairing skirt (5) engage the fairing side section.
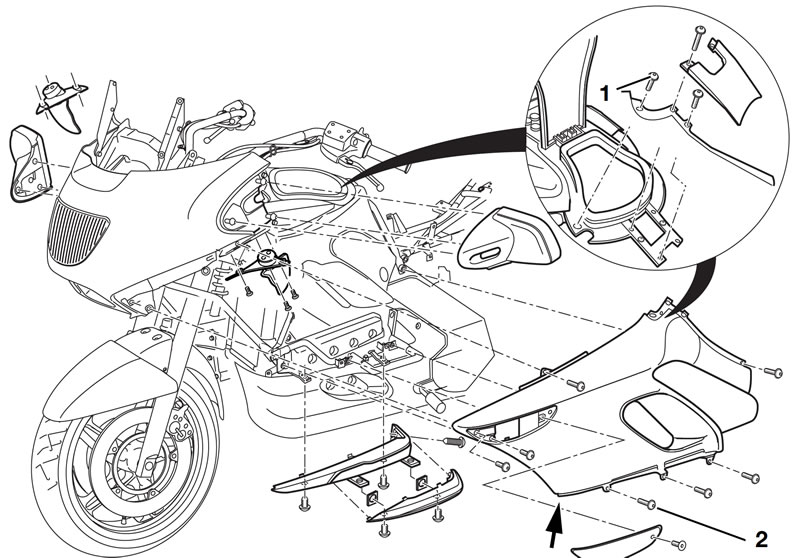
Removing and installing fairing side section
- Release 10 fasteners (2)
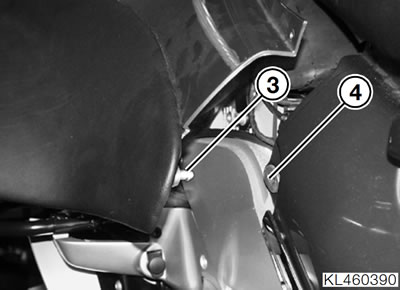
- Pull pin (3) out of rubber grommet (4) in the battery cover.
- Raise the fairing side section to disengage it from the radio control unit.
- Remove the fairing side section.
- Installation is the reverse of the removal procedure: pay particular attention to the following.
Note: Loosely install all fairing screws before tightening.
- Install securing screws (1).
Note: When installing, note the position of the front corner (arrow) of the fairing side section relative to the engine spoiler.
- [Right]. Install 9 fasteners in clockwise direction.
- [Left]. Install 9 fasteners in counter-clockwise direction.
Tightening torques:
- Fairing screws — 2 Nm
