- Remove left and right fairing side sections.
See Group 46.
- Remove tank cover.
- Remove handlebar trim.
- Remove cover of fork bridge.
- Remove cable ties from handlebar.
- Remove left grip.
- Remove right grip.
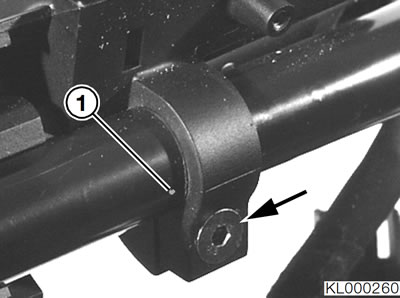
- Slacken clamping screws (arrow) on left and right fittings.
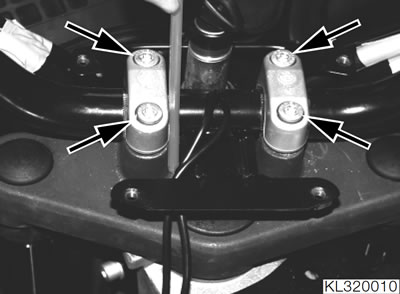
- Remove clamping screws (arrows) and lift off clamping blocks.
- Pull right and left fittings off handlebar and remove handlebar.
- Installation is the reverse of the removal procedure: pay particular attention to the following.
- Return clutch-lever fitting and brake-lever fittings to their original positions, as marked (1).
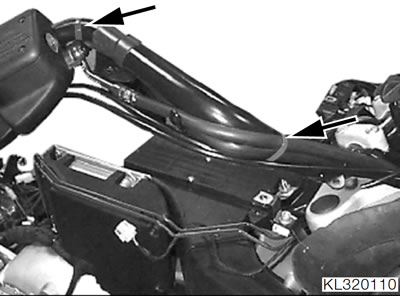
Caution: Make sure lines and Bowden cables are routed correctly; secure lines with cable ties (arrows).
- Adjust handlebar in compliance with installation instructions.
Installation instructions for adjusting handlebar
Note: The handlebar trim cannot be installed unless the handlebar is correctly adjusted.
- Remove left and right fairing side sections.
See Group 46.
- Remove tank cover.
- Remove upper handlebar trim.
- Remove cover of fork bridge.
- Make sure front wheel is in straight-ahead position.
- Slacken clamping screws (arrows).
Handlebar: adjusting horizontally
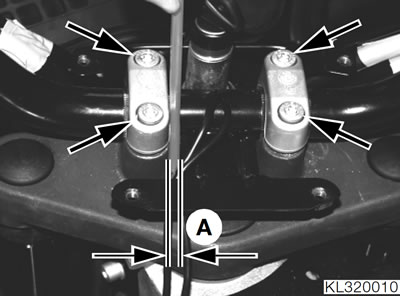
Note: Use w/f 5 Allen key as gauge for adjusting.
- Set distance "A".
Setting:
- Distance "A" — 5 mm (0.20 in)
- Slightly tighten clamping screws.
Handlebar: adjusting height
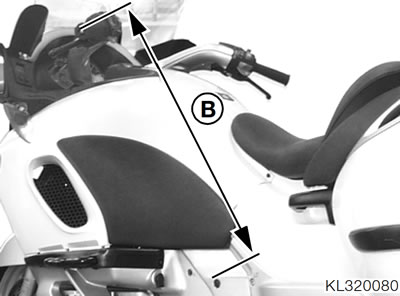
- Adjust handlebar so that distance "B" from edge of side bore in main frame to center of handlebar end is to specification.
Setting:
- Distance "B" — 695±5 mm (27.36±0.20 in)
- Check distance "B" at other side of motorcycle; readjust if necessary.
Warning: Make sure that the gaps at the two clamping blocks are equal.
- Uniformly tighten clamping screws.
Tightening torques:
- Clamping screws — 21 Nm
