
Clean the battery terminals and position the battery as far away from the charger as the leads will permit.
Do not place batteries below the charger - gases from the battery may corrode and damage the charger.
Do not place batteries on top of the charger. Be sure the air vents are not blocked.
Tool: Christie battery charger MC1012/2 (USA only).
1. Turn the "POWER" switch to "OFF".
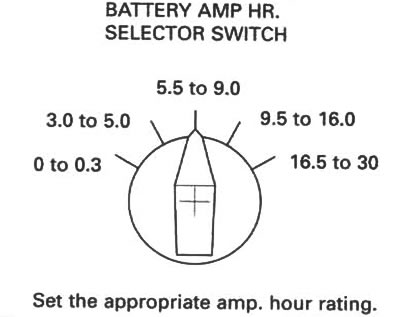
2. Set the "BATTERY AMP HR. SELECTOR SWITCH" for the size of the battery being charged.
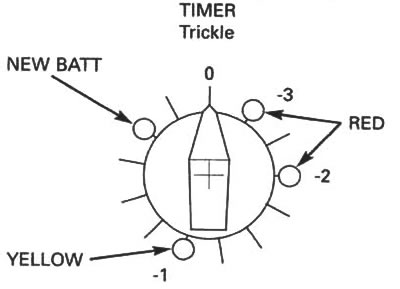
3. Set the "TIMER" to the position indicated by the Honda Battery Tester; RED-3, RED-2 or YELLOW 1. If you are charging a new battery, set the switch to the "NEW BATT" position.
4. Attach the clamps to the battery terminals: red to positive, black to negative.
Connect the battery cables only when the Power Switch is OFF.
5. Turn the "POWER" switch to "ON".
6. When the timer reaches the "Trickle" position, the charging cycle is complete. Turn the "POWER" switch to "OFF" and disconnect the clamps.
7. Let the battery cool for at least 10 minutes or until gassing subsides after charging.
8. Retest the battery using the Honda battery tester and recharge if necessary using the above steps.
The charger will automatically switch to the "Trickle" mode after the set charging time has elapsed.