
Fastener removal and installation
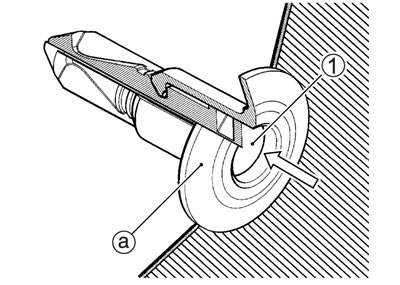
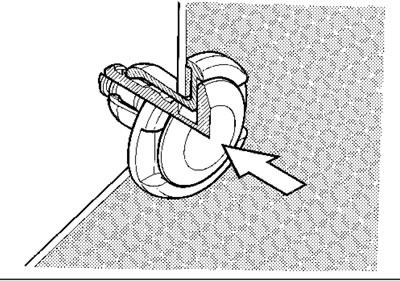
Fastener (Type A)
Removal
- Depress the head of fastener center piece 1.
- Pull out the fastener a.
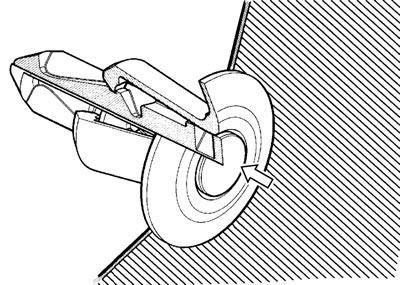
Installation
- Let the center piece stick out toward the head so that the pawls 2 close.
- Insert the fastener into the installation hole.
Note: To prevent the pawl 2 from damage, insert the fastener all the way into the installation hole.

- Push in the head of center piece until it becomes flush with the fastener outside face.
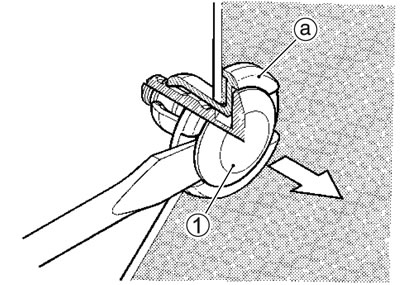
Fastener (Type B)
Removal
- Pry up the head of fastener center piece 1 with a screw driver.
- Pull out the fastener a.
Installation
- Insert the fastener into the installation hole.
Note: To prevent the pawl 2 from damage, insert the fastener all the way into the installation hole.
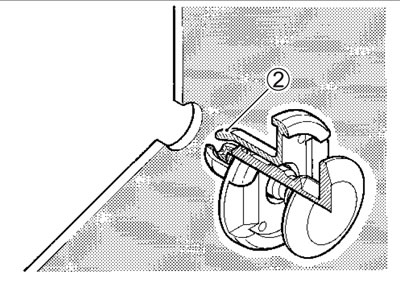
- Push in the head of center piece.
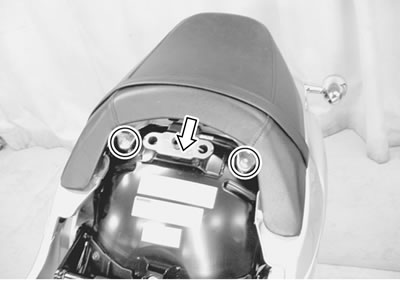
Front and rear seat
Removal
- Remove the front seat with the ignition key.
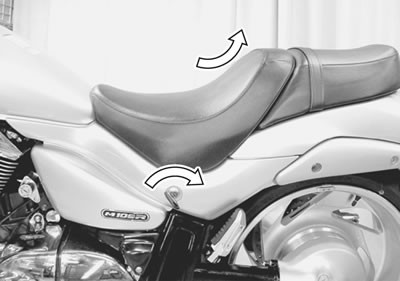
- Remove the bolts and rear seat.
Frame side cover
Removal
- Remove the front seat. (9-4)
- Remove the left frame side cover 1.
Note: Indicates hook location.
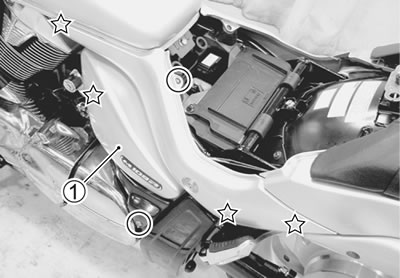
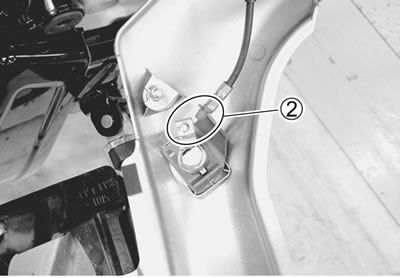
- Disconnect the seat lock cable 2.
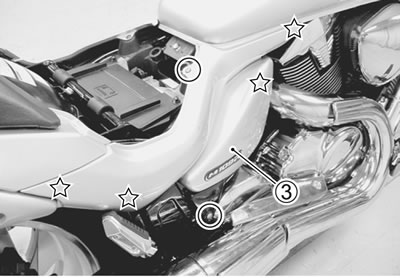
- Remove the right frame side cover 3.
Note: Indicates hook location.
Rear frame cover
Removal
- Remove the left and right frame side covers. (above)
- Remove the rear seat. (9-4)
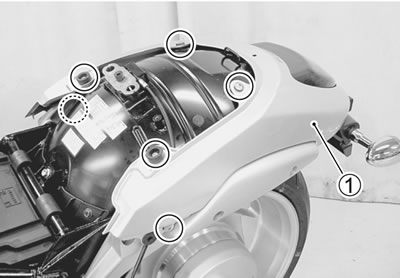
- Remove the screws.

- Remove the rear frame cover 1 and disconnect the rear combination light lead wire coupler.
Frame head cover and radiator cover
Removal
- Remove the fuel tank. (6-3)
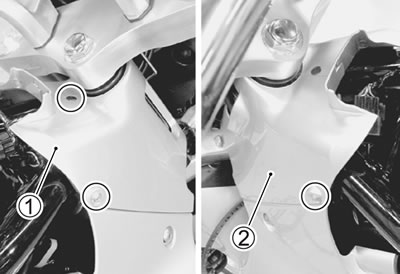
- Remove the right frame head cover 1 and left frame head cover 2.
- Remove the right radiator cover 3 by removing the bolt 4 and fastener 5.
Note: Indicates hook location.

- Remove the left radiator cover 6 by removing the bolt 7 and fastener 8.
Note: Indicates hook location.
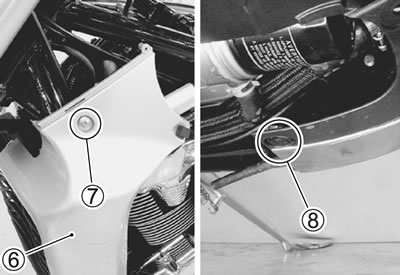

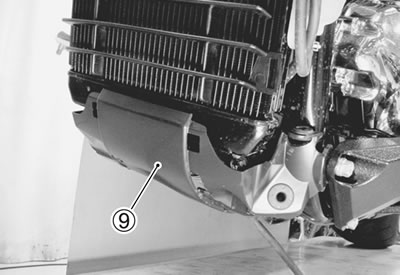
- Remove the radiator bottom cover 9.
Installation
Install the frame head covers and radiator covers in the reverse order of removal. Pay attention to the following points:
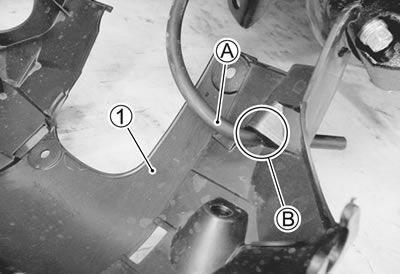
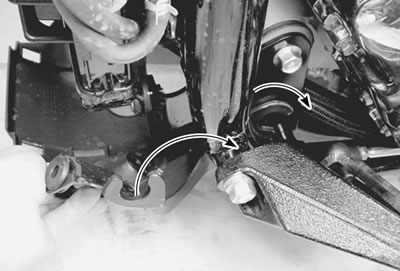
- Install the radiator bottom cover 1.
Note: Pass the breather hose A in the hole B of a radiator bottom cover.
- Frame head cover and radiator cover installation. (11-46)