
Construction
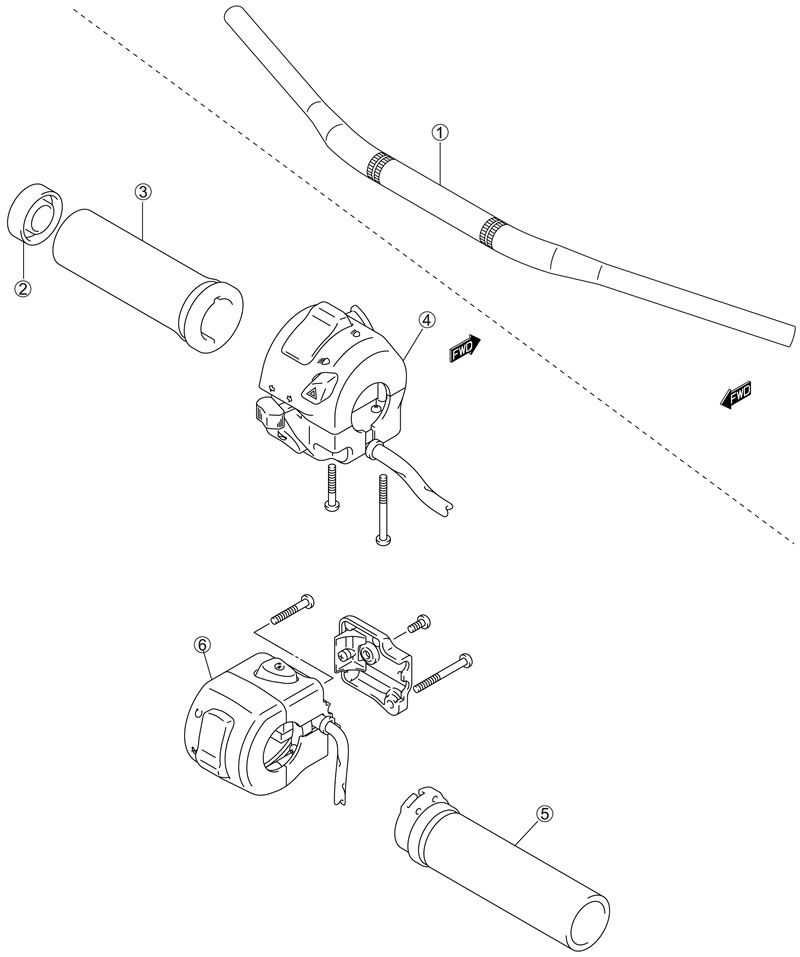
1. Handlebars; 2. Grip end cap; 3. Left handlebar grip; 4. Left handlebar switch; 5. Right handlebar grip; 6. Right handlebar switch
Removal
- Remove the right rear view mirror 1.
- Remove the brake master cylinder 2.
- Remove the throttle grip end cap 3.
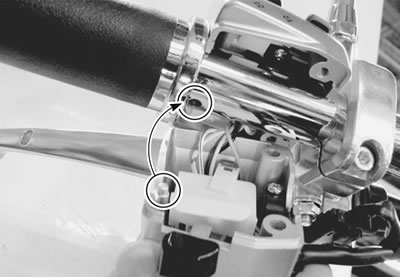
- Disconnect the front brake switch lead wire coupler 4 and remove the right handlebar switch 5.
- Disconnect the throttle cable by removing the throttle grip 6.

- Remove the left handlebar switch 7 and disconnect the clutch lever switch lead wire coupler 8.
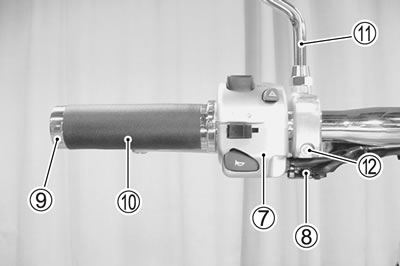
- Remove the left handlebar grip end cap 9 and left handlebar grip 10.
- Remove the left rear view mirror 11 and loosen the clutch lever holder bolt 12.

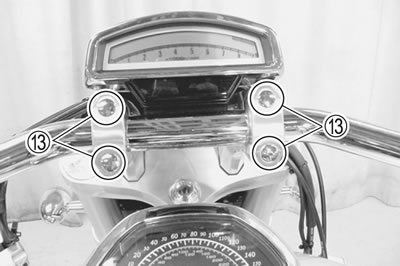
- Remove the handlebar clamp bolt caps 13.
- Remove the handlebar clamp bolts 14.
- Remove the handlebar with the clutch lever holder.

Installation
Install the handlebar in the reverse order of removal. Pay attention to the following points:
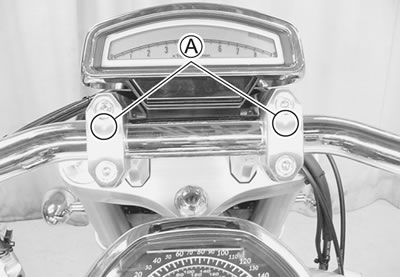
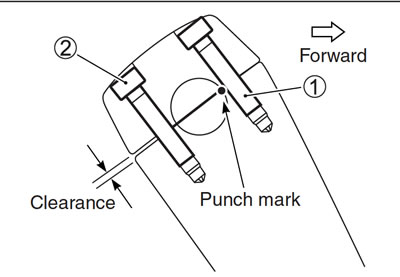
- When setting the handlebar clamp to the handlebar holder, face the punched mark А to the forward.
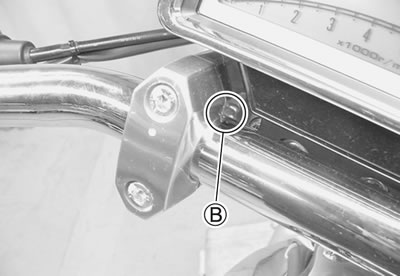
- Align the punched mark В on handlebars with the handlebar clamp mating surface as shown.
- First, tighten the handlebar clamp bolts 1 to the half of specified torque, and then tighten the handlebar clamp bolts 1 and 2 to the specified torque.
- Handlebar clamp bolt: 23 Nm (2.3 kgf·m, 16.5 lb·ft)
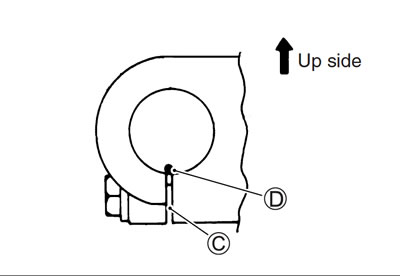
- Install the clutch lever holder, align the holder's mating surface C with punched mark D on the handlebars.
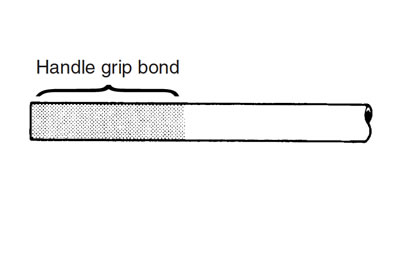
- Apply a handle grip bond onto the left handlebars before installing the handlebar grip.
- Install the front brake master cylinder. (9-61)
- Apply the SUZUKI SUPER GREASE "A" to the throttle cables and their holder.
- 99000-25010: SUZUKI SUPER GREASE "A" or equivalent
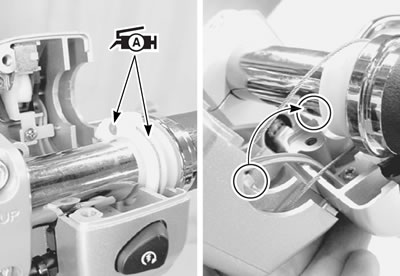
- When remounting the right and left handlebar switches, engage the stopper with the handlebar hole.
After installing the handlebars, the following adjustments are required before driving.