
Removal
Warning! Before starting work, ensure the motorcycle is stabilised and adequately supported. This will help prevent it from falling and causing injury to the operator or damage to the motorcycle.
1. Remove the rear wheel as described on page 16.8.
2. Release the circlip securing the driven flange assembly to the wheel centre.
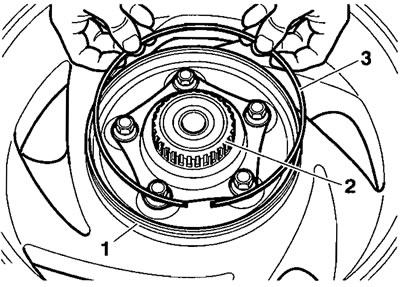
1. Wheel centre; 2. Driven flange; 3. Circlip
3. Withdraw the driven flange from the wheel, recovering the spacer from the cush rubber side of the flange.
Note: It is not necessary to remove the drive flange nuts.
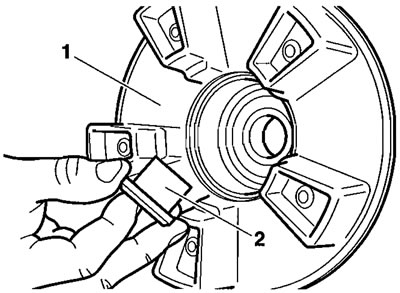
4. Recover the cush drive rubbers from within the wheel.

1. Wheel; 2. Cush drive rubbers
Installation
1. Position the cush drive rubbers within the wheel centre.
2. Refit the spacer to the inside face of the driven flange.
1. Driven flange; 2. Spacer
3. Locate the driven flange assembly to the wheel centre, engaging the paddles with the cush rubbers. Ensure the spacer is not displaced during assembly.

1. Driven flange
4. Retain the assembly with a new bold circlip.
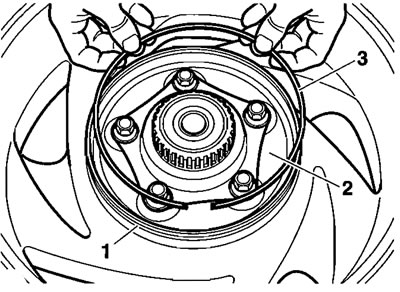
1. Wheel centre; 2. Driven flange; 3. Circlip
5. Refit the rear wheel as described on page 16.8.