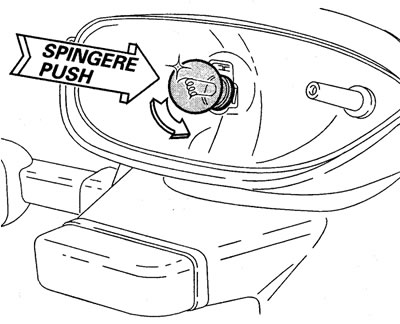
Headlight
Once you have identified the bulb to be changed, remove the corresponding side cover of the instrument panel.
To reach the headlight bulbs, proceed as follows:
Note. To facilitate this operation, undo the screw (1) that attaches the instrument panel bracket to the headight bracket and lift the instrument panel.

Low beam (right-hand side):
Disconnect the rubber shroud from the headlight body.
Disconnect the plug (1) from the light by press the quick release button at the bottom.
High beam (left-hand side):
Disconnect the plug of the white light cable from the front wiring.
Disconnect the rubber shroud from the headlight body and pull out the light cable.
Note. To change the headlight bulbs, you do not need to disconnect the black earth cable plug from the headlight body.
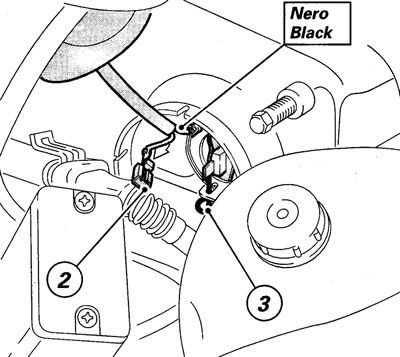
Release the bulb retaining clip (3) and remove the bulb from its socket.
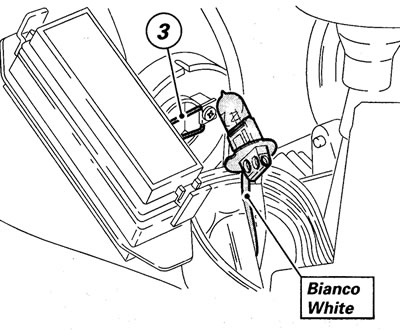
Fit a new bulb with the same specifications.
Note. Do not touch the transparent part with your fingers as this causes it to blacken and permanently reduces its brightness.
Insert the guide pins on the base of the bulb into the corresponding sockets in order to obtain the correct orientation.
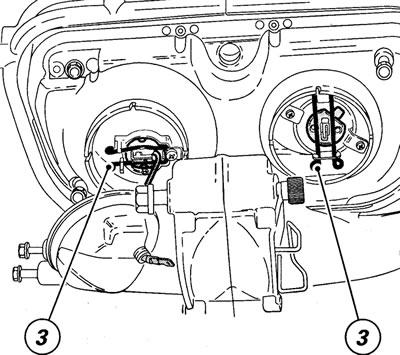
Connect the ends of the clip (3) to the supports on the headlight body.
Connect up the cables, refit the rubber shroud and the other parts of the headlight.
To change the bulb of the parking light, pull the bulb holder (4) out from behind the headlight. Remove the bulb and change.

Instrument panel
To change the bulbs of the warning lights and instrument panel lights, you must first remove the front fairing.
Pull the lamp socket out from behind the panel. Remove the bulb from the socket and change.
Fit a new bulb with the same specifications.
The cable on each bulb holder is marked with a number which matches the number punched on the corresponding socket in the instrument panel. This allows you to identify the correct positions of each warning light when you are changing more than one bulb.

Note. To facilitate access to the instrument light bulbs, lift the instrument panel in the same way as described for changing the headlight bulbs.
Note. Each instrument light bulb holder has a protrusion (A) which allows it to be removed from the instrument panel without tearing the cables.
Indicators
To gain access to the indicator bulbs, remove the corresponding side cover of the instrument panel.
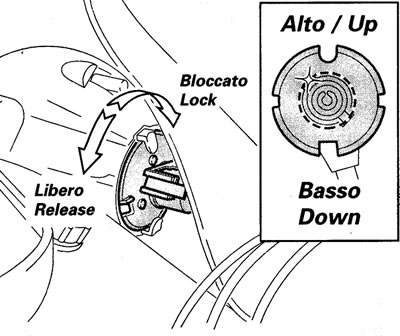
Turn the bulb holder anticlockwise to remove it from the indicator body.
Remove the blown light bulb and fit a new bulb.
Refit the bulb holder with the rounded notch facing up and turn it clockwise until it engages with the socket in the body of the indicator.
To gain access to the rear indicator light bulbs, undo the fixing screw (5) to detach the light cover from the body.
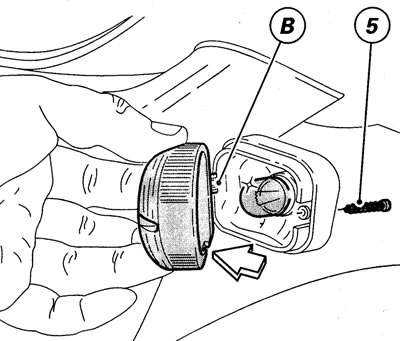
Change the light bulb by pushing and turning it in its socket.
Refit the light cover by inserting the tab (B) into the slot in the light body and tightening the fixing screw (5).
Number plate light
Access to the number plate light bulb can be gained by removing the bulb holder from the inside of the number plate holder. Remove the bulb and fit a new bulb.

Stop light
To change the stop and parking light bulb, undo the two fixing screws (6) on the lens.
Take off the lens, then remove the bulb from its socket by pushing and turning it anti-clockwise.
Fit a new light bulb and the lens.
