
Bleeding
Note: Honda recommend using a commercially available vacuum-type brake bleeding tool (see illustration). If bleeding the system using the conventional method does not work sufficiently well, it is advisable to obtain a bleeder and repeat the procedure detailed below, following the manufacturers instructions for using the tool. If the tool is not available, take the machine to a Honda dealer.
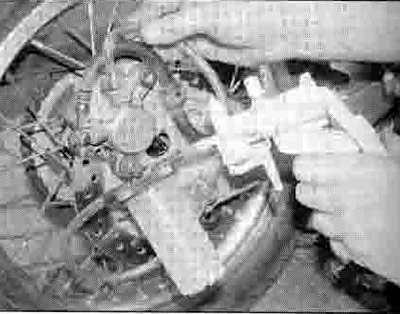
10. NOTE Bleeding the brakes using a commercial vacuum-operated bleeding tool
1. Bleeding the brakes is simply the process of removing all the air bubbles from the brake fluid reservoirs, the hoses and the brake calipers. Bleeding is necessary whenever a brake system hydraulic connection is loosened, when a component or hose is replaced, or when the master cylinder or caliper is overhauled. Leaks In the system may also allow air to enter, but leaking brake fluid will reveal their presence and warn you of the need for repair.
2. To bleed the brakes, you will need some new DOT 4 brake fluid, a length of clear vinyl or plastic tubing, a small container partially filled with clean brake fluid, some rags and a ring spanner to fit the brake caliper bleed valves.
3. Cover the fuel tank, fairing panels, front mudguard and other painted components to prevent damage in the event that brake fluid is spilled.
4. Remove the reservoir cover or cap, diaphragm plate and diaphragm (see Daily (pre-ride) checks) and slowly pump the brake lever or pedal a few times, until no air bubbles can be seen floating up from the holes in the bottom of the reservoir. Doing this bleeds the air from the master cylinder end of the line. Loosely refit the reservoir cover.
5. Pull the dust cap off the bleed valve (see illustration). Attach one end of the clear vinyl or plastic tubing to the bleed valve and submerge the other end In the brake fluid in the container (see illustration).
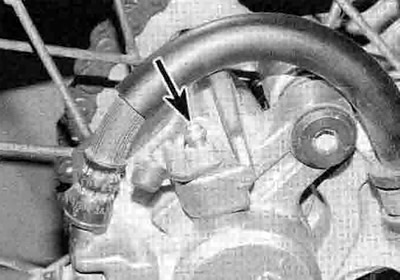
10.5a. Brake caliper bleed valve (arrowed)

10.5b. To bleed the brakes, you need a spanner, a short section of clear tubing, and a clear container half-filled with brake fluid
6. Remove the reservoir cap or cover and check the fluid level. Do not allow the fluid level to drop below the lower mark during the bleeding process.
7. Carefully pump the brake lever or pedal three or four times and hold it in (front) or down (rear) while opening the caliper bleed valve. When the valve is opened, brake fluid will flow out of the caliper into the clear tubing and the lever will move toward the handlebar or the pedal will move down.
8. Retighten the bleed valve, then release the brake lever or pedal gradually. Repeat the process until no air bubbles are visible in the brake fluid leaving the caliper and the lever or pedal is firm when applied. On completion, disconnect the bleeding equipment, then tighten the bleed valve to the torque setting specified at the beginning of the chapter and install the dust cap. On models with twin front disc brakes repeat the procedure on the other caliper.
9. Install the diaphragm, plate and cover or cap assembly, wipe up any spilled brake fluid and check the entire system for leaks.
If it's not possible to produce a firm feel to the lever or pedal the fluid my be aerated. Let the brake fluid in the system stabilise for a few hours and then repeat the procedure when the tiny bubbles in the system have settled out. Also check to make sure that there are no 'high-spots' in the brake hose in which an air bubble can become trapped - this will occur most often in an incorrectly mounted hose union, but can also arise through bleeding the brakes while some of the brake system components are at such an angle to encourage this. Reversing the angle or displacing and moving the offending component around will normally dislodge any trapped air.
Renewing the fluid
10. Changing the brake fluid is a similar process to bleeding the brakes and requires the same materials plus a suitable tool for siphoning the fluid out of the hydraulic reservoir. Also ensure that the container is large enough to take all the old fluid when it is flushed out of the system.
11. Follow Steps 3 and 5, then remove the reservoir cap. diaphragm plate and diaphragm and siphon the old fluid out of the reservoir. Fill the reservoir with new brake fluid, then follow Step 7.
12. Retighten the bleed valve, then release the brake lever or pedal gradually. Keep the reservoir topped-up with new fluid to above the LOWER level at all times or air may enter the system and greatly increase the length of the task. Repeat the process until new fluid can be seen emerging from the bleed valve.
Old brake fluid is invariably much darker in colour than new fluid, making it easy to see when all old fluid has been expelled from the system.
13. Disconnect the hose, then tighten the bleed valve to the specified torque setting and install the dust cap.
14. Top-up the reservoir, install the diaphragm, plate and cover or cap. and wipe up any spilled brake fluid. Check the entire system for fluid leaks.
15. Check the operation of the brakes before riding the motorcycle.