
Note: The references made to the type of battery used in the different models assumes original spec equipment is installed. In the case of older models, it is possible that the standard battery has been replaced with a maintenance free (MF) battery at some point, in which case refer to the relevant text for the battery type, not the model of bike. The batteries are easy to distinguish - standard ones have removable caps (usually yellow) across the top. while MF batteries do not. and are usually marked MF on the front.
Standard type batteries - XL600V and XRV750-L to N (1990 to 1992) models
Caution: Be extremely careful when handling or working around the battery. The electrolyte is very caustic and an explosive gas (hydrogen) is given off when the battery is charging.
1. Remove the right-hand side panel (see Chapter 8). Check that the terminals are clean and tight and that the casing is not damaged or leaking.
2. The electrolyte level is visible through the translucent battery case - it should be between the LIPPER and LOWER level marks (see illustration).
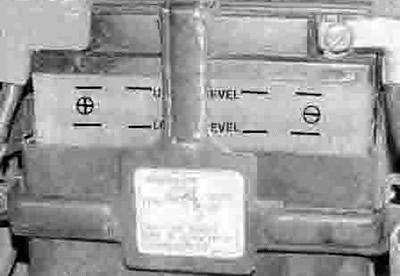
6.2. Make sure the level in each cell is between the UPPER and LOWER level lines
3. If the electrolyte is low. displace or remove the battery (see Chapter 9), then unscrew the cell caps and fill each cell to the upper level mark with distilled water (see illustrations). Do not use tap water (except in an emergency), and do not overfill. The cell holes are quite small, so it may help to use a clean plastic squeeze bottle with a small spout to add the water. Fit the battery cell caps, then install the battery (see Chapter 9).
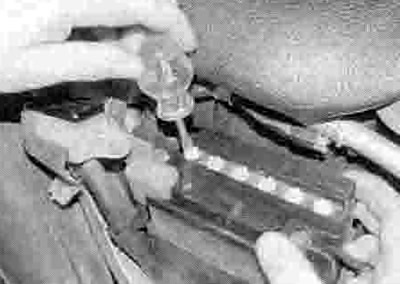
6.3a. Remove the cell cap...

6.3b... and top up the cell with distilled water
4. See Chapter 9 for further details on batteries and other checks that can be made. If the machine is not in regular use, remove the battery and give it a refresher charge every month to six weeks (see Chapter 9).
Maintenance-free (MF) batteries - XL650V and XRV750-P models onwards (1993-on)
5. The above models are fitted with a sealed MF (maintenance free) battery. Note: Do not attempt to remove the battery caps to check the electrolyte level or battery specific gravity. Removal will damage the caps, resulting in electrolyte leakage and battery damage. All that should be done is to check that the terminals are clean and tight and that the casing is not damaged or leaking. See Chapter 9 for further details.
6. If the machine is not in regular use, remove the battery and give it a refresher charge every month to six weeks (see Chapter 9).