
Throttle cables
1. Make sure the throttle grip rotates smoothly and freely from fully closed to fully open with the front wheel turned at various angles. The grip should return automatically from fully open to fully closed when released.
2. If the throttle sticks, this is probably due to a cable fault. Remove the cables (see Chapter 4) and lubricate them (see Section 12). Check that the inner cables slide freely and easily in the outer cables. If not, replace the cables with new ones. With the cables removed, make sure the throttle twistgrip rotates freely on the handlebar. Install the cables, making sure they are correctly routed. If this fails to improve the operation of the throttle, the cables must be replaced with new ones. Note that in very rare cases the fault could lie in the carburettors rather than the cables, necessitating their removal and inspection (see Chapter 4).
3. With the throttle operating smoothly, check for a small amount of freeplay in the cables, measured in terms of the amount of twistgrip rotation before the throttle opens, and compare the amount to that listed in this Chapter's Specifications (see illustration). It it's incorrect, adjust the cables to correct it as follows.
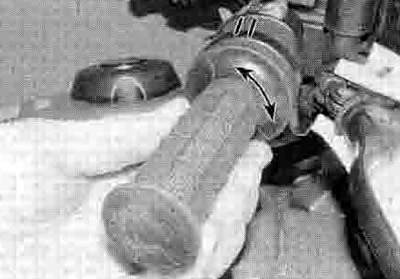
15.3. Throttle cable freeplay is measured in terms of twistgrip rotation
4. Freeplay adjustments can be made using the adjuster in the accelerator cable where it leaves the throttle/switch housing on the handlebar. Pull the cable boot away from the housing (see illustration). Loosen the locknut and turn the adjuster in or out as required until the specified amount of freeplay is obtained (see this Chapter's Specifications), then retighten the lockout (see illustration).

15.4a. Pull back the rubber boot to access the adjuster
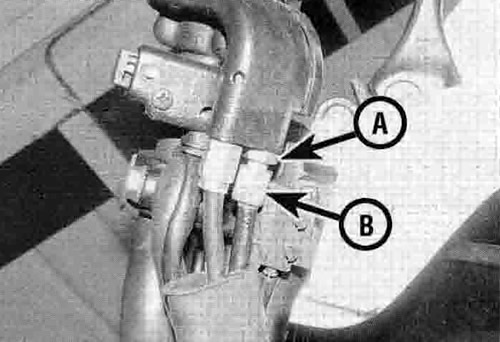
15.4b. Throttle cable adjuster locknut (A) and adjuster (B) - throttle end
5. If the adjuster has reached its limit of adjustment, reset it by turning it fully in so that the freeplay is at a maximum, then tighten the locknut and refit the boot. The cable must now be adjusted at the carburettor end. On XL600V models, remove the left-hand fairing side panel (see Chapter 8). On XL650V and XRV750 models, remove the fuel tank (see Chapter 4). The adjuster is on the lower cable in the bracket. Slacken the adjuster locknut, then screw the adjuster in or out as required, making sure the rear nut remains captive in the bracket, thereby threading itself along the adjuster as you turn it. until the specified amount of freeplay is obtained, then tighten the locknut (see illustration). Subsequent adjustments can now be made at the throttle end. If the cable cannot be adjusted as specified, replace it with a new one (see Chapter 4).
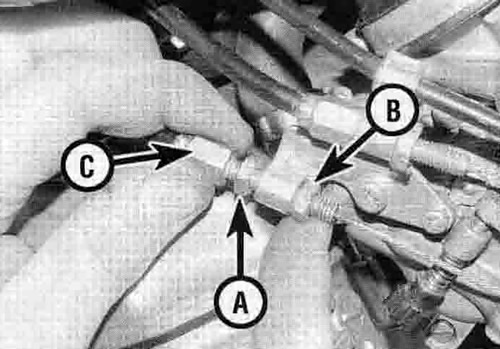
15.5. Slacken the locknut (A), then turn the adjuster (C) as required, keeping the rear (captive) nut (B) locked
Warning: Turn the handlebars all the way through their travel with the engine idling. Idle speed should not change. If it does, the cables may be routed incorrectly. Correct this condition before riding the bike.
6. Check that the throttle twistgrip operates smoothly and snaps shut quickly when released.
Choke cable
7. If the choke does not operate smoothly this is probably due to a cable fault. Remove the cable (see Chapter 4) and lubricate it (see Section 12). Check that the inner cable slides freely and easily in the outer cable If not, replace the cable with a new one. With the cable removed, make sure the choke lever is able to move freely. Install the cable, making sure it is correctly routed.
8. If this fails to improve the operation of the choke, the fault could lie in the choke plungers and their bores in the carburettors rather than the cable (see Chapter 4).