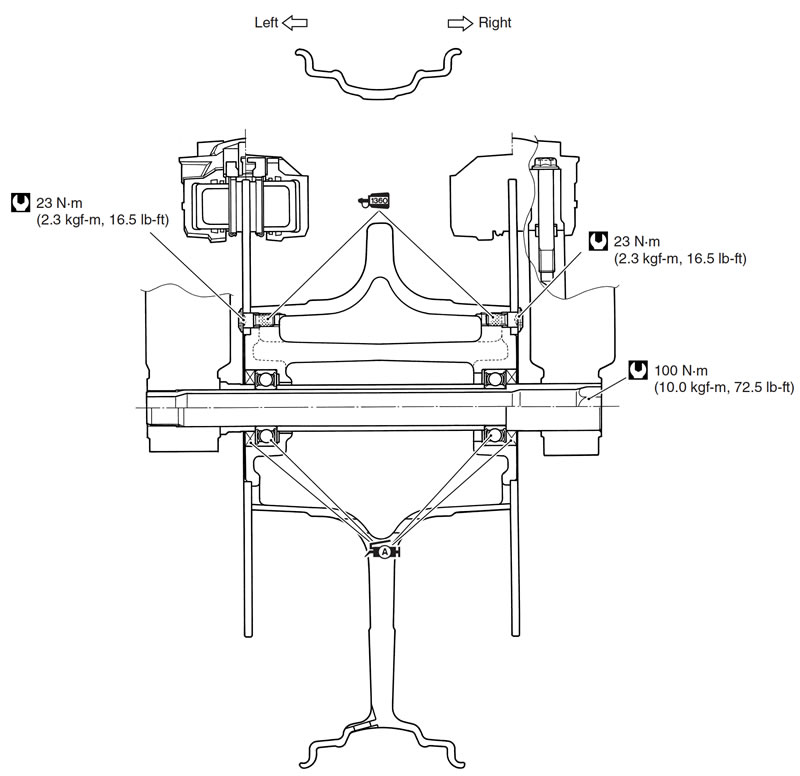
Construction
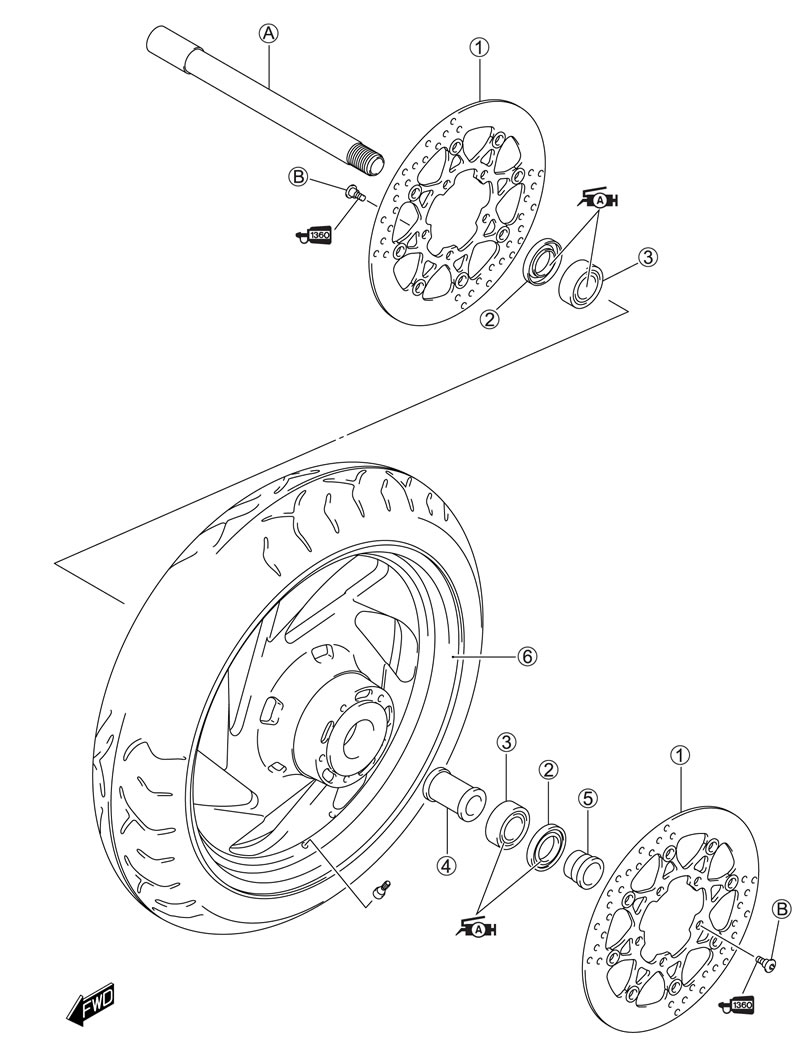
1. Brake disc; 2. Dust seal; 3. Bearing; 4. Spacer; 5. Collar; 6. Front wheel; A. Front axle; B. Brake disc bolt
| ITEM | Nm | kgf·m | lb·ft |
| A | 100 | 10.0 | 72.5 |
| B | 23 | 23.0 | 16.5 |
Removal
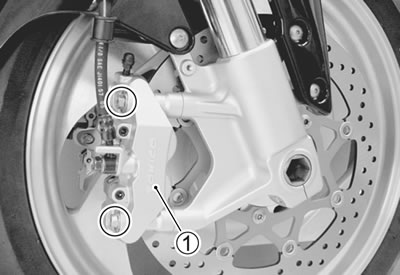
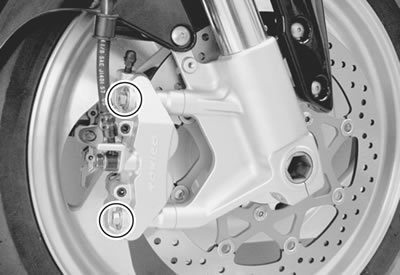
- Remove the brake calipers 1, left and right.
Caution: Do not operate the brake lever while removing the calipers.
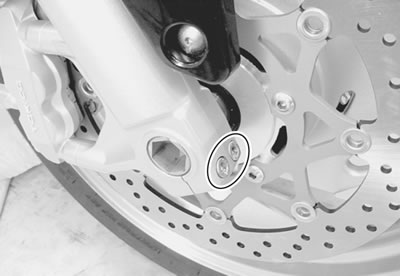
- Loosen the two axle pinch bolts 2 on the right front fork leg.
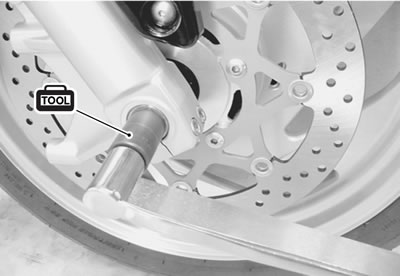
- Loosen the front axle with the special tool.
- 09900-18740: Hexagon socket (24 mm)
- Raise the front wheel off the ground and support the motorcycle with a jack or a wooden block.
- Draw out the front axle and remove the front wheel.
Note: After removing the front wheel, fit the calipers temporarily to the original positions.
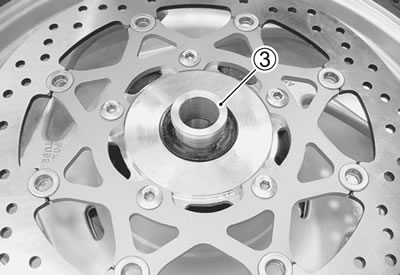
- Remove the collar 3.

Inspection and disassembly
WHEEL (9-73).
TIRE (2-27 and 9-73).
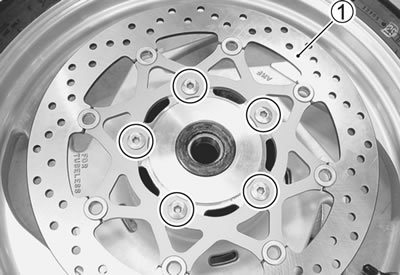
BRAKE DISC (9-58).
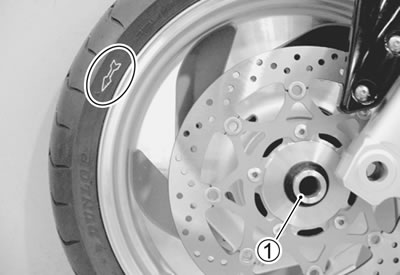
- Remove the brake disc 1.
Wheel axle
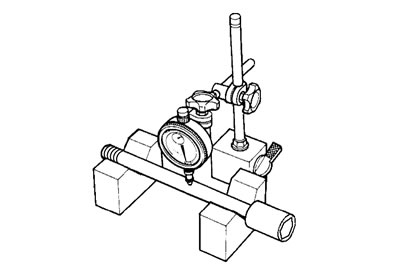
- Using a dial gauge, check the axle for runout and replace it if the runout exceeds the limit.
- 09900-20607: Dial gauge (1/100)
- 09900-20701: Magnetic stand
- 09900-21304: V-block set (100 mm)
Wheel axle runout (front):
- Service Limit: 0.25 mm (0.010 in)
Wheel
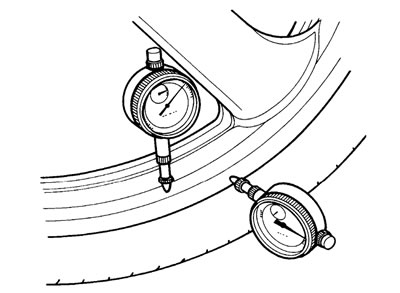
- Make sure that the wheel runout checked as shown does not exceed the service limit. An excessive runout is usually due to worn or loosened wheel bearings and can be reduced by replacing the bearings. If bearing replacement fails to reduce the runout, replace the wheel.
Wheel runout:
- Service Limit (Axial and Radial): 2.0 mm (0.08 in)
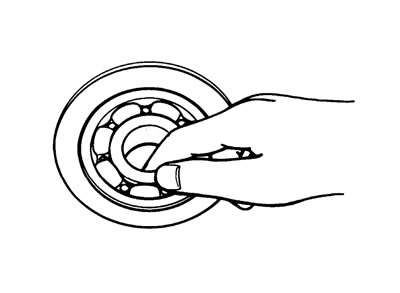
Wheel bearings
- Inspect the play of the wheel bearings by finger while they are in the wheel. Rotate the inner race by finger to inspect for abnormal noise and smooth rotation.
- Replace the bearing in the following procedure if there is anything unusual.
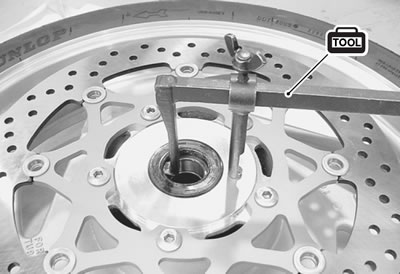
- Remove the dust seals on both sides with the special tool.
- 09913-50121: Oil seal remover
Caution: The removed dust seals must be replaced with new ones.
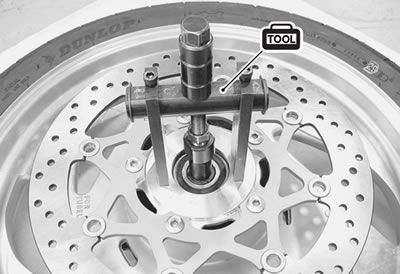
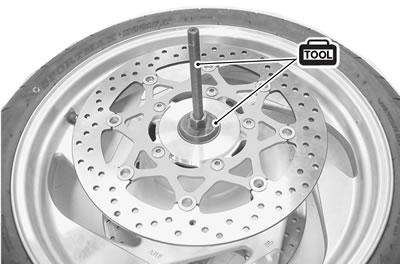
- Remove the wheel bearings on both sides with the special tool.
- 09921-20240: Bearing remover set (52 mm)
Caution: The removed bearings should be replaced with new ones.
Reassembly and installation
Reassemble and install the front wheel in the reverse order of removal and disassembly. Pay attention to the following points:
Wheel bearing
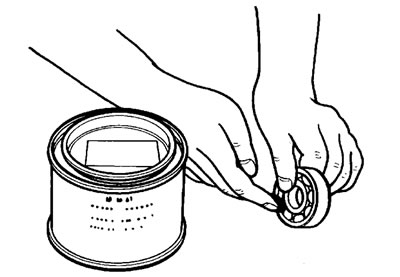
- Apply SUZUKI SUPER GREASE "A" to the wheel bearings.
- 99000-25010: SUZUKI SUPER GREASE "A" or equivalent
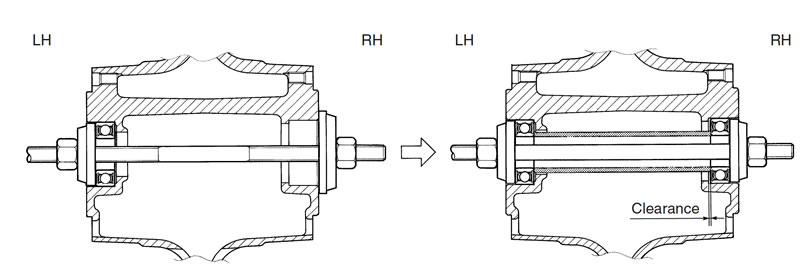
- Install the wheel bearings with the special tools as follows.
- 09941-34513: Bearing/Steering race installer set
- 09924-84510: Bearing installer set
Caution: First install the left wheel bearing, then install the spacer and right wheel bearing.
The sealed cover of the bearing must face outside.
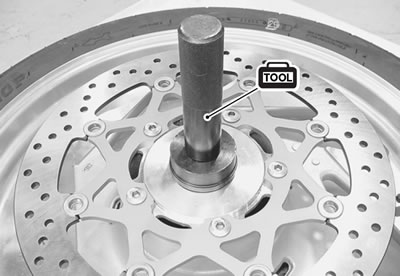
- Install the dust seal with the special tool.
- 09913-70210: Bearing installer set (52 mm)
- Apply SUZUKI SUPER GREASE "A" to the dust seal lip.
- 99000-25010: SUZUKI SUPER GREASE "A" or equivalent
Brake disc
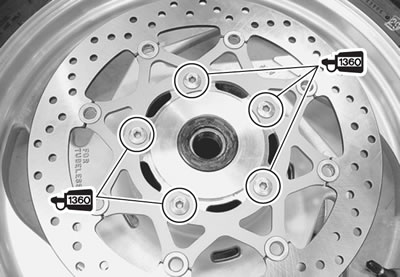
- Make sure that the brake disc is clean and free of any greasy matter.
- Apply THREAD LOCK SUPER to the disc mounting bolts and tighten them to the specified torque.
- Brake disc bolt: 23 Nm (2.3 kgf·m, 16.5 lb·ft)
- 99000-32130: THREAD LOCK SUPER "1360" or equivalent
Wheel
- Install the collar 1 in the left side.
- Install the front wheel with the front axle and tighten the front axle with hand temporarily.
Warning: The directional arrow on the tire should point to the wheel rotation, when remounting the wheel.
Front axle
- Tighten the front axle to the specified torque.
- 09900-18740: Hexagon socket (24 mm)
- Front axle bolt: 100 Nm (10.0 kgf·m, 72.5 lb·ft)
Brake caliper
- Tighten the brake caliper mounting bolts, left and right to the specified torque.
- Front brake caliper mounting bolt: 39 Nm (3.9 kgf·m, 28.0 lb·ft)
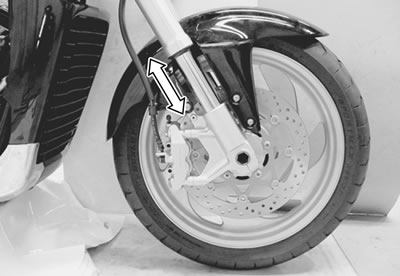
- Move the front fork up and down 4 or 5 times.
- Tighten two axle pinch bolts on the right front fork leg to the specified torque.
- Front axle pinch bolt: 23 Nm (2.3 kgf·m, 16.5 lb·ft)
Note: After remounting the front wheel, pump the brake lever a few times to check for proper brake operation.