
1. A routine general check of the brake system will ensure that any problems are discovered and remedied before the rider's safety is jeopardised.
2. Check the brake lever and pedal for loose connections, improper or rough action, excessive play, bends, and other damage. On XL600V-H to L (1987 to 1990) models, similarly check the linkage between the rear pedal and the rear wheel. Replace any damaged parts with new ones (see Chapter 7).
3. Make sure all brake component fasteners are tight. Check the brake shoes and/or pads for wear (see Section 3) and make sure the fluid level in the reservoirs is correct (see Daily (pre-ride) checks). Look for leaks at the hose and pipe connections and check for cracks in the hoses and pipes (see illustration). If the lever or pedal is spongy, bleed the brakes (see Chapter 7).

19.3. Flex the hoses and check for cracks, bulges and leaking fluid. Also check the pipes and all connections for leaks
4. Make sure the brake light operates when the front brake lever is pulled in. The front brake light switch, mounted on the underside of the master cylinder, is not adjustable. If it fails to operate properly, check it (see Chapter 9).
5. Make sure the brake light is activated just before the rear brake takes effect. If adjustment Is necessary, hold the switch and turn the adjuster ring on the switch body until the brake light is activated when required (see illustration). The switch is mounted on the inside of the frame, above the brake pedal and just ahead of the master cylinder. If the brake light comes on too late, turn the ring clockwise. If the brake light comes on too soon or is permanently on, turn the ring anticlockwise. If the switch doesn't operate the brake light, check it (see Chapter 9).
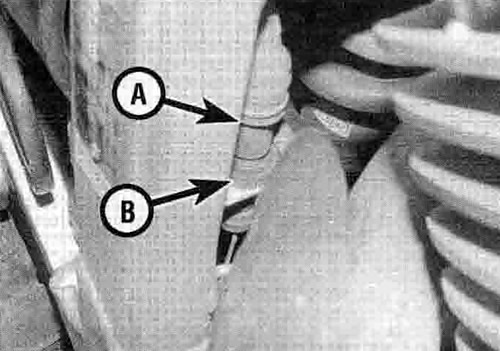
19.5. Hold the rear brake light switch body (A) and turn the adjuster ring (B) as required
6. On all except XL600V-H to P (1987 to 1993) models, the front brake lever has a span adjuster which alters the distance of the lever from the handlebar (see illustration). Each setting is identified by a notch in the adjuster which aligns with the arrow on the lever. Turn the adjuster ring until the setting which best suits the rider is obtained.
19.6. Adjusting the front brake lever span
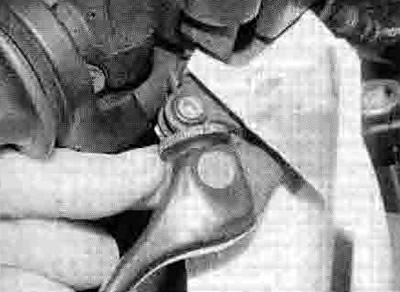
7. The height of the rear brake pedal can be adjusted to suit the rider's preference. On XL600V-H to L (1987 to 1990) models, slacken the locknut on the pedal stopper bolt in the footrest bracket, then turn the bolt until the pedal is at the desired height. After adjustment, make sure you adjust the amount of freeplay in the pedal before the brake takes effect (see Daily (pre-ride) checks). On all other models, slacken the clevis locknut, then turn the pushrod using a spanner on the hex (either on the base or at the top of the rod, according to model) until the pedal is at the desired height (see illustrations). On completion tighten the locknut securely. On all models adjust the rear brake light switch after adjusting the pedal height (see Step 5).

19.7a. Slacken the locknut (A) and turn the pushrod using the hex (B) to adjust pedal height

19.7b. On some models the adjusting hex (B) is at the top of the pushrod. Locknut (A)