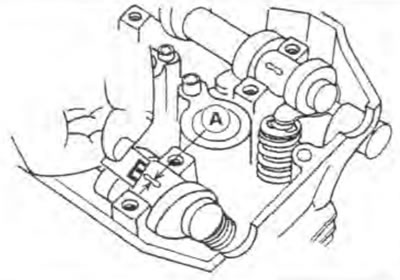
Measure each clearance between the camshaft journal and the camshaft cap using plastigage (press gauge) [А].

Tighten:
Torque - Camshaft Cap Bolts: 12 Nm (1.2 kg·m, 104 in·lb)
Camshaft Chain Guide Bolts: 12 N·m (1.2 kg·m, 104 in·lb)
Note. Do not turn the camshaft when the plastigage is between the journal and camshaft cap.
Camshaft Journal, Camshaft Cap Clearance
Standard: 0.038-0.081 mm
Service Limit: 0.17 mm
★ If any clearance exceeds the service limit, measure the diameter of each camshaft journal with a micrometer.
Camshaft Journal Diameter
Standard: 23.940-23.962 mm
Service Limit: 23.91 mm
★ If the camshaft journal diameter is less than the service limit, replace the camshaft with a new one and measure the clearance again.
If the clearance still remains out of the limit, replace the cylinder head unit.
Camshaft runout
Remove the camshaft.
Set the camshaft in a camshaft alignment jig or on V blocks.
Measure runout with a dial gauge at the specified place as shown.

★ If the runout exceeds the service limit, replace the shaft.
Camshaft Runout Standard: TIR 0.1 mm
Camshaft wear
Remove the camshaft.
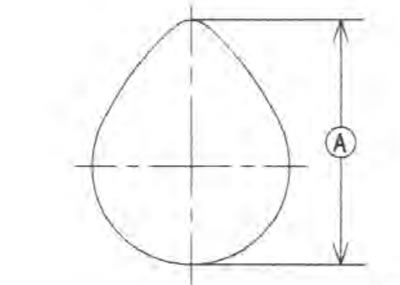
Measure the height [A] of each cam with a micrometer.

★ If the cams are worn down past the service limit, replace the camshaft.
Camshaft height
| Standard: | Service Limit | |
| Exhaust | 34.345-34.453 mm | 34.24 mm |
| Inlet | 35.146 - 35.254 mm | 35,04 mm |
