Tail section removal (Aprilia RS125/3)
- Main
- Aprilia
- RS-series
- RS 125 [3]
- Running gear and frame
- Frame and hinged elements
- Tail section removal
Torque wrench settings:
Remove both seat subframe covers; see 7.1.8.
Undo and remove the two inner nuts (1) and collect the screws.
Release and remove the two screws (2) on both sides.
Remove the tail section complete with passenger seat. To remove the passenger seat and the strap:
The original is published on an online portal: Motoinstruction
Release and remove the seven screws (3).
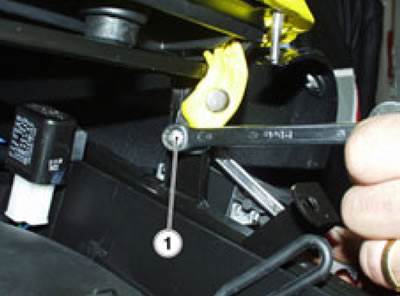
- Inner nuts (1): 5 Nm (0.5 Kgm).
- Screws (2): 2 Nm (0.2 Kgm).
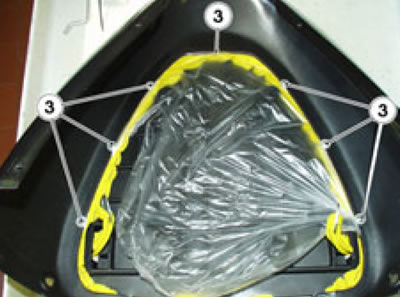
- Screws (3): 2 Nm (0.2 Kgm).
Remove both seat subframe covers; see 7.1.8.
Undo and remove the two inner nuts (1) and collect the screws.

Release and remove the two screws (2) on both sides.

Remove the tail section complete with passenger seat. To remove the passenger seat and the strap:
The original is published on an online portal: Motoinstruction
Release and remove the seven screws (3).

See this article in russian language
This article has been reviewed: Artemy Kuzmin
Similar articles about motorcycles of other brands
Removing and installing frame tail section BMW R 1150 GS (1999-2004)Lamps — headlight, brake light, tail light and turn signal… Suzuki V-Strom DL-1000K2/K9 (2002-2012)
Removing the upper tail cover Yamaha YZF-R1 (2009-2014)
Tail/brake light removal/installation Kawasaki Vulcan VN 900 (2006-2024)
Tail Light and Brake Light — Bulb Replacement Honda CB 400 SF (1992-1999)
Link to this article in different formats
Comments and feedback from visitors
No comments yet, you will be the first!
- Information for owner
- Introduction to manual
- Maintenance
- Troubleshooting
- Engine and systems
- Engine repair
- Fuel system
- Cooling and lube system
- Running gear and frame
- Frame and hinged elements
- Front suspension and handlebar
- Rear suspension
- Brake system
- Wheels and tires
- Electric equipment
- Equipment and devices
- Starting and charging system
