
Warning!
- Before proceeding to change a bulb, rotate the ignition switch to "
".
- Wear clean gloves or use a clean, dry cloth to handle bulbs. Do not put your fingerprints on a bulb, as this may cause overheating leading to failure. If you happen to touch a bulb with your fingers, remove any fingerprints with alcohol to avoid early failure.
- DO NOT PULL ON THE WIRING.
Place the motorcycle on the stand.
Note. Check the fuses before changing a bulb; see 8.14.1.
Replacement procedures:
Parking light bulb
Warning! Never pull on the wiring to extract a bulb holder.
Working from the rear end of the front fairing, grasp the bulb holder (1) and pull until clear of its seat.
Withdraw the parking light bulb (2) and fit a new bulb of equal rating.

High beam bulb
Working from the rear right end of the front fairing, slip off the dust cover (3) with your fingers.
Withdraw the electrical connector (4).
Release the retainer (5) at the rear of the bulb holder (6).
Extract the bulb.

Note. Make sure the locating pegs locate properly into the holder when fitting the bulb.
Fit a new bulb of equal rating in the correct position.
Low beam bulb
Working from the rear left end of the front fairing, slip off the dust cover (7) with your fingers.
Withdraw the connector (8).
Release the retainer (9) at the rear of the bulb holder (10).
Extract the bulb.

Note. Make sure the locating pegs locate properly into the holder when fitting the bulb.
Fit a new bulb of equal rating in the correct position.
Tail light bulbs
Note. Check the BRAKE light switches for proper operation before changing a bulb; see 8.9.1.
Place the motorcycle on the stand.
Release and remove the two screws (12).
Remove the guard (11).
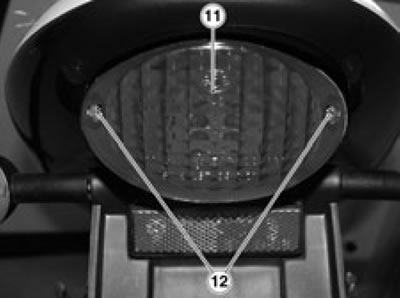
Push the bulb (13) gently and twist anti-clockwise.
Extract the bulb (13).

Warning! Fit the bulb into the bulb holder making sure the two bulb pegs locate into the slots in the bulb holder.
Fit a new bulb of equal rating in the correct position.
Note. On refitting, make sure the guard locates correctly into its seat. Tighten the screws (12) carefully and do not overtighten to avoid damage to the guard.
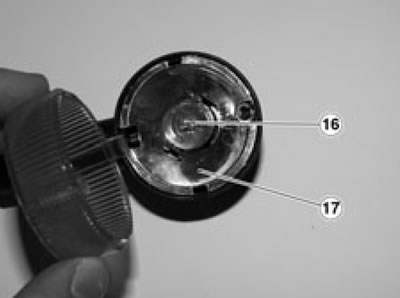
Front and rear indicator bulbs
Place the motorcycle on the stand.
Release and remove the screw (14).
Note. Be careful when removing the guard, or the locating tab might break off.
Remove the guard (15).

Note. On refitting, make sure the guard locates correctly into its seat. Tighten the screw (14) carefully and do not overtighten to avoid damage to the guard.
Push the bulb (16) gently and twist anti-clockwise.
Extract the bulb.
Note. Make sure the locating pegs locate properly into the slots in the bulb holder when fitting the bulb.
Fit the new bulb of equal rating in the correct position.
Note. In the event the bulb holder (17) comes off, refit it correctly with the slotted open end matching the screw hole.