MotoInstruction.ru
Mobile
version
Articles
& news
Site
map
Feed
back
Add to
bookmark
English Русский
Aprilia
BMW
Ducati
Harley
Honda
Kawasaki
Suzuki
Triumph
Yamaha
Aprilia:
RS-series▾
RS125 [3] (1998-2005)
Shiver▾
SL750 (2007-2016)

Assembling the clutch (Aprilia Shiver 750)

  • Main
  • Aprilia
  • Shiver
  • SL 750
  • Engine and systems
  • Transmission
  • Assembling the clutch
0
Fit the shim washer.


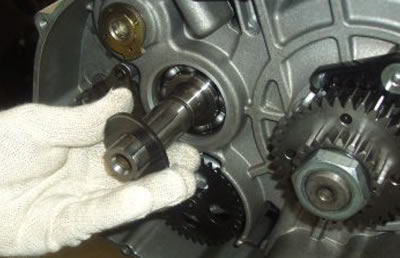
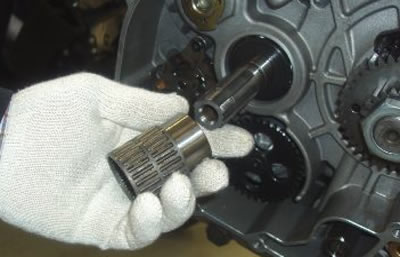
Fit the needle bearing and the spacer.


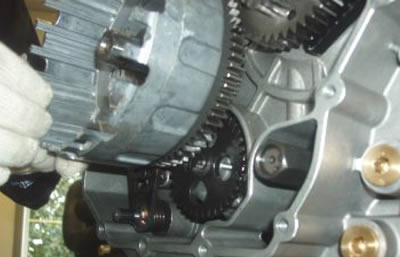
Fit the clutch bell.

Make sure that the oil pump control drive gear of the clutch bell engages correctly with the oil pump driven gear.


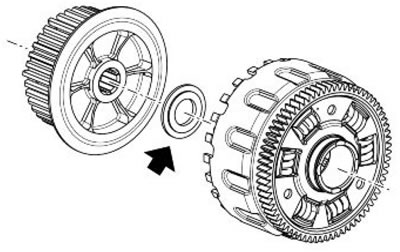
Place the special washer correctly between the clutch bell and the hub.

Caution! Fit the special washer with the machining facing the bell.


Position the clutch hub.


Fit the clutch cover.

Check that the measurement has not changed compared with the one carried out upon removal; tighten the clutch nut afterwards. If it has changed, rotate the crankshaft so that the oil pump control drive gear engages correctly with the oil pump driven gear on the clutch bell.


Fit the washer and a new clutch hub nut.


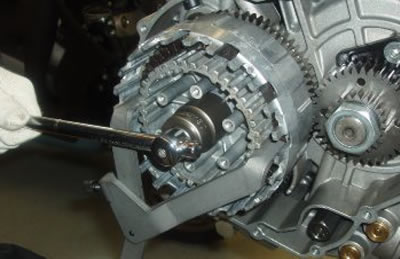
Tighten the clutch hub nut using the specific tool.

Specific tooling: 9100896 Clutch bell locking tool


Tighten the nut and proceed to caulk.


  • Insert the flat ring (1).
  • Insert the cupped ring (2).
  • Fit the lathed driven disc (3).
  • Fit the nitrided steel disc (4).


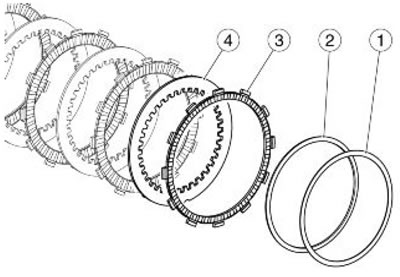
Caution! Be careful with the cupped ring fitting side; the ring cone shall be directed towards the engine.


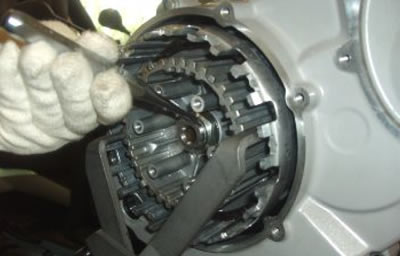
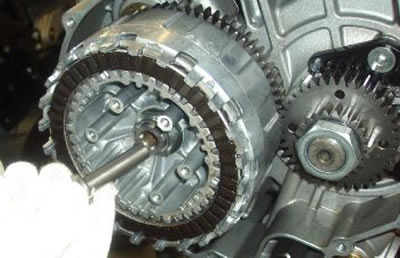
Fit the clutch discs. Start with the friction material discs and alternate with steel discs.

Position all friction material discs with their teeth aligned in one of the long slots of the clutch bell.

Place the control rod.


Place the thrust plate.

Caution! Ensure that the arrow on the thrust plate is aligned with the machining on the hub.


Fit the clutch springs.

Fit the screw washers.

Tighten the six screws operating in stages and diagonally.


Replace the gasket upon refitting.

See also specifications for this operation.
See this article in russian language
◀ Previous
Aprilia SL750 : Transmission
Next ▶

Checking the clutch housing
Checking the clutch plates
Disassembling the clutch
Removing the clutch cover
Gearbox selector shaft — removal and installation
Checking the gear selector
Drive chain adjusting
Similar articles about motorcycles of other brands
Suzuki DRZ 250 (1996-2007): Clutch free play Triumph Rocket III (2004-2018): Exploded view — clutch controls Yamaha FZ1 Fazer (2006-2015): Clutch lever Kawasaki ZX6R/ZX600J (2000-2002): Clutch exploded view Honda CB 400 SF (1992-1999): Clutch — disassembly and assembly, replacement of discs and springs Ducati ST2 (1997-2003): Changing the clutch fluid Harley-Davidson V-Rod (2002-2006): Manual clutch lever BMW R 1150 GS (1999-2004): Checking clutch operating fluid level
Link to this article in different formats
TEXTHTMLBB Code
Comments and feedback from visitors
No comments yet, you will be the first!


Add up two numbers: 34 + 31


SL750 (2007-2016) 
  • Information for owner
  • Introduction to manual
  • Control devices
  • Operation manual
  • Technical characteristics
  • Maintenance
  • Engine and systems
  • Engine repair
  • Lubrication system
  • Cooling system
  • Fuel system
  • Transmission
  • Running gear and frame
  • Frame and hinged elements
  • Front suspension and handlebar
  • Rear suspension
  • Brake system
  • Electric equipment
  • Equipment and devices
Aprilia BMW Ducati Harley Honda Kawasaki Suzuki Triumph Yamaha
MotoInstruction.ru © 2021–2025 | Sitemap | Articles | Contacts | Site search | Add to bookmarks | Mobile version