- Remove left and right fairing side sections.
See Group 46.
- Remove upper section of fairing.
Warning: Comply with safety precautions when handling or working with fuel.
- Remove fuel tank.
See Group 16.
- Remove the intake air pipe.
- Remove the air output duct from the right-hand radiator.
See Group 17.
- Press radiator out of holder.

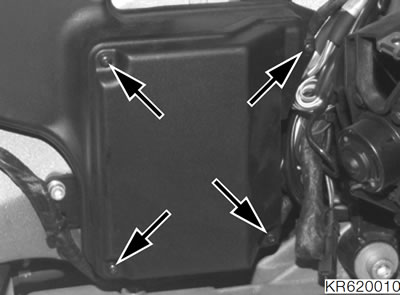
- Release the fasteners (arrows) and remove the cover of the electronics box.

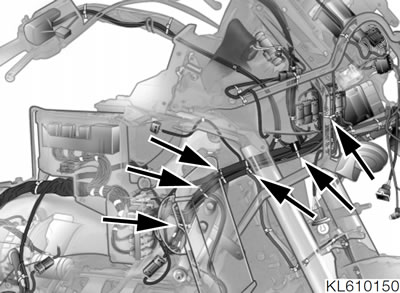
- Open the cable ties (arrows).

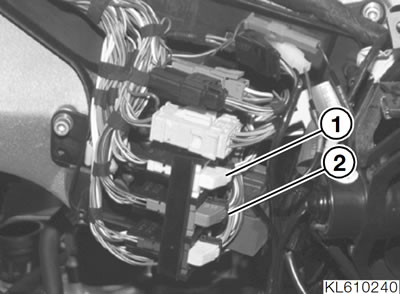
- Disconnect plugs (1, 2) in electronics box.

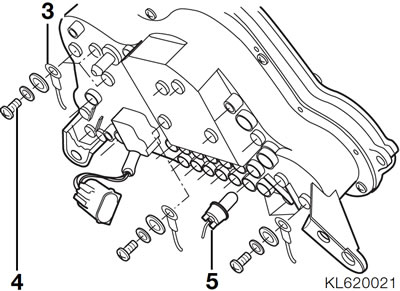
Note: Fasteners (4) hold the instruments in the housing; loosely reinstall the screws after disconnecting the contacts (3). Make sure they are reinstalled in their original positions.
- If necessary, pull gently on the cables to release the telltale/warning lights (5).
- Remove telltale lights (5) and contacts (3) from the instrument cluster.
- Disconnect the plug for the clock.
- Remove the wiring harness.
- Install the new wiring harness in the correct positions.
- Install contacts and telltale/warning lights in accordance with the cable colours.
- From this point on, installation is the reverse of the removal procedure.
