
Caution: Protect trim panel parts with a material such as foam to prevent damage from straps and hoists.
Caution: Support the motorcycle to prevent it toppling sideways. Fit straps to the ends of the handlebars. Do not use the tensioning belts included with the packaging for lifting. Check that for lifting the crash bar is securely fastened to the skirt bracket and tighten if necessary.
Tightening torques:
Crash bar to skirt bracket — 9 Nm
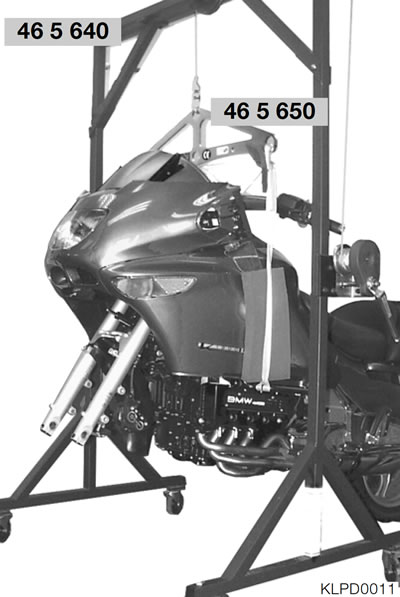
- Secure the crossbar belts, BMW No. 46 5 650, to the crash bars (see arrow) close to the motorcycle.
- Secure the motorcycle in an assembly crane, BMW No. 465640, by the crossbar, BMW No. 465650.
- Loosen the clamping bolt on the quick-release axle before you lift the motorcycle.
- Release the anchorage points at the front of the crate and loosen those at the rear of the crate.
- Lift the motorcycle in the assembly crane, BMW No. 465640, by the crossbar, BMW No. 465650.
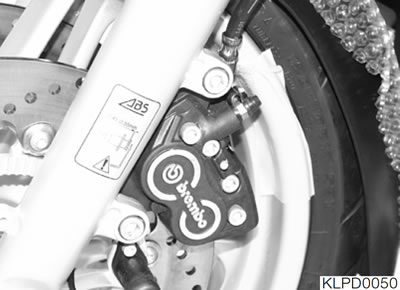
Caution: Do not scrape the wheel - mask it off if necessary. Do not tilt the brake calliper. There is a risk of damage to the brake pads.
Note: Do not apply handbrake lever with brake callipers removed/front wheel removed.
- Remove left and right brake callipers.
- Remove the wood used to support the quick-release axle.
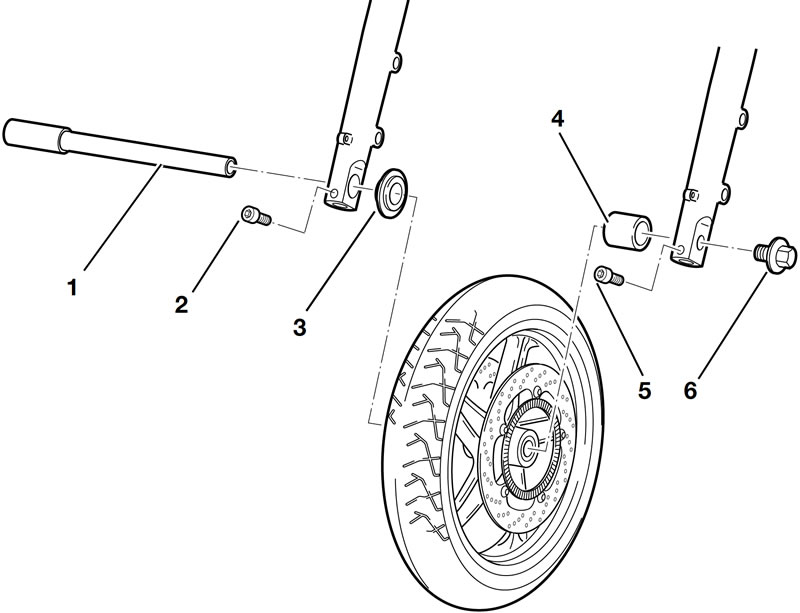
- Remove quick-release axle (1).
- Lightly grease the quick-release axle (1) and bearing cage (3) and spacer bushes (4) with Shell Retinax EP2.
- Fit the bearing cage (3) and spacer bushes (4) on the front wheel.
- Tighten the retaining screw (6).
- Clean the brake discs.
- Install the brake callipers.
- Check the ABS sensor gap and adjust if necessary.
ABS sensor gap: — 0.45...0.55 mm (0.018...0.022 in)
Tightening torques:
Quick-release axle threaded connection — 30 Nm
Quick-release axle clamp screws — 21 Nm
Brake calliper to fork slider tube — 40 Nm
- Lower the motorcycle.
- Support the motorcycle to prevent it toppling sideways.
- Remove the tensioning straps from the motorcycle.
- Roll the motorcycle off the pallet.
- Compress the front fork firmly several times.
- Place the motorcycle on its centre stand if you are carrying out any further assembly work.
- Tighten the clamping screws (2, 5).