
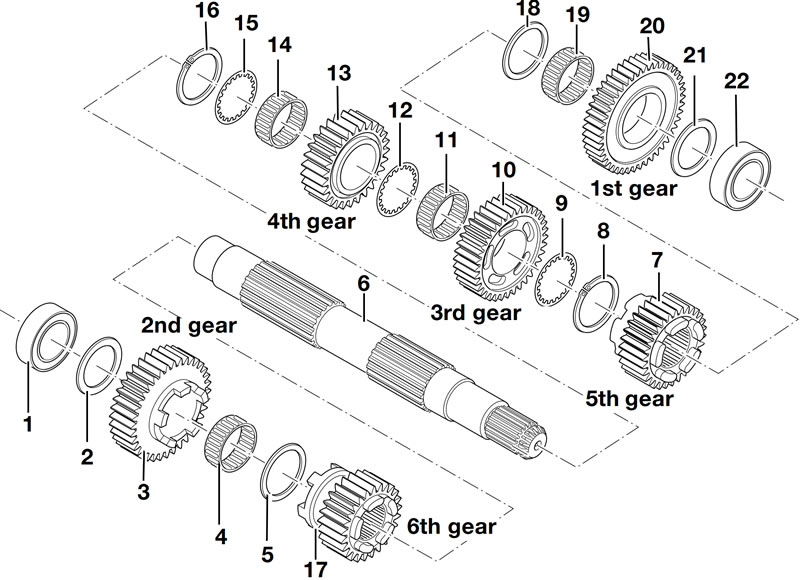
Disassembling output shaft
Caution! To avoid damaging the needle roller bearing on the splines of the shaft, spread it carefully at the end face when removing.

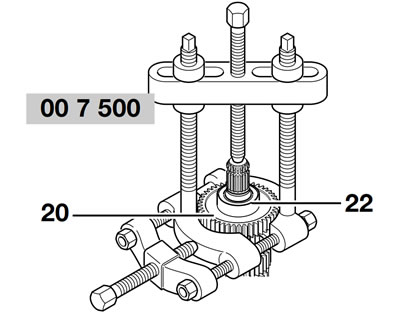
Using universal puller, BMW No. 00 7 500, pull off grooved ball bearing (22) together with 1st gearwheel (20).
Remove spacing washer (21), shift gearwheel for 1st gear (20), needle roller bearing (19) and spacing washer (18).
Remove sliding gearwheel (7).
Remove circlip (8), backup washer (9), shift gearwheel for 3rd gear (10) and needle roller bearing (11).
Remove backup washer (12), 4th gear shift wheel (13), needle roller bearing (14) and backup washer (15).
Remove circlip (16) and sliding gearwheel for 5th gear (17).
Turn output shaft (6) other way round and clamp into the vise with soft jaws.
Using universal puller, BMW No. 007500, pull off deep-groove ball bearing (1) together with shift gearwheel for 2nd gear (4).
Remove shim washer (2), needle roller bearing (3), shift gearwheel for 2nd gear (4) and thrust washer (5).
Assembling output shaft
Note: Assembly starts at the shift gearwheel for 4th gear. Before assembly, lightly coat all friction faces with gear oil.
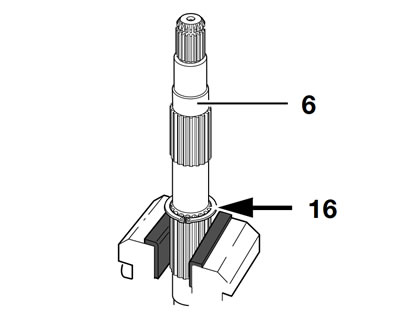
Clamp output shaft (6) into a vise fitted with jaw protectors, with the splines facing upwards.
Install circlip (16/arrow).
Install backup washer (15).
Install needle roller bearing (14).
Caution! To avoid damaging the needle roller bearing on the splines of the shaft, spread it carefully at the end face when installing.
Install shift wheel for 4th gear (13) with the pockets facing circlip (16).
Install backup washer (12) and needle roller (11).
Install shift wheel for 3rd gear (10) with pockets facing away from the 4th gear shift wheel (13).
Install backup washer (9) and circlip (8).
After installing the 3rd and 4th shift wheels, measure endplay (see 23.18).
Install shift wheel for 5th gear (7) with recess for shift fork facing towards the 3rd gear shift wheel (10).
Install backup washer (18) and needle roller bearing (19).
Install the shift gearwheel for 1st gear (20) with the pockets facing sliding gearwheel (7).
Install spacing washer (21) and grooved ball bearing (22).
After installing, check endplay at the shift gearwheel for 1st gear (see 23.18).
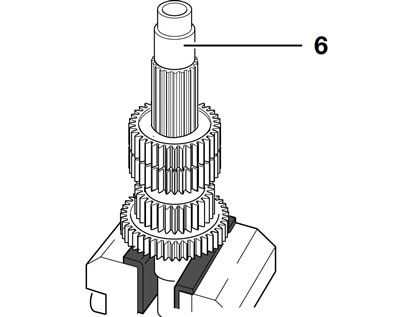
Reverse position of output shaft (6) in vise.
Install sliding gearwheel for 6th gear (17) with the recess for the selector fork facing the 2nd gear shift wheel (3).
Install backup washer (5) and needle roller bearing (4).
Install the shift wheel for 2nd gear (3) with the dogs facing the 6th gear sliding gearwheel (17).
Check/adjust fully-assembled length (see 23.20).
Install spacing washer (2) of calculated thickness, and press on grooved ball bearing (1).
Check 2nd gear endplay.