
To disassemble the master cylinder of the rear circuit, it is necessary to remove it from the motorcycle frame, disconnect the brake fluid reservoir supply pipe from it and disconnect the rod from the brake pedal (see «Rear brake master cylinder - removal and installation»).

Disassembly
1. Using pliers with thin sponges or tweezers, remove the anther of the piston rod.

2. Using special pliers, remove the stem retaining ring.

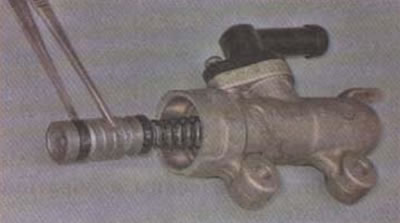
3. Remove the piston rod.

4. Carefully, so as not to damage the cuffs, remove the piston assembly with the return spring.
5. If brake fluid leaks are observed at the place where the brake fluid reservoir hose fitting is attached, use a Phillips screwdriver to unscrew its fastening screw.
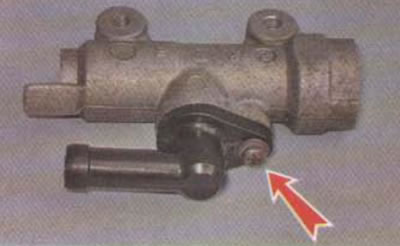
6. Filming fitting _
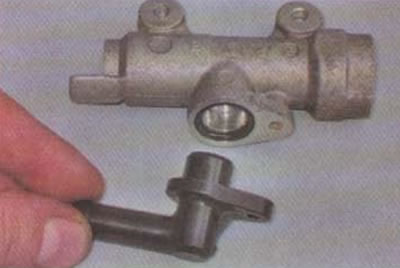
7. Remove the rubber o-ring of the fitting.

We examine the details of the brake cylinder. The cuffs should not have tears, cracks or signs of deformation. In addition, the cuffs must have sufficient flexibility. Otherwise, brake fluid leakage is likely and the brakes may not be effective due to fluid bypass. There should be no deep scratches, aluminum enveloping or other mechanical damage on the cylinder walls. The anther should not have cracks or tears. If necessary, we replace parts with the indicated damage. Often, if the integrity of the piston boot has been compromised, dirt and oxides accumulate on the outside of the rod and piston. Before assembly, it is necessary to clean the rod and piston from foreign deposits.
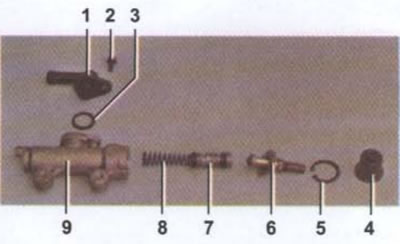
1 - fitting for the supply hose of the tank; 2 - fitting screw; 3 - sealing ring; 4 - stock boot; 5 - retaining ring of the piston pusher; 6 - piston pusher; 7 - piston assembly with cuffs; 8 - piston return spring; 9 - brake cylinder housing
Assembly
Attention! Brake parts may only be washed with clean brake fluid. Do not use carburetor cleaner, brake cleaner, solvents or other similar substances for flushing, since rubber parts of mechanisms are irreversibly deformed and destroyed upon contact with them.
1. Before assembly, wash all parts of the brake cylinder with clean brake fluid.
2. Before assembly, it is recommended to blow all parts and channels of the brake cylinder with compressed air to prevent dirt from entering the brake system.
Attention! The rubber sealing ring of the fitting of the hose of the brake fluid reservoir is disposable. It is not allowed to reinstall it. When assembling, a new ring must be installed.
3. We assemble in the reverse order.
4. After assembling and installing the brake cylinder in place, we pump the rear brake circuit (see «Hydraulic brake drive - brake fluid replacement and pumping»).